Keystone Nexus(移动端)
欢迎来到本教程,它将指导您连接 Keystone 硬件钱包与 Keystone Nexus。在本教程中,您将学习如何连接并探索 Keystone Nexus 的基本功能,包括发送交易等。让我们开始吧!
1. 准备
- Keystone 3 Pro 设备并更新到 V2.0.2 或者以上固件版本 (固件升级请参考教程)
- 移动端安装 Keystone Nexus 应用程序
- Apple Store:https://apps.apple.com/us/app/keystone-nexus/id6742313403
- Google Play:https://play.google.com/store/apps/details?id=com.keystone.wallet&hl=en
现在,您可以准备将 Keystone 3 Pro 与 Keystone Nexus 连接并探索其功能了!
2. 连接 Keystone 硬件钱包与 Keystone Nexus
在 Keystone 硬件钱包上:
- 点击右上角”…”图标,选择 ”Connect Software Wallet“
- 在 “Choose Wallet“ 页面选择 “Keystone Nexus”,会生成一个连接钱包的二维码
在 Keystone Nexus 上:
- 打开 Keystone Nexus 应用,进入主页,点击 ”Start protecting your assets”后选择“Scan to connect”,然后使用摄像头扫描硬件钱包上生成的二维码。
扫描完成后,选择您需要管理的币种,应用出现 “Connected successfully“ 的弹窗,意味着您成功绑定了您的 Keystone 硬件钱包与 Keystone Nexus。
3. 发送
在 Keystone Nexus 上:
在钱包主页点击交易的资产(以发送 BTC 为例),进入资产管理页面。
点击 “Send”,进入发送交易页面,在 “Enter address” 栏输入地址,然后点击 “Next”。
输入交易金额后点击 “Next”,确认交易信息后点击 “Next“,此时页面会生成一个签署交易的二维码。
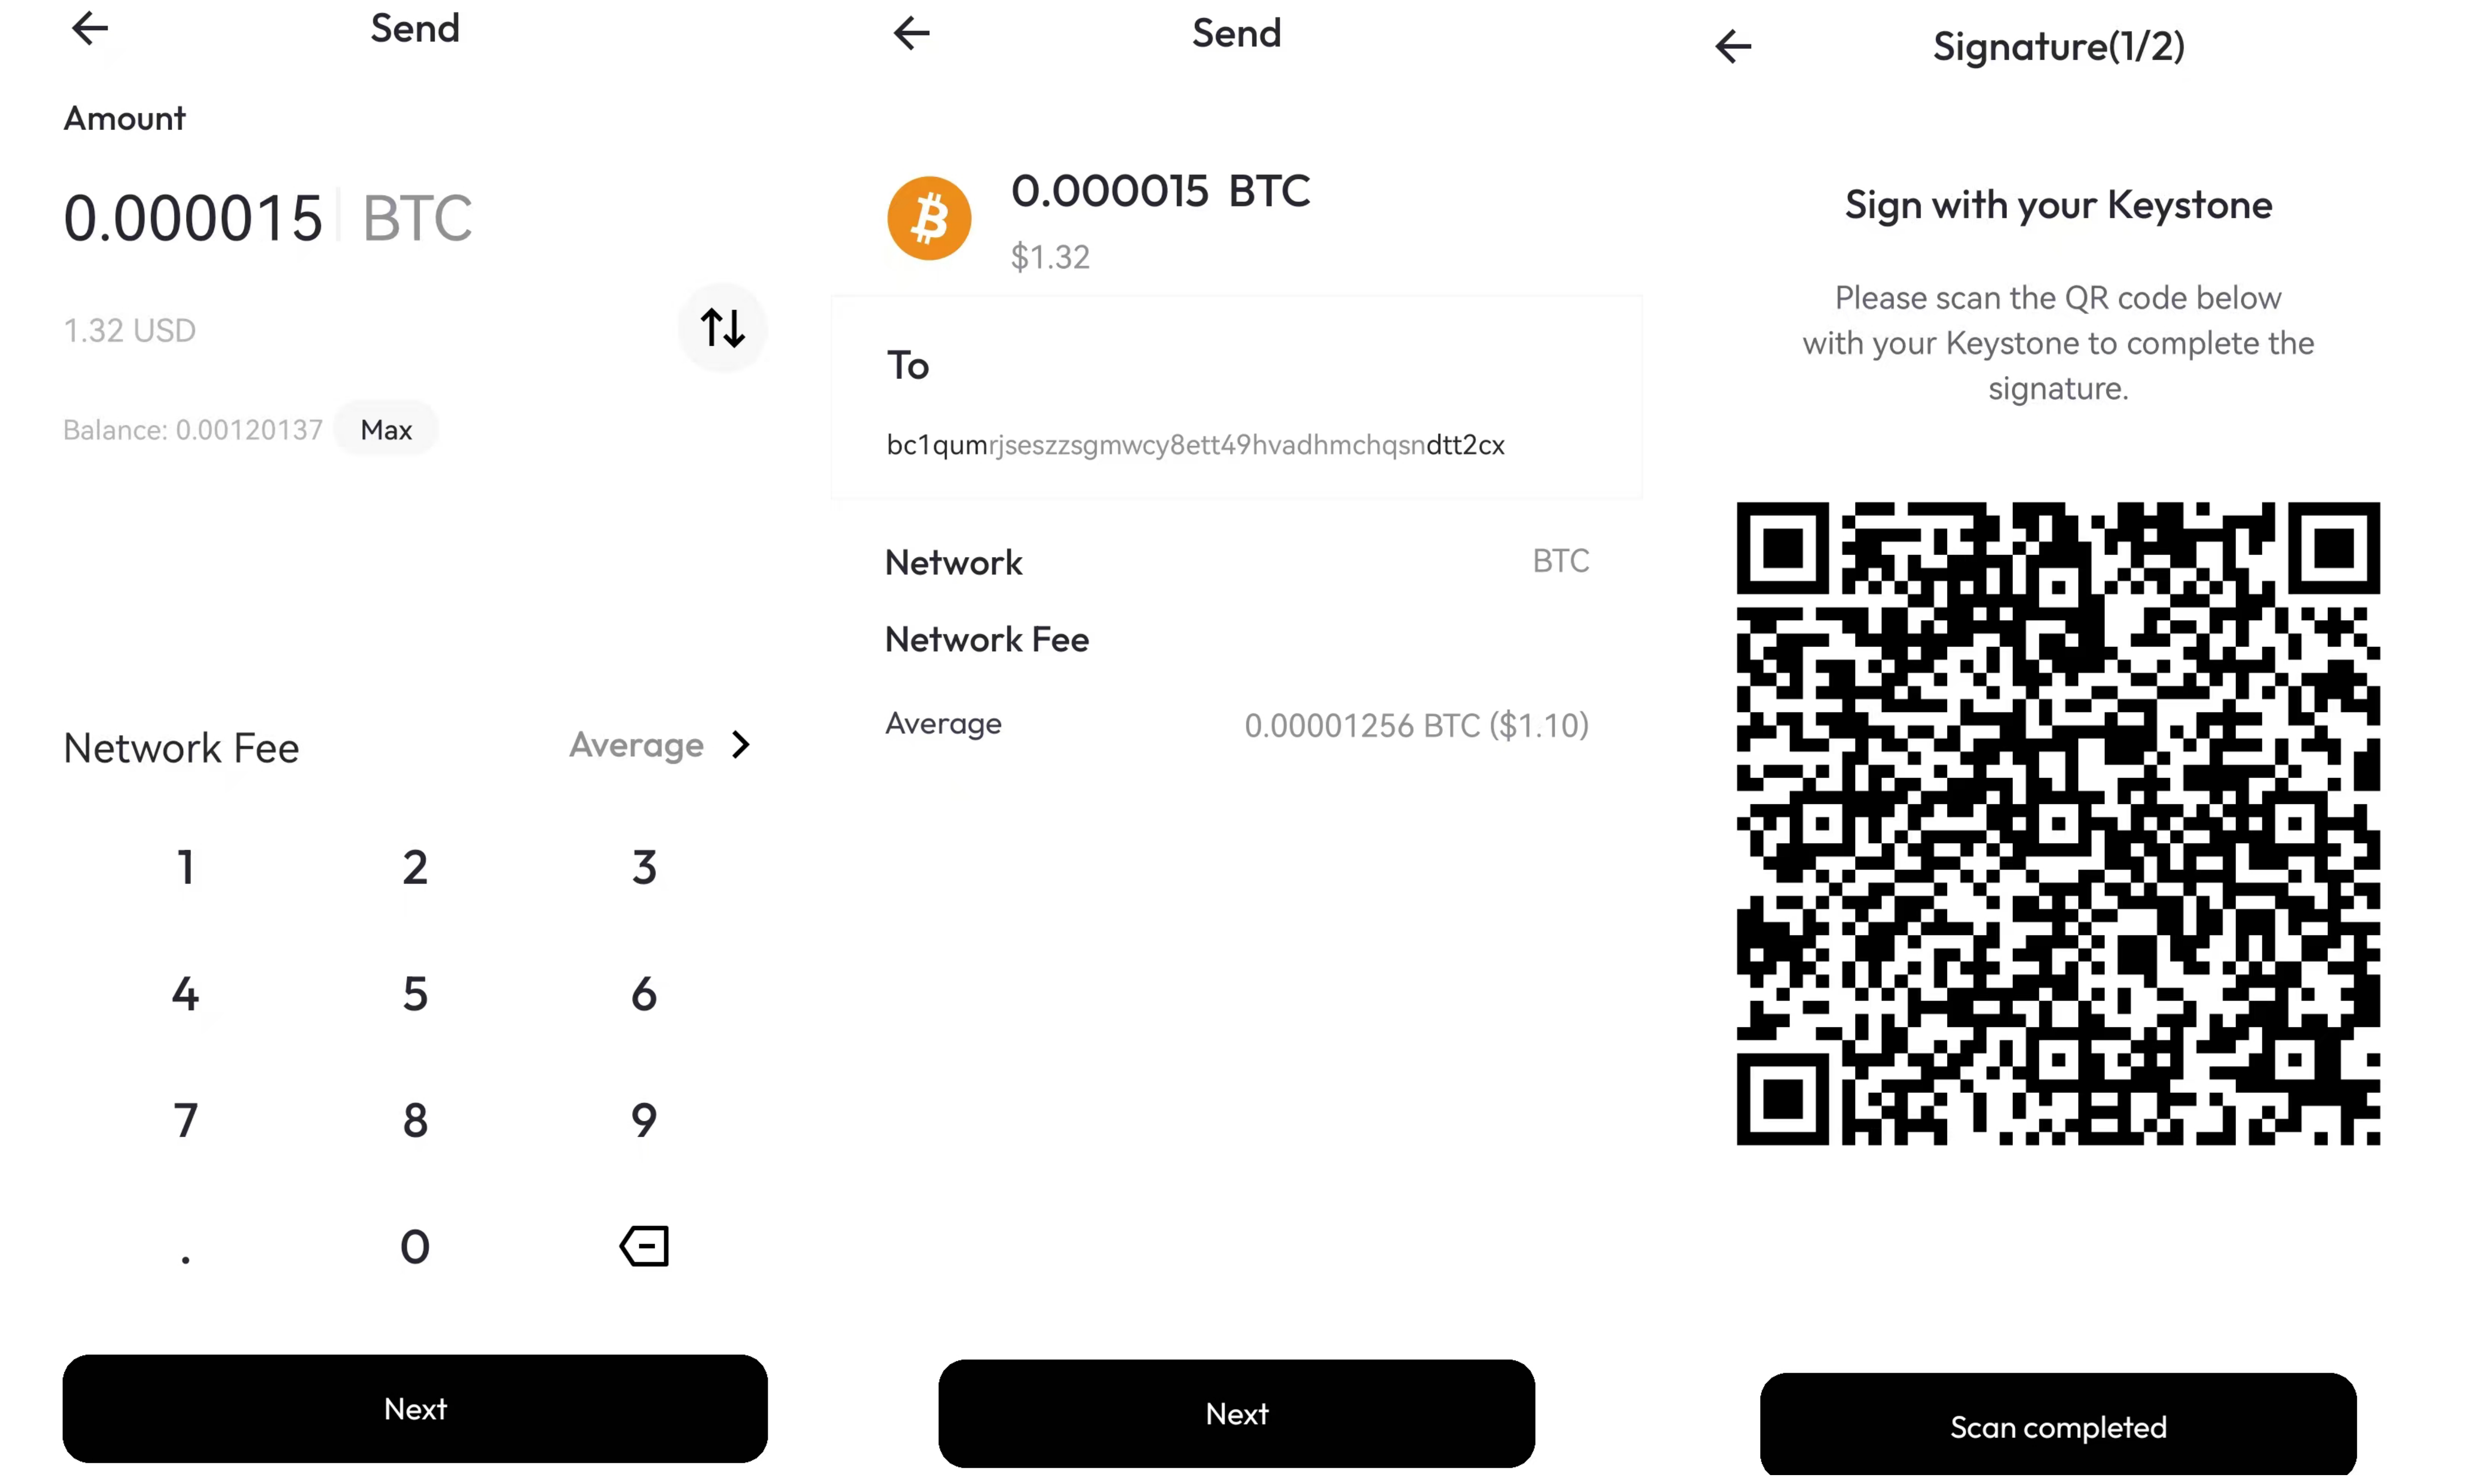
签署交易
- 使用 Keystone 设备扫描 Keystone Nexus 生成的二维码,确认交易信息,滑动 [Swipe to Confirm],Keystone 设备会生成确认交易信息的二维码。
- 回到 Keystone Nexus,点击 ”Scan completed”,使用手机扫描 Keystone 页面生成的二维码,即可完成交易。
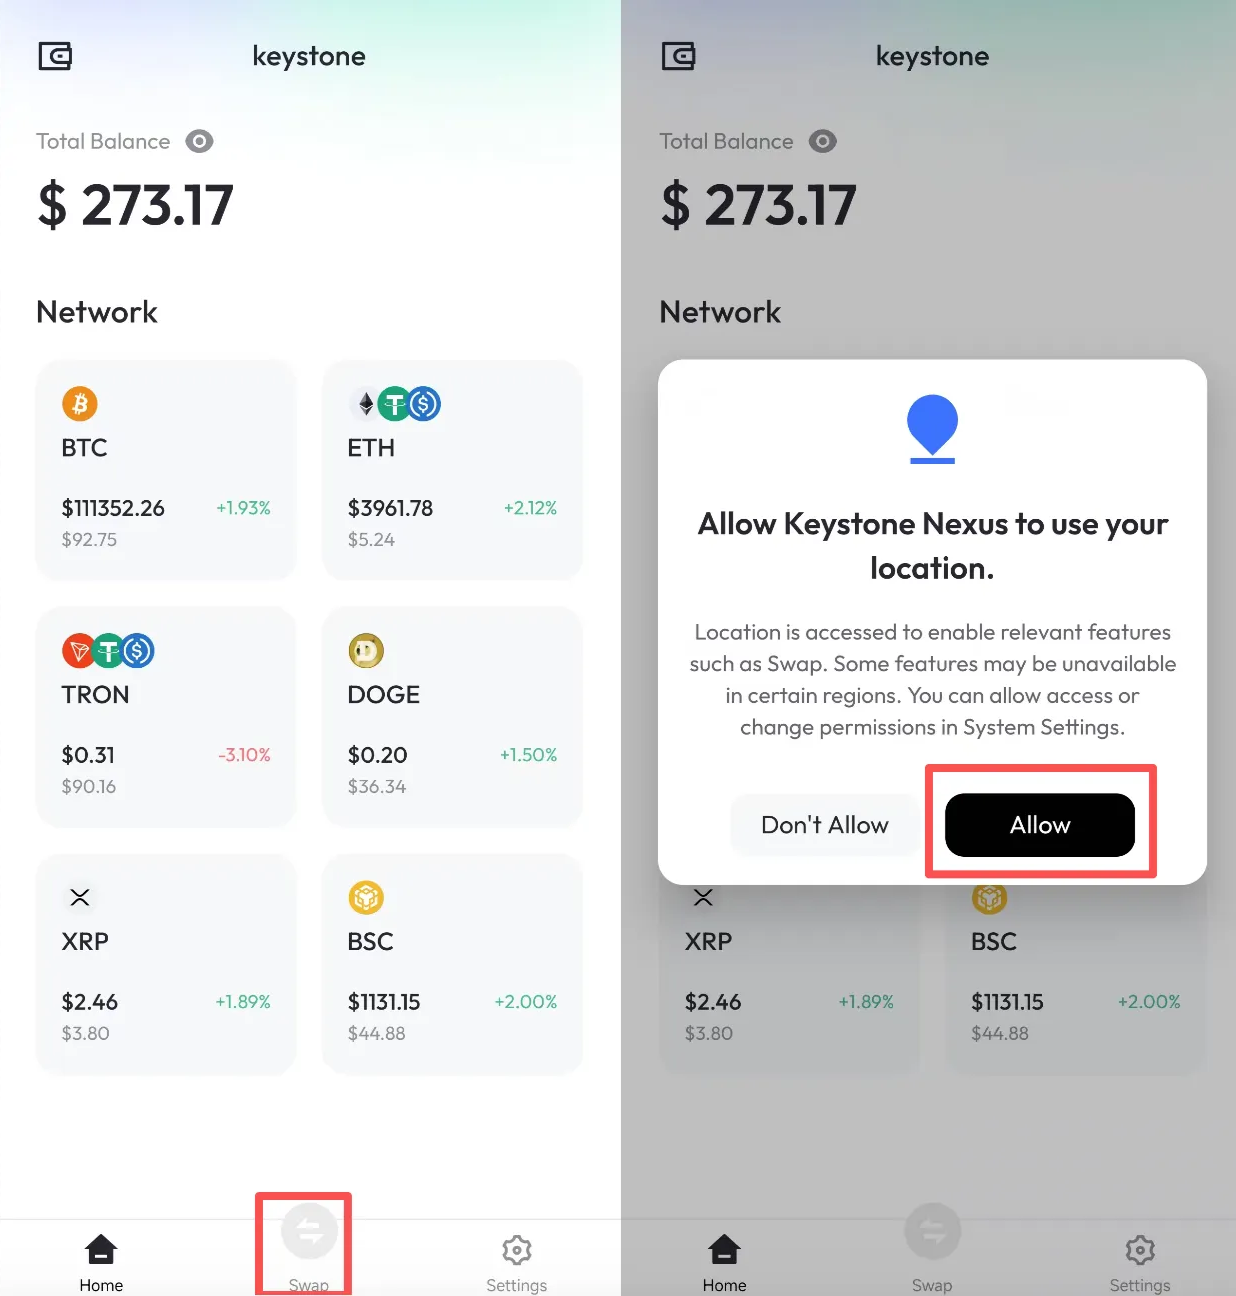
4. Swap
注:首次使用时,您需要授权定位权限,才能开启 Swap 功能。
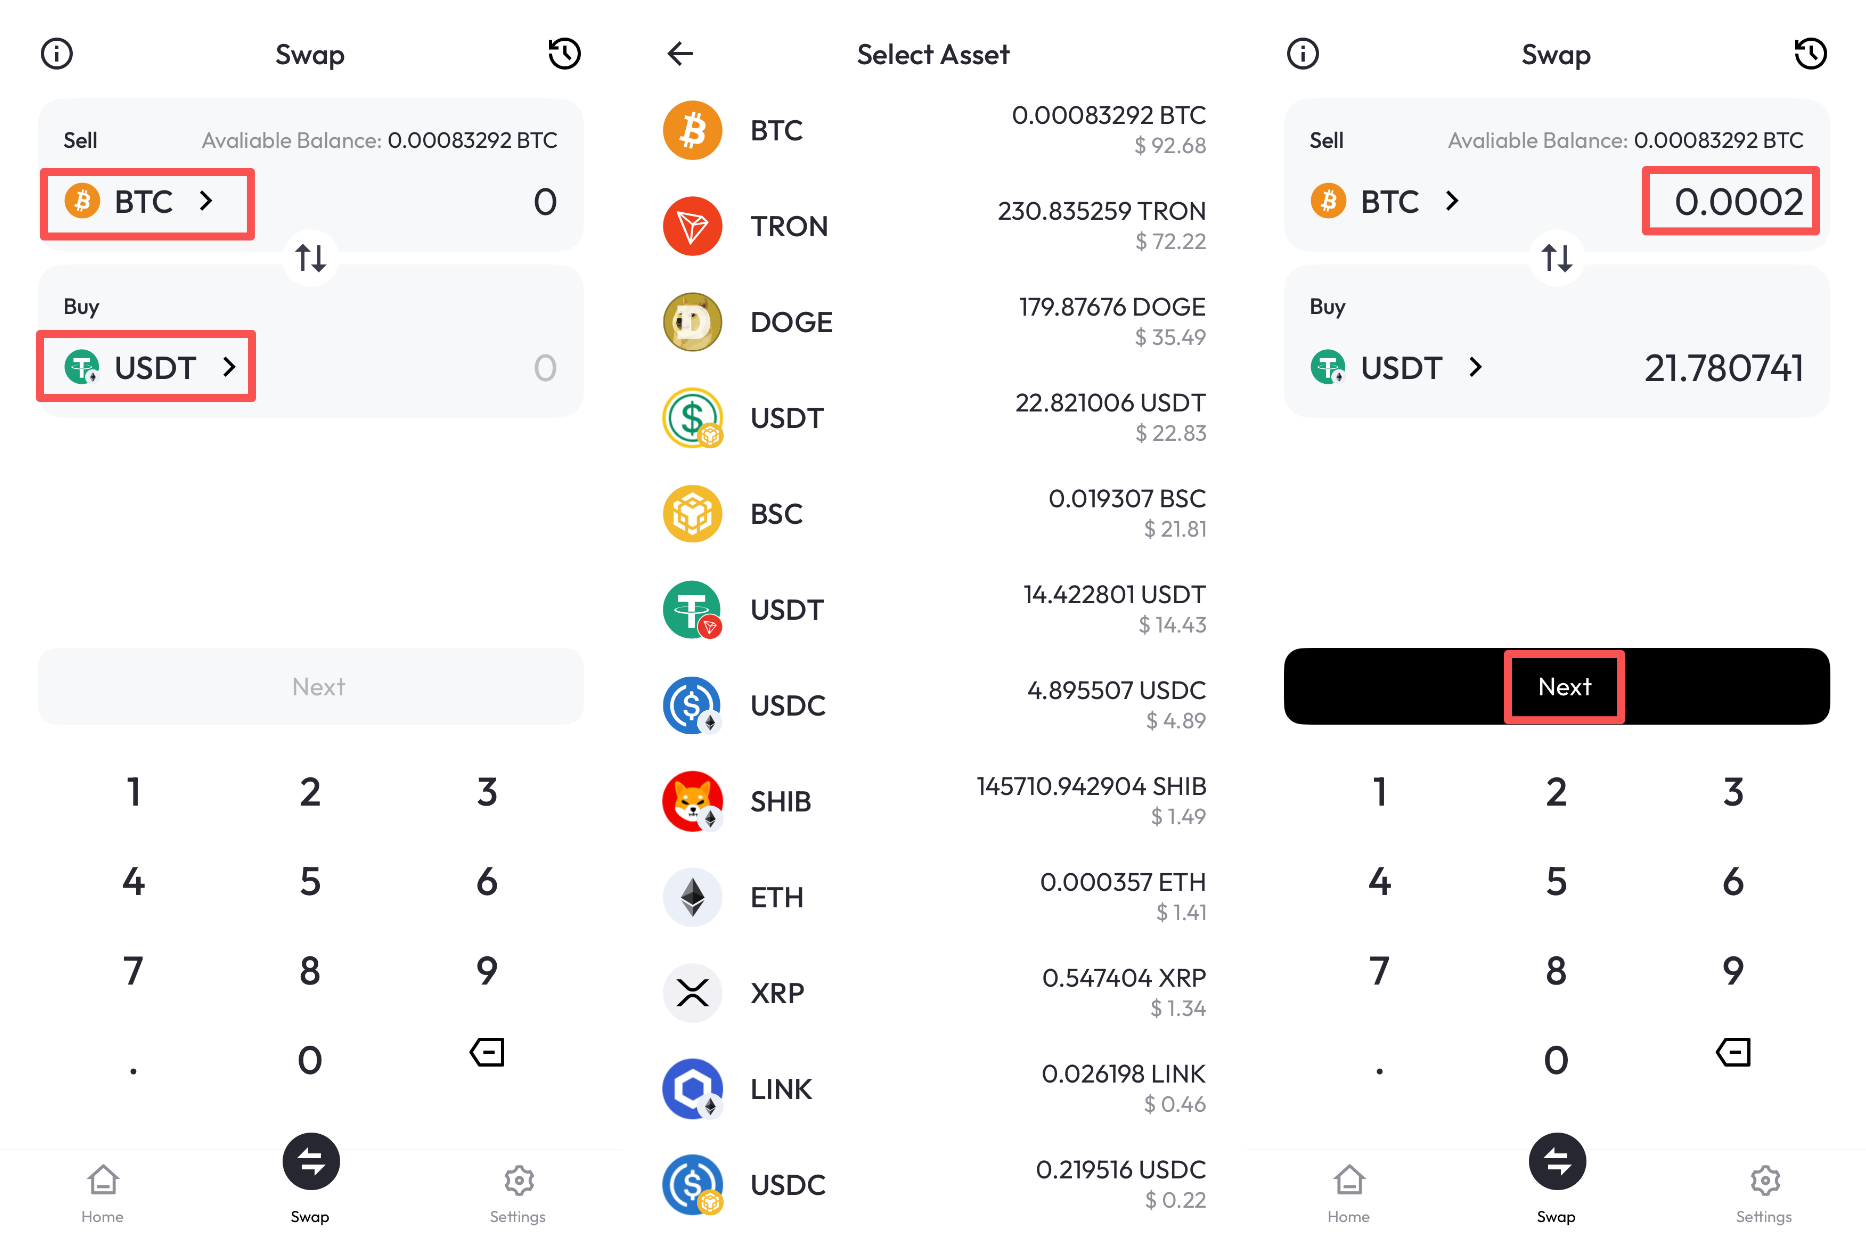
Swap 交易操作
在 Swap 页面,选择卖出和买入的币种,输入需要卖出币种,此时下方会自动显示买入币种的对应金额,点击 “Next” 。
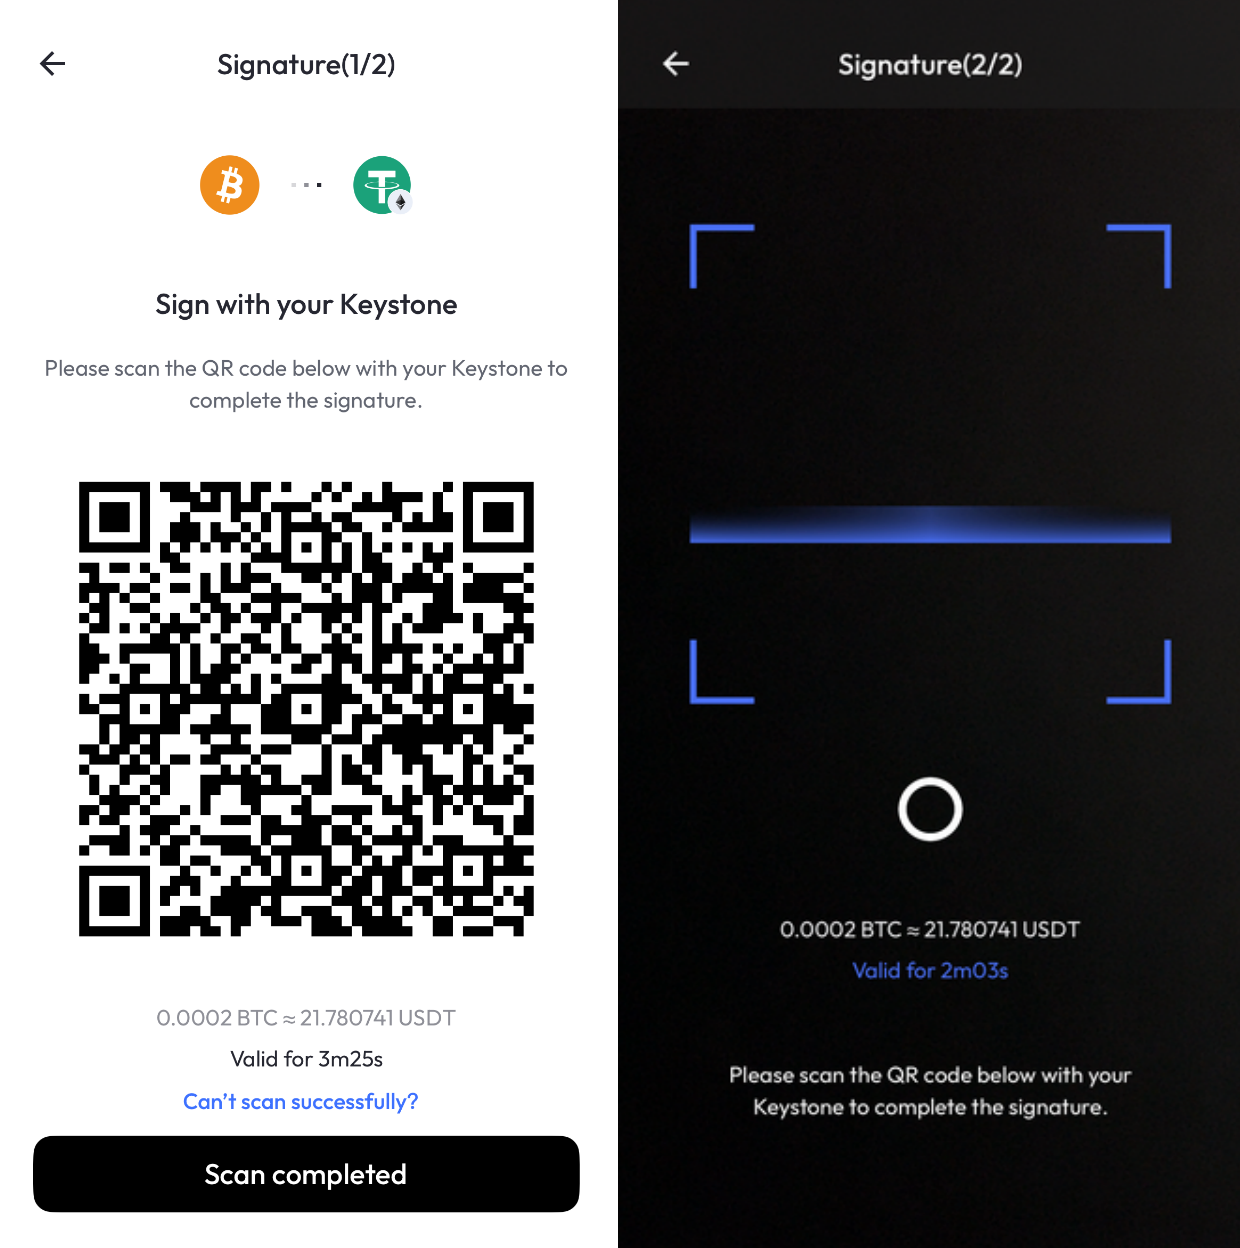
使用 Keystone 3 Pro 扫描 Nexus 生成的交易二维码,详见上方发送-签署交易过程。
在 Swap 页面,选择右上角图标可以查看 Swap 历史交易信息;下滑点击 “View more” 查看更多之前记录。