How to create a 2/3 multisig on hardware wallets by squads
Preparation:
- Check Battery: Ensure that your Keystone wallet has at least 20% battery remaining.
- Upgrade Keystone Wallet to multi-currency firmware version 1.5.4 or above, and connect it to a compatible software wallet as the first multi-signature participant 1/3.
- Ledger as the second multi-signature participant 2/3.
- Trezor as the third multi-signature participant 3/3.
Step 1: Create a 2/3 Multi-Signature Wallet on Squads
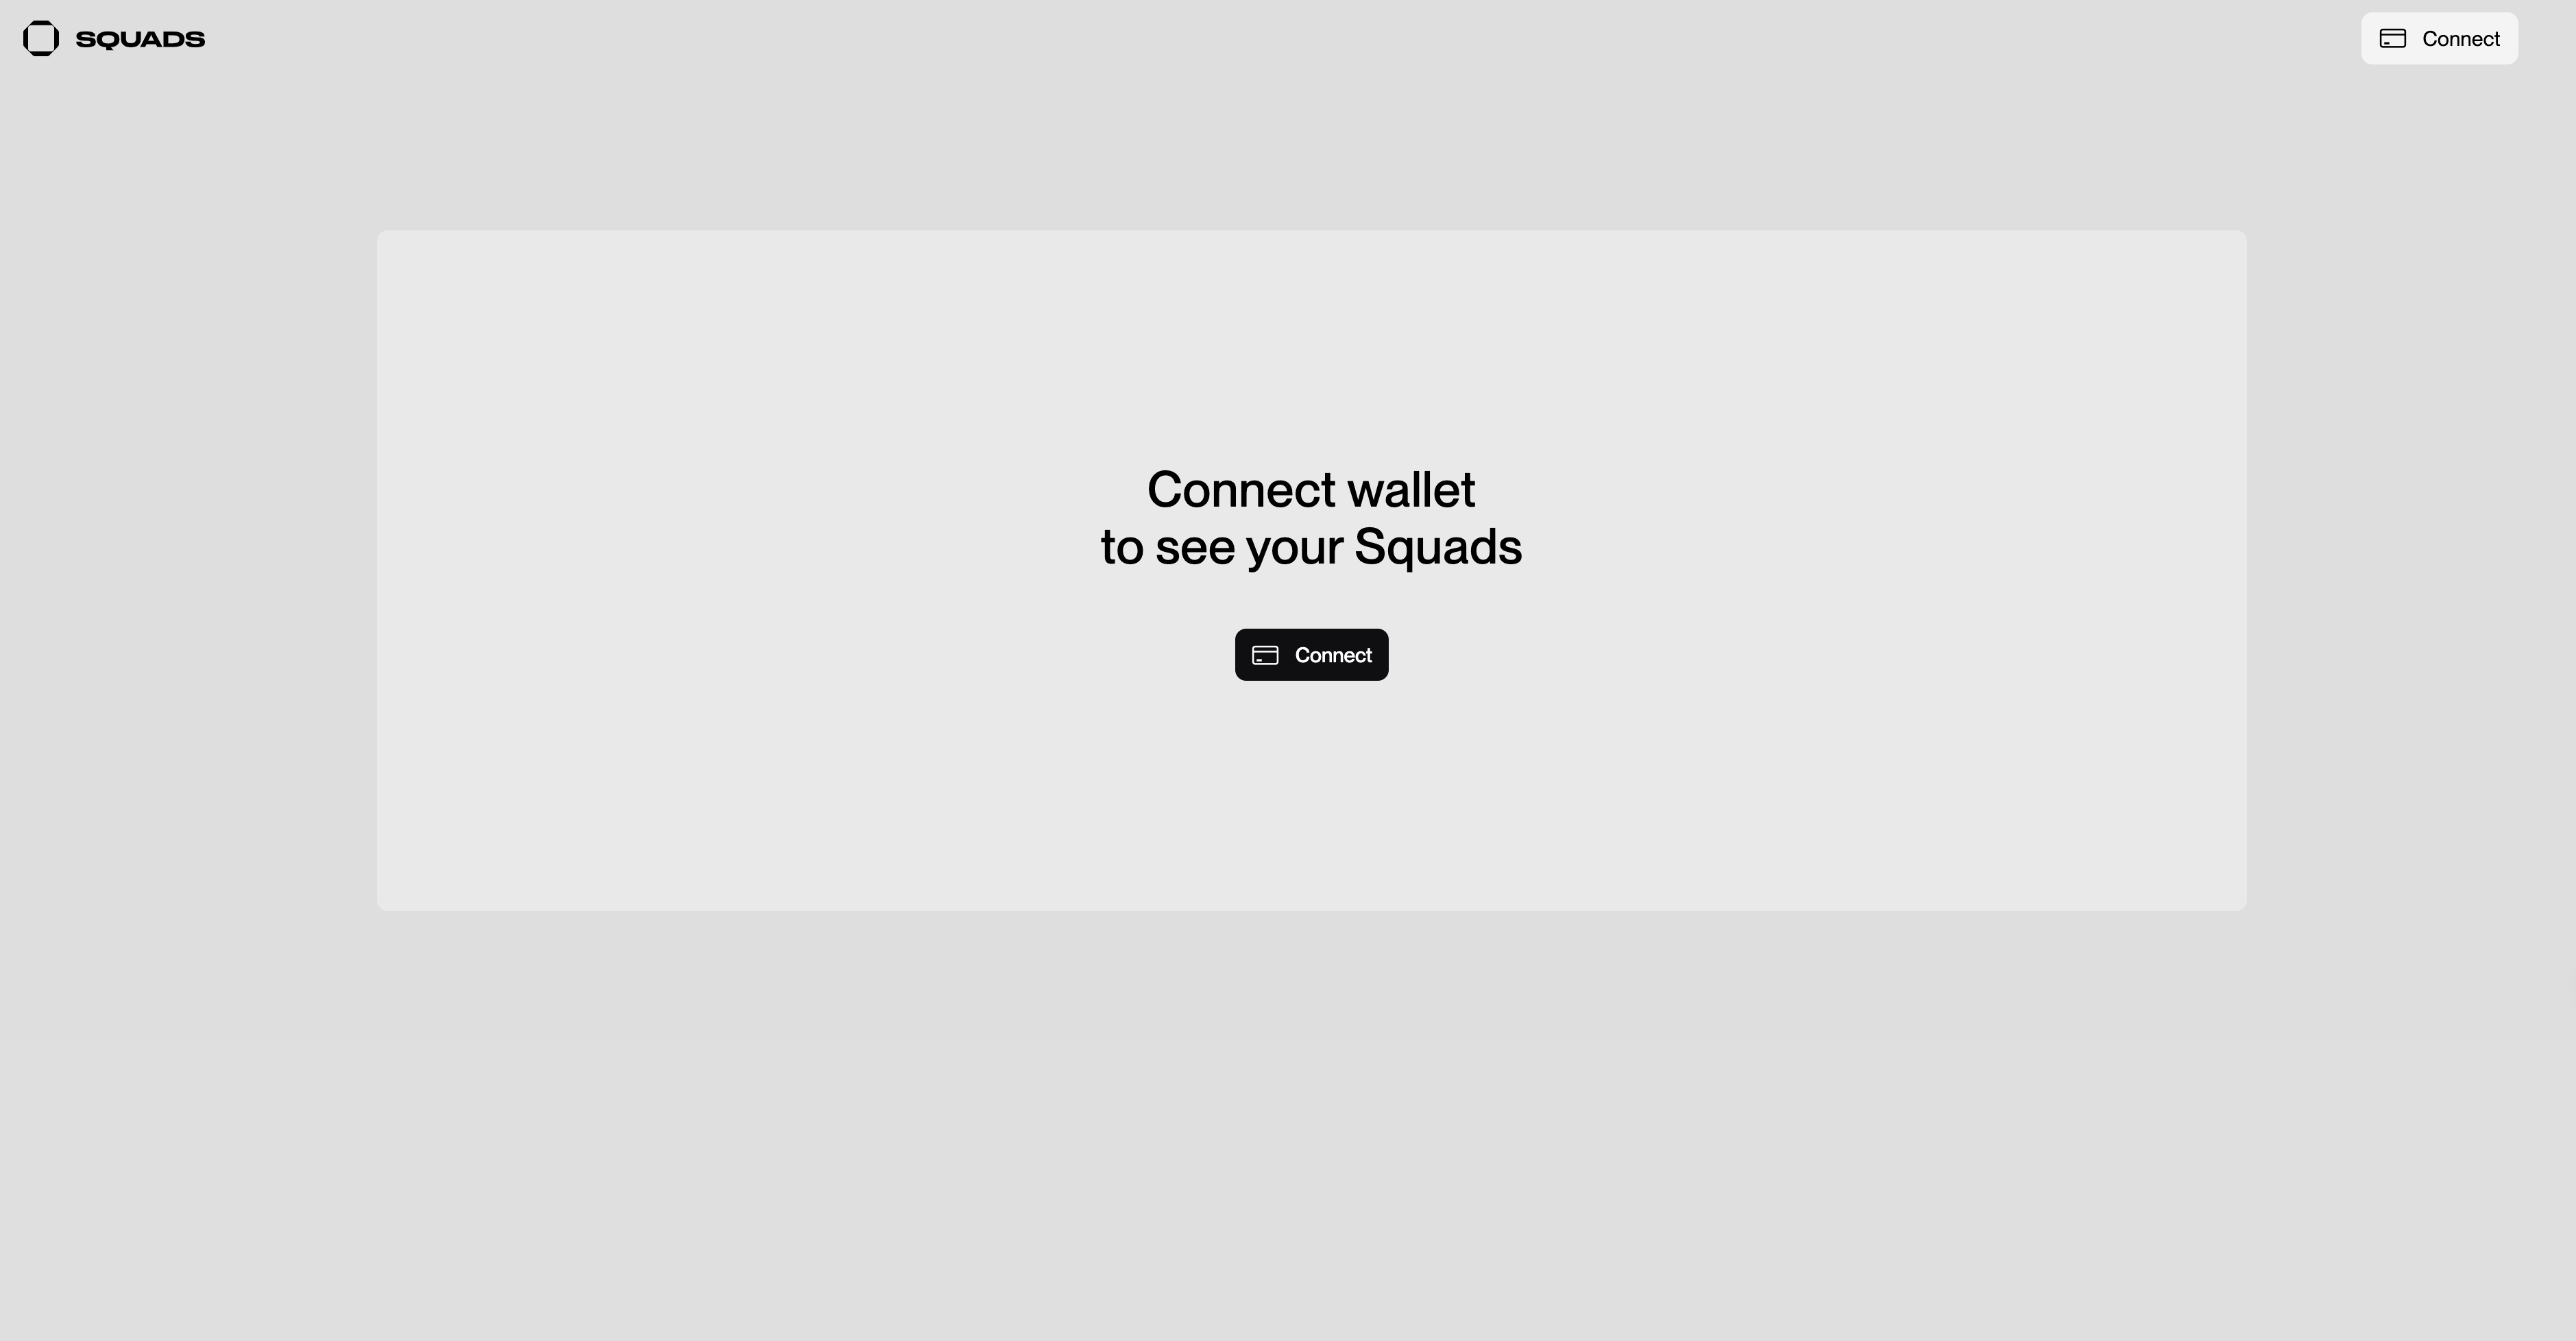
- First, run Squads, and the system will prompt you to connect your wallet:
- After connecting, click on [Connect Squads] , and the system will prompt you to select the wallet type of importing Squads:
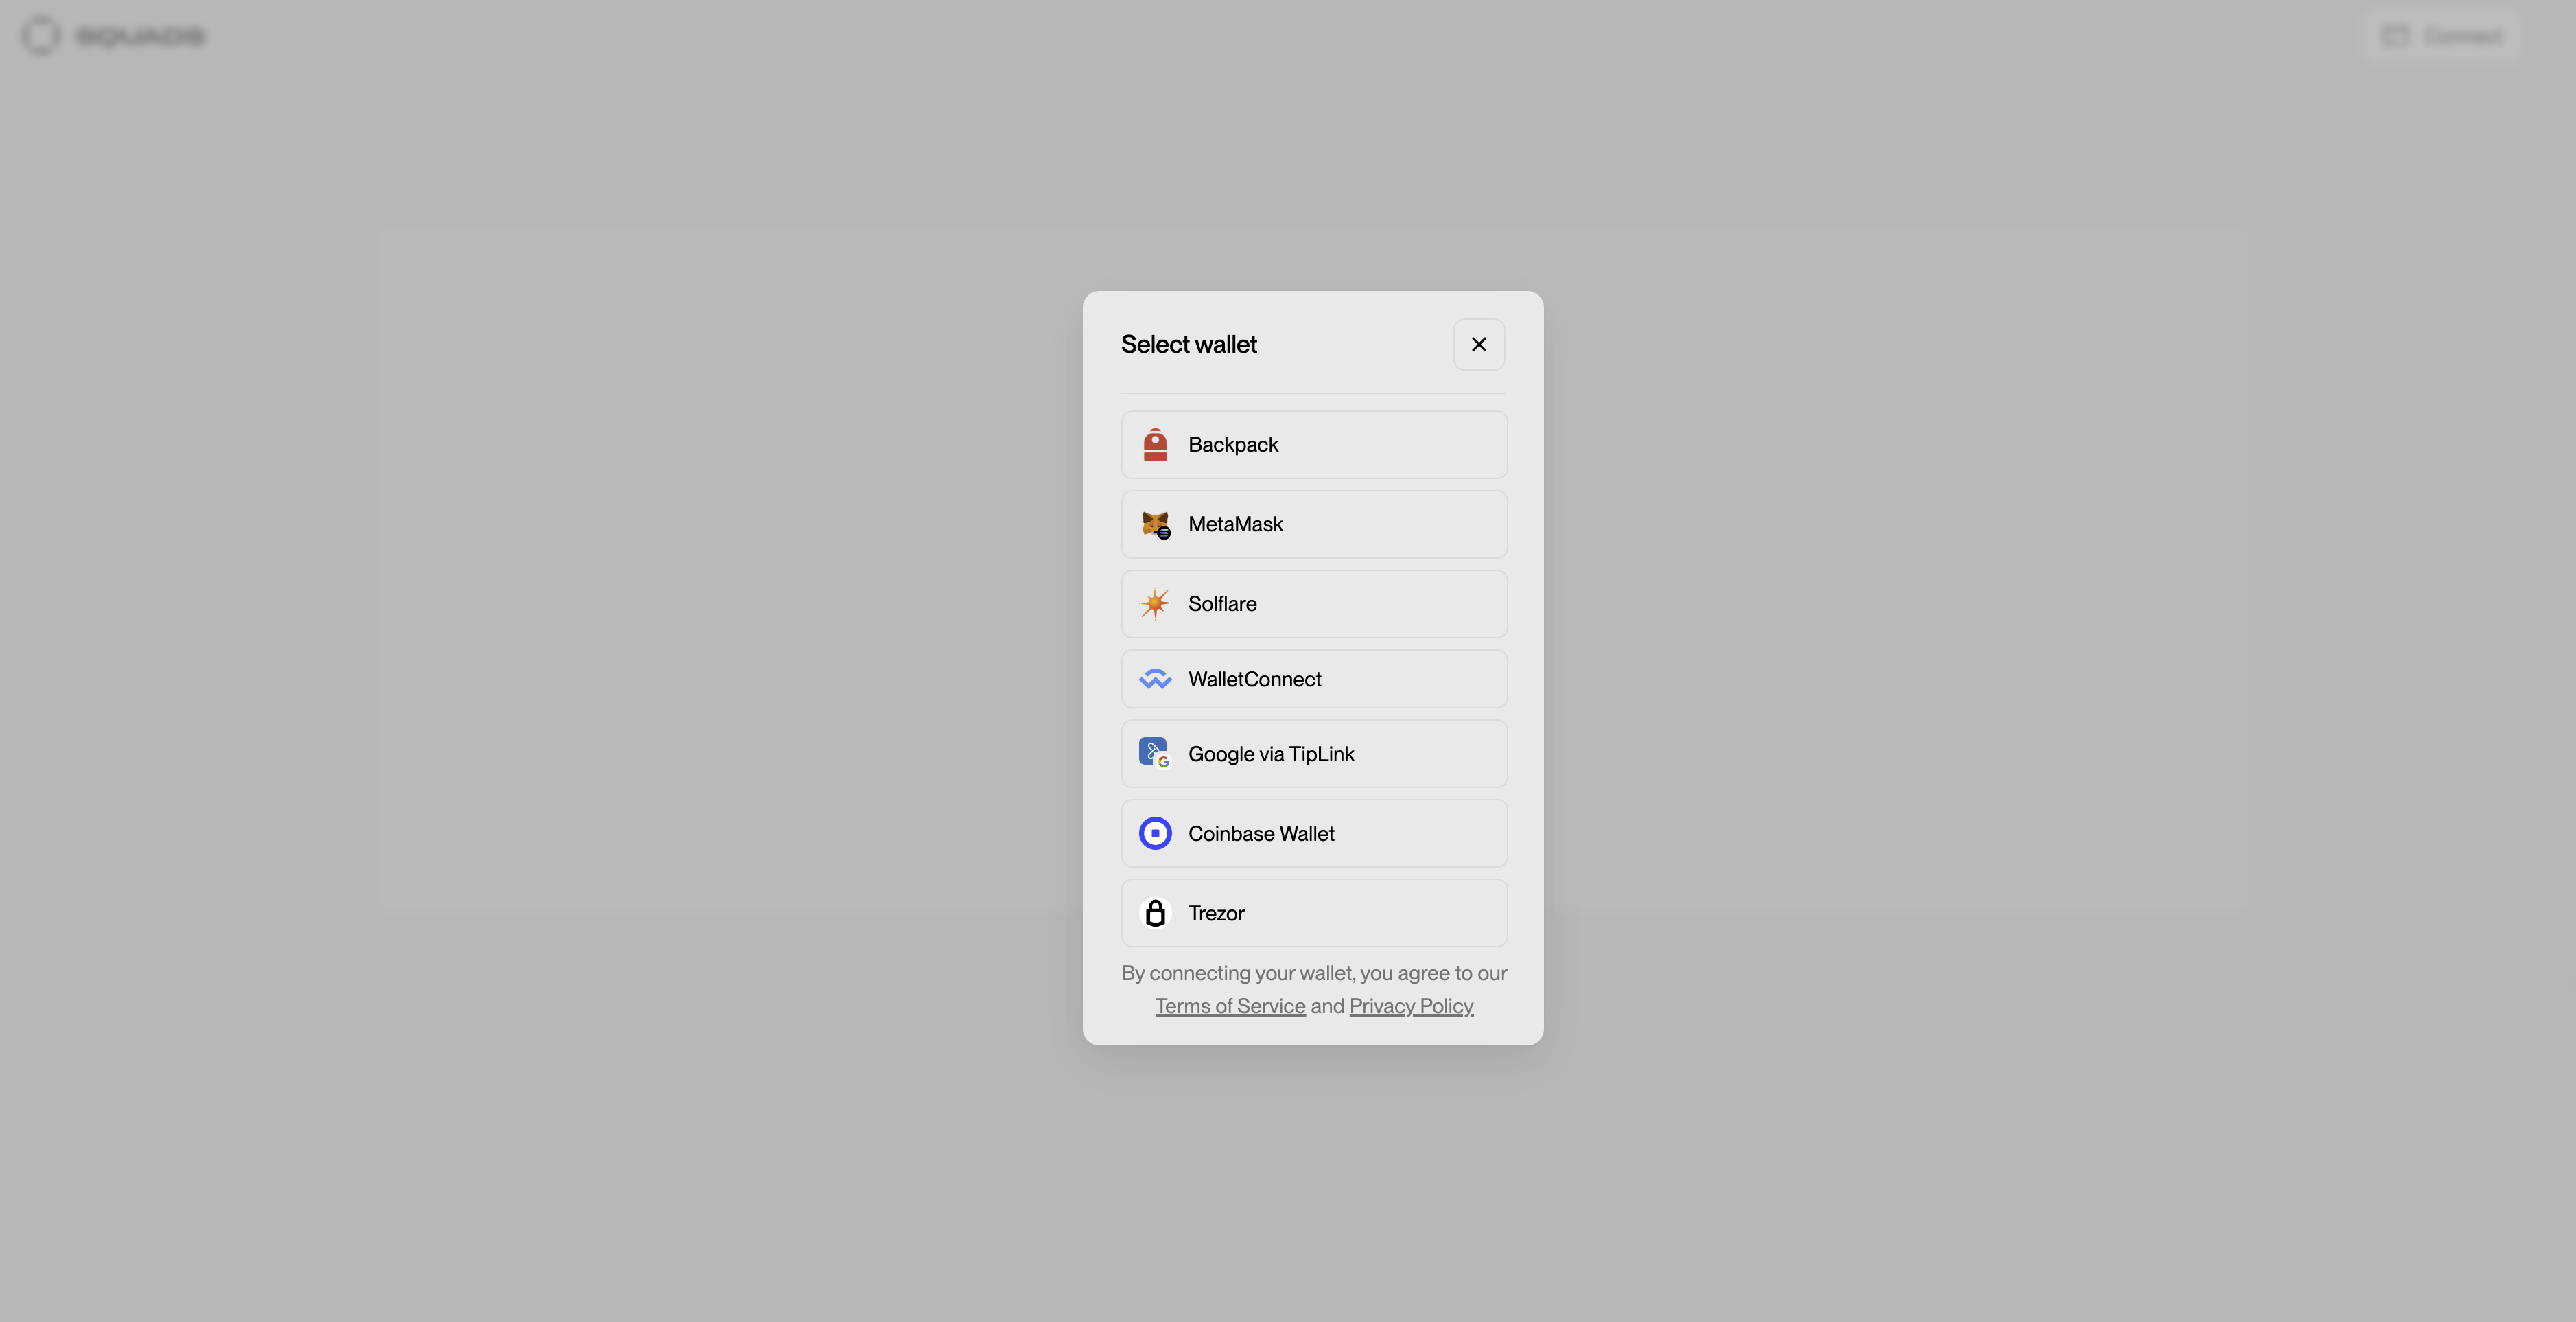
We’ll use Trezor here as an example. After connecting, it will serve as the first signer for Squads Owner.
- Once selected, the system will prompt you to export the wallet public key > Click [Export]

The system will then prompt you to add the wallet to your Squads. These wallets will be able to authorize multi-signature wallet transactions. You can add as many wallets as needed, but in this guide, we will only add three.
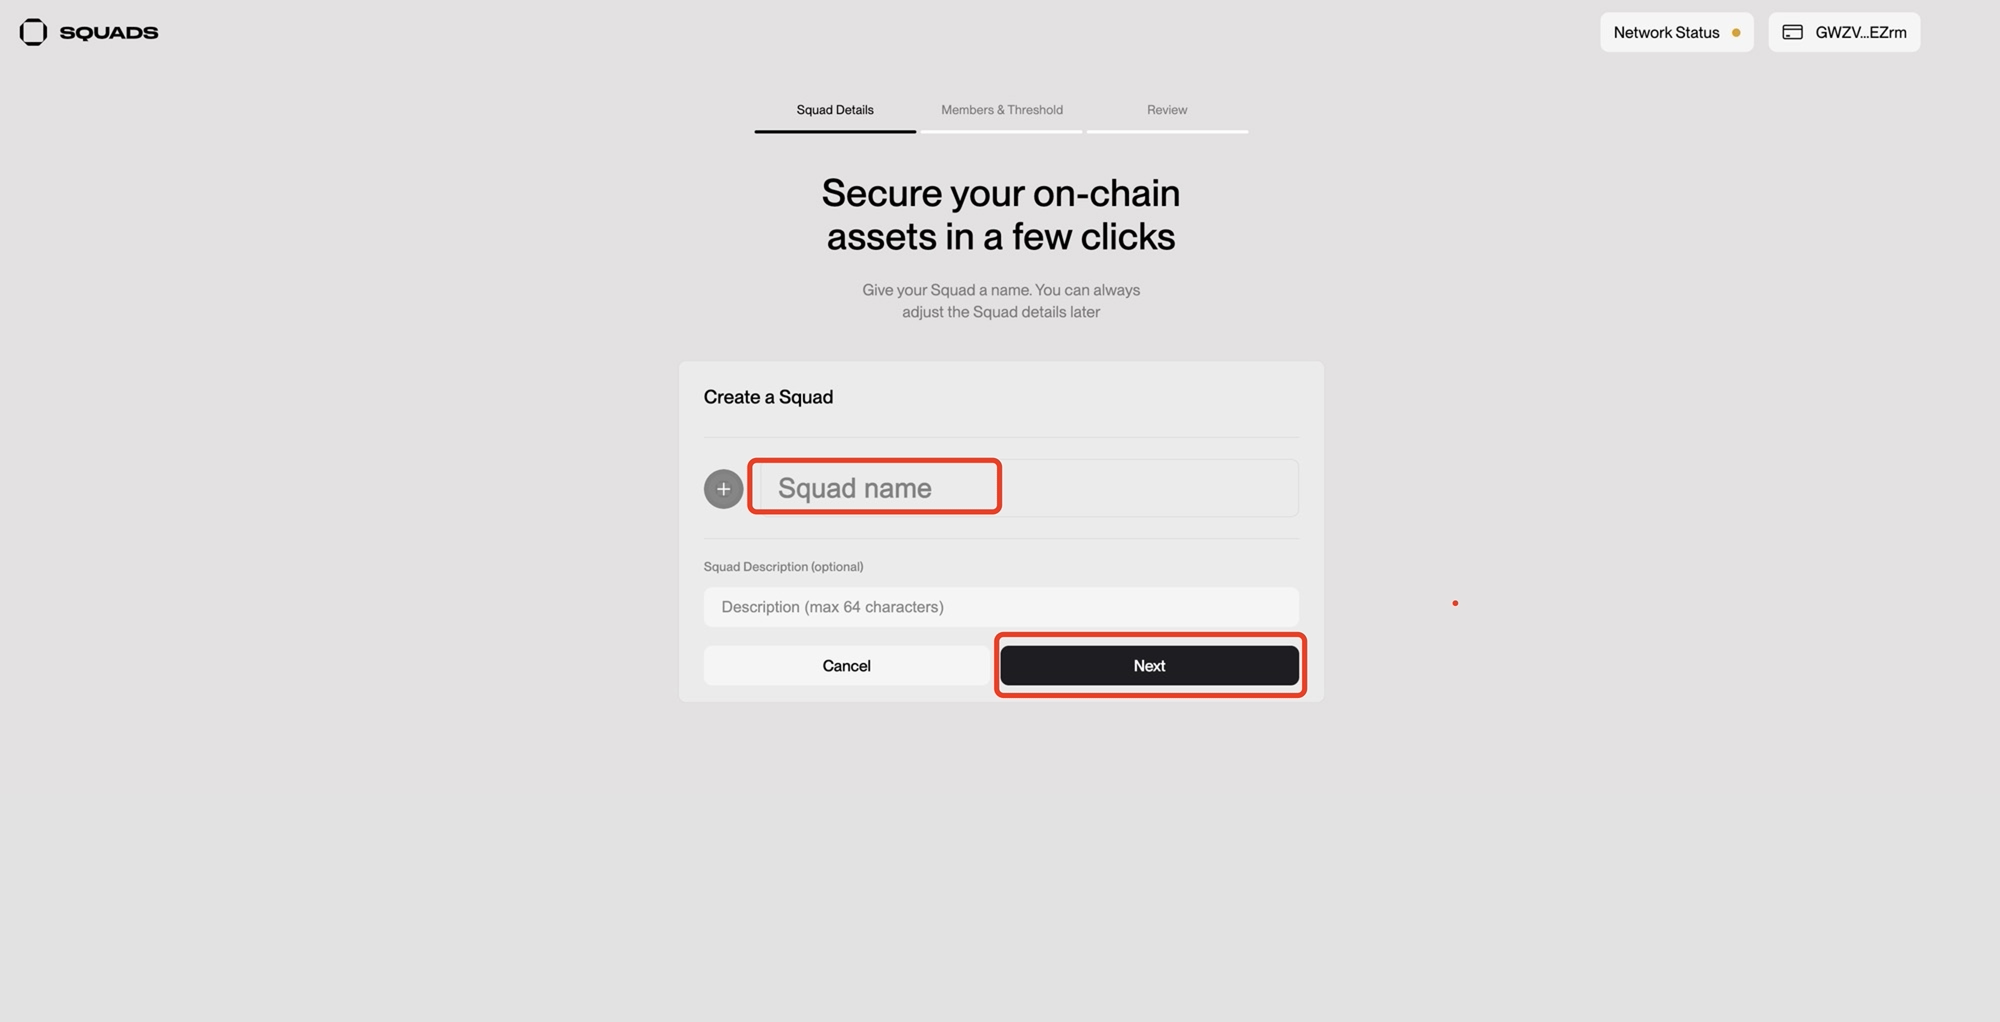
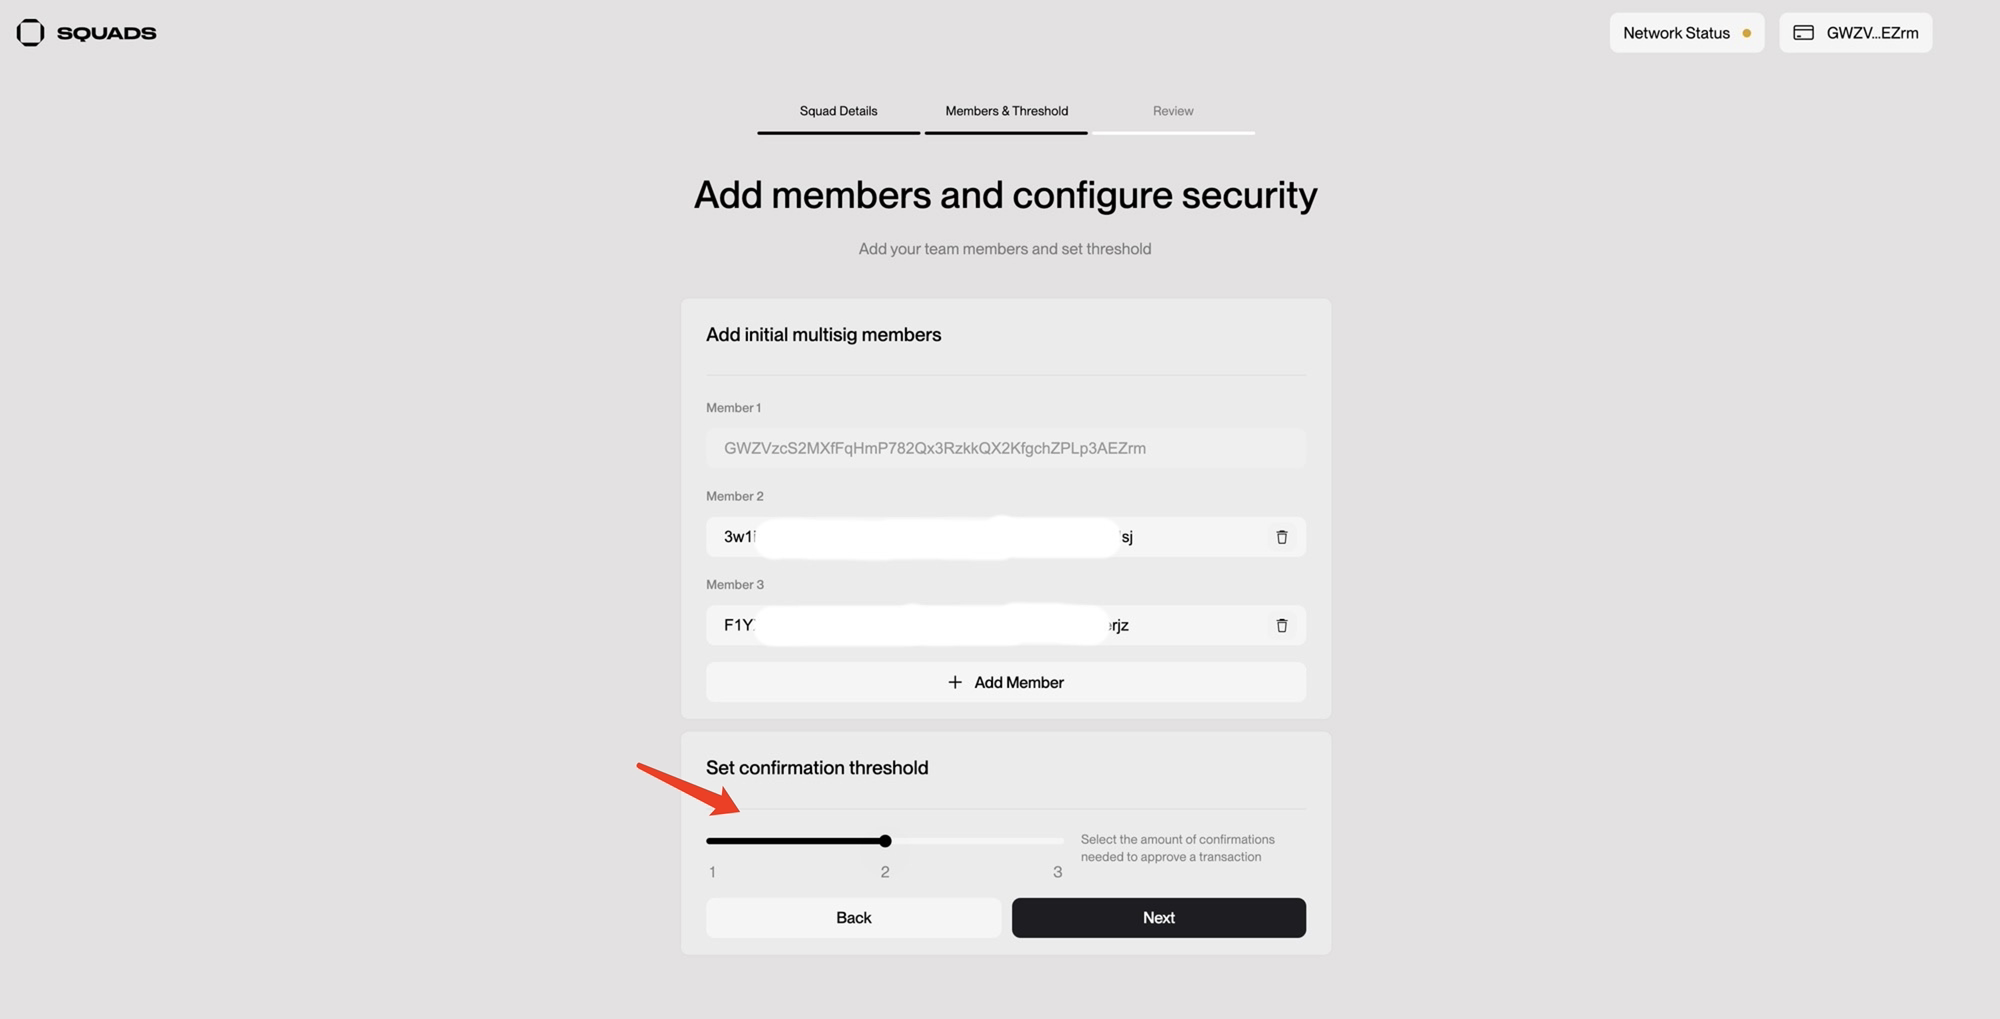
After successful connecting, go to the Squads settings page > Fill in the Squad information > Click [Next].
- Enter the Wallet Address/Public Keys for Keystone and Ledger as owner 2 and owner 3.
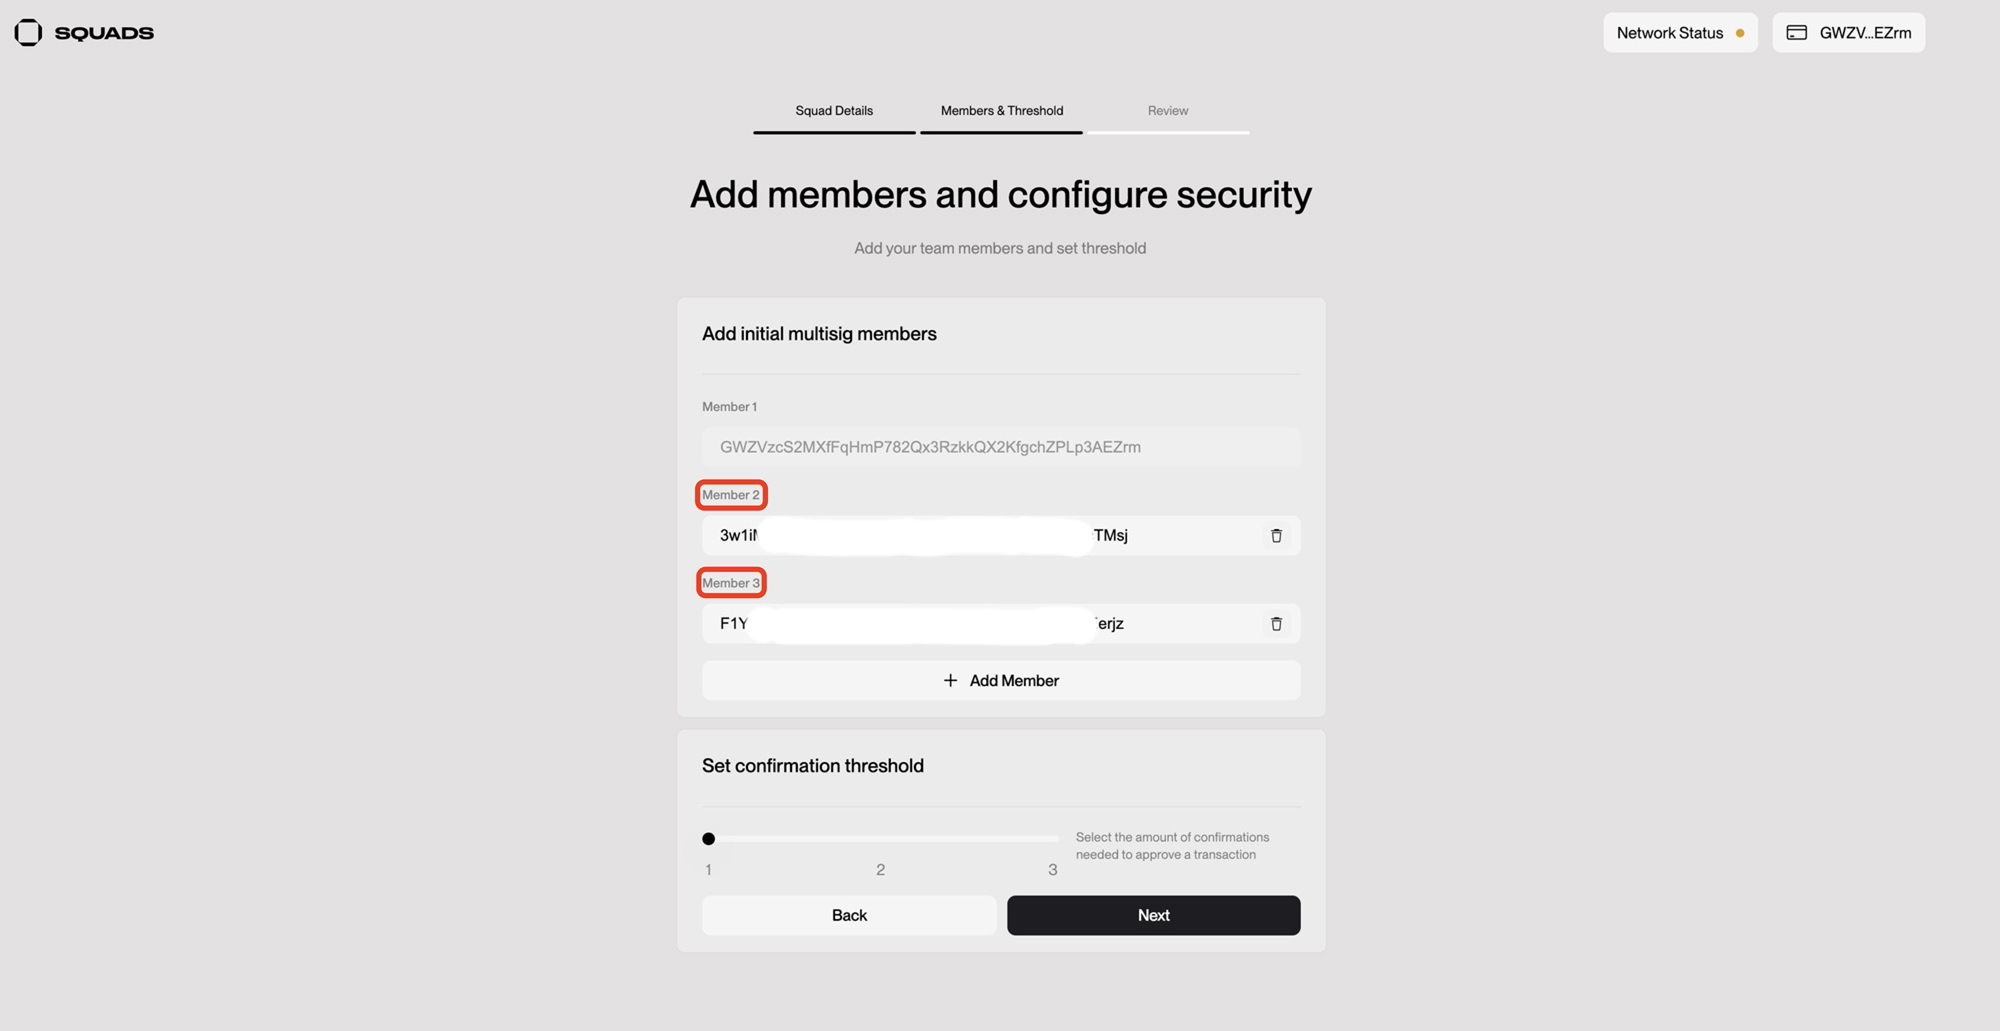
- Before proceeding to the next step, set the number of signatures required for authorizing transactions. For this guide, we will set it to 2. After setting this up, click [Next] to continue.
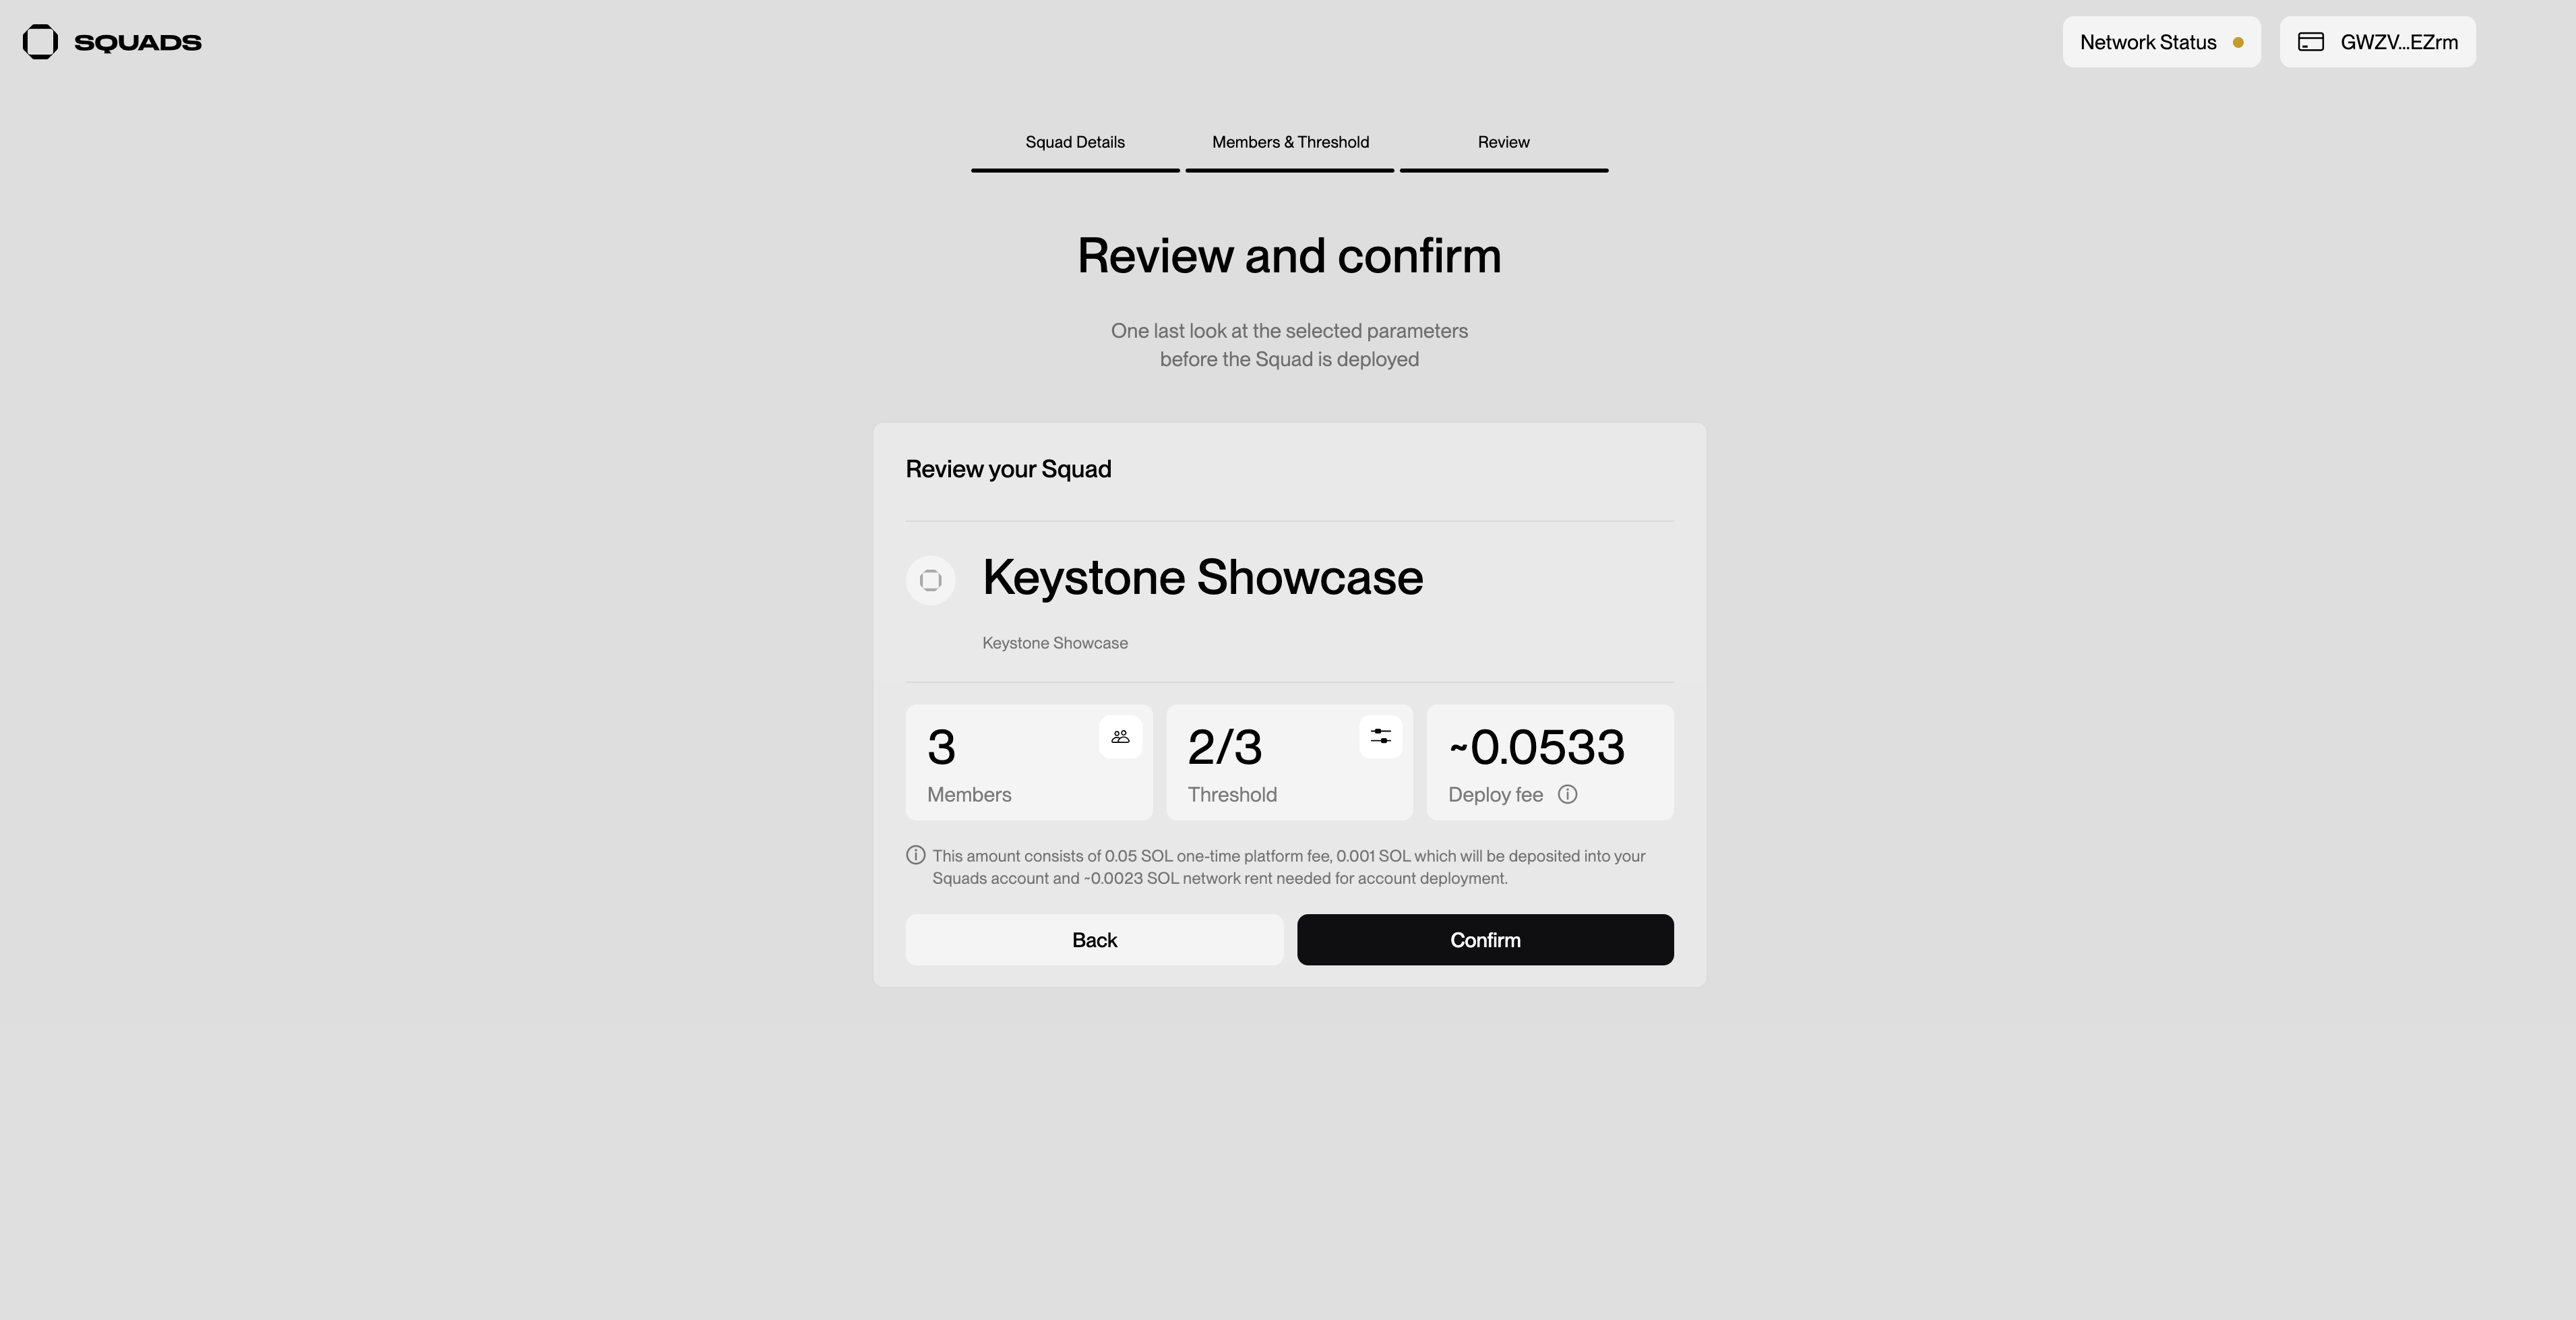
- Finally, review your Squads information and click [Confirm]. The system will prompt you to sign the transaction to create the squad.
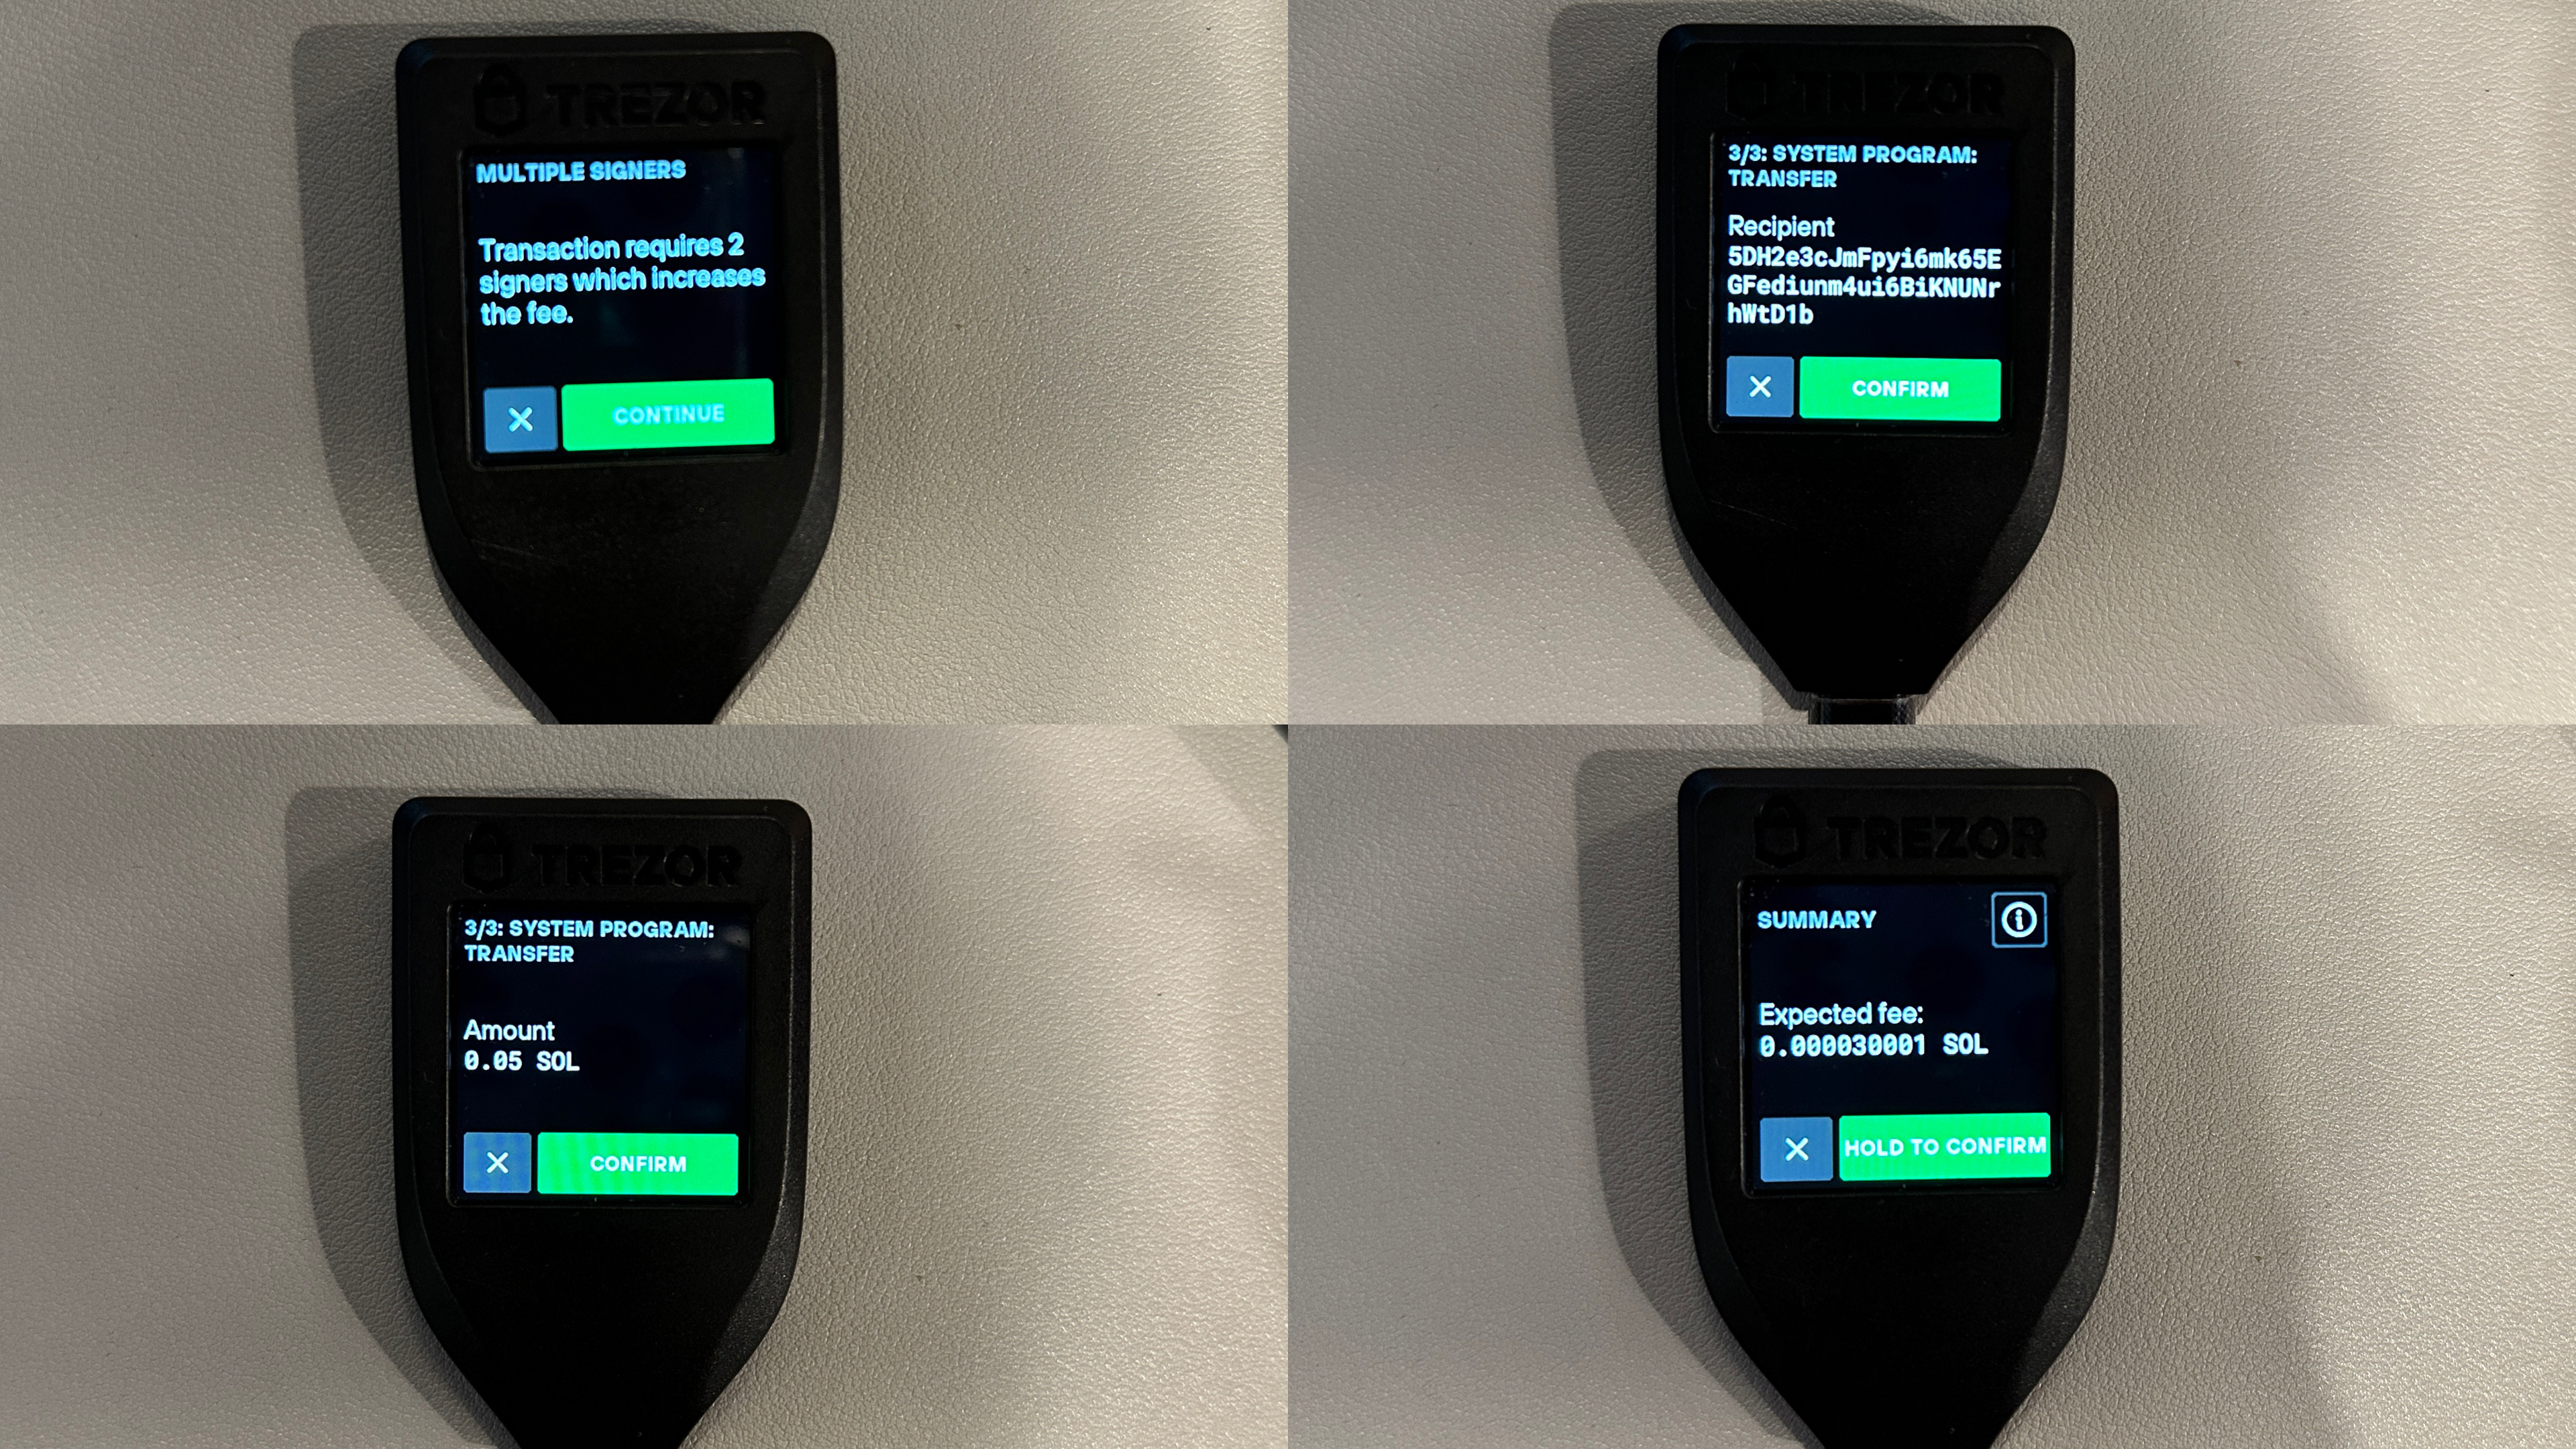
- At this point, the first linked wallet account will be prompted to sign the transaction.
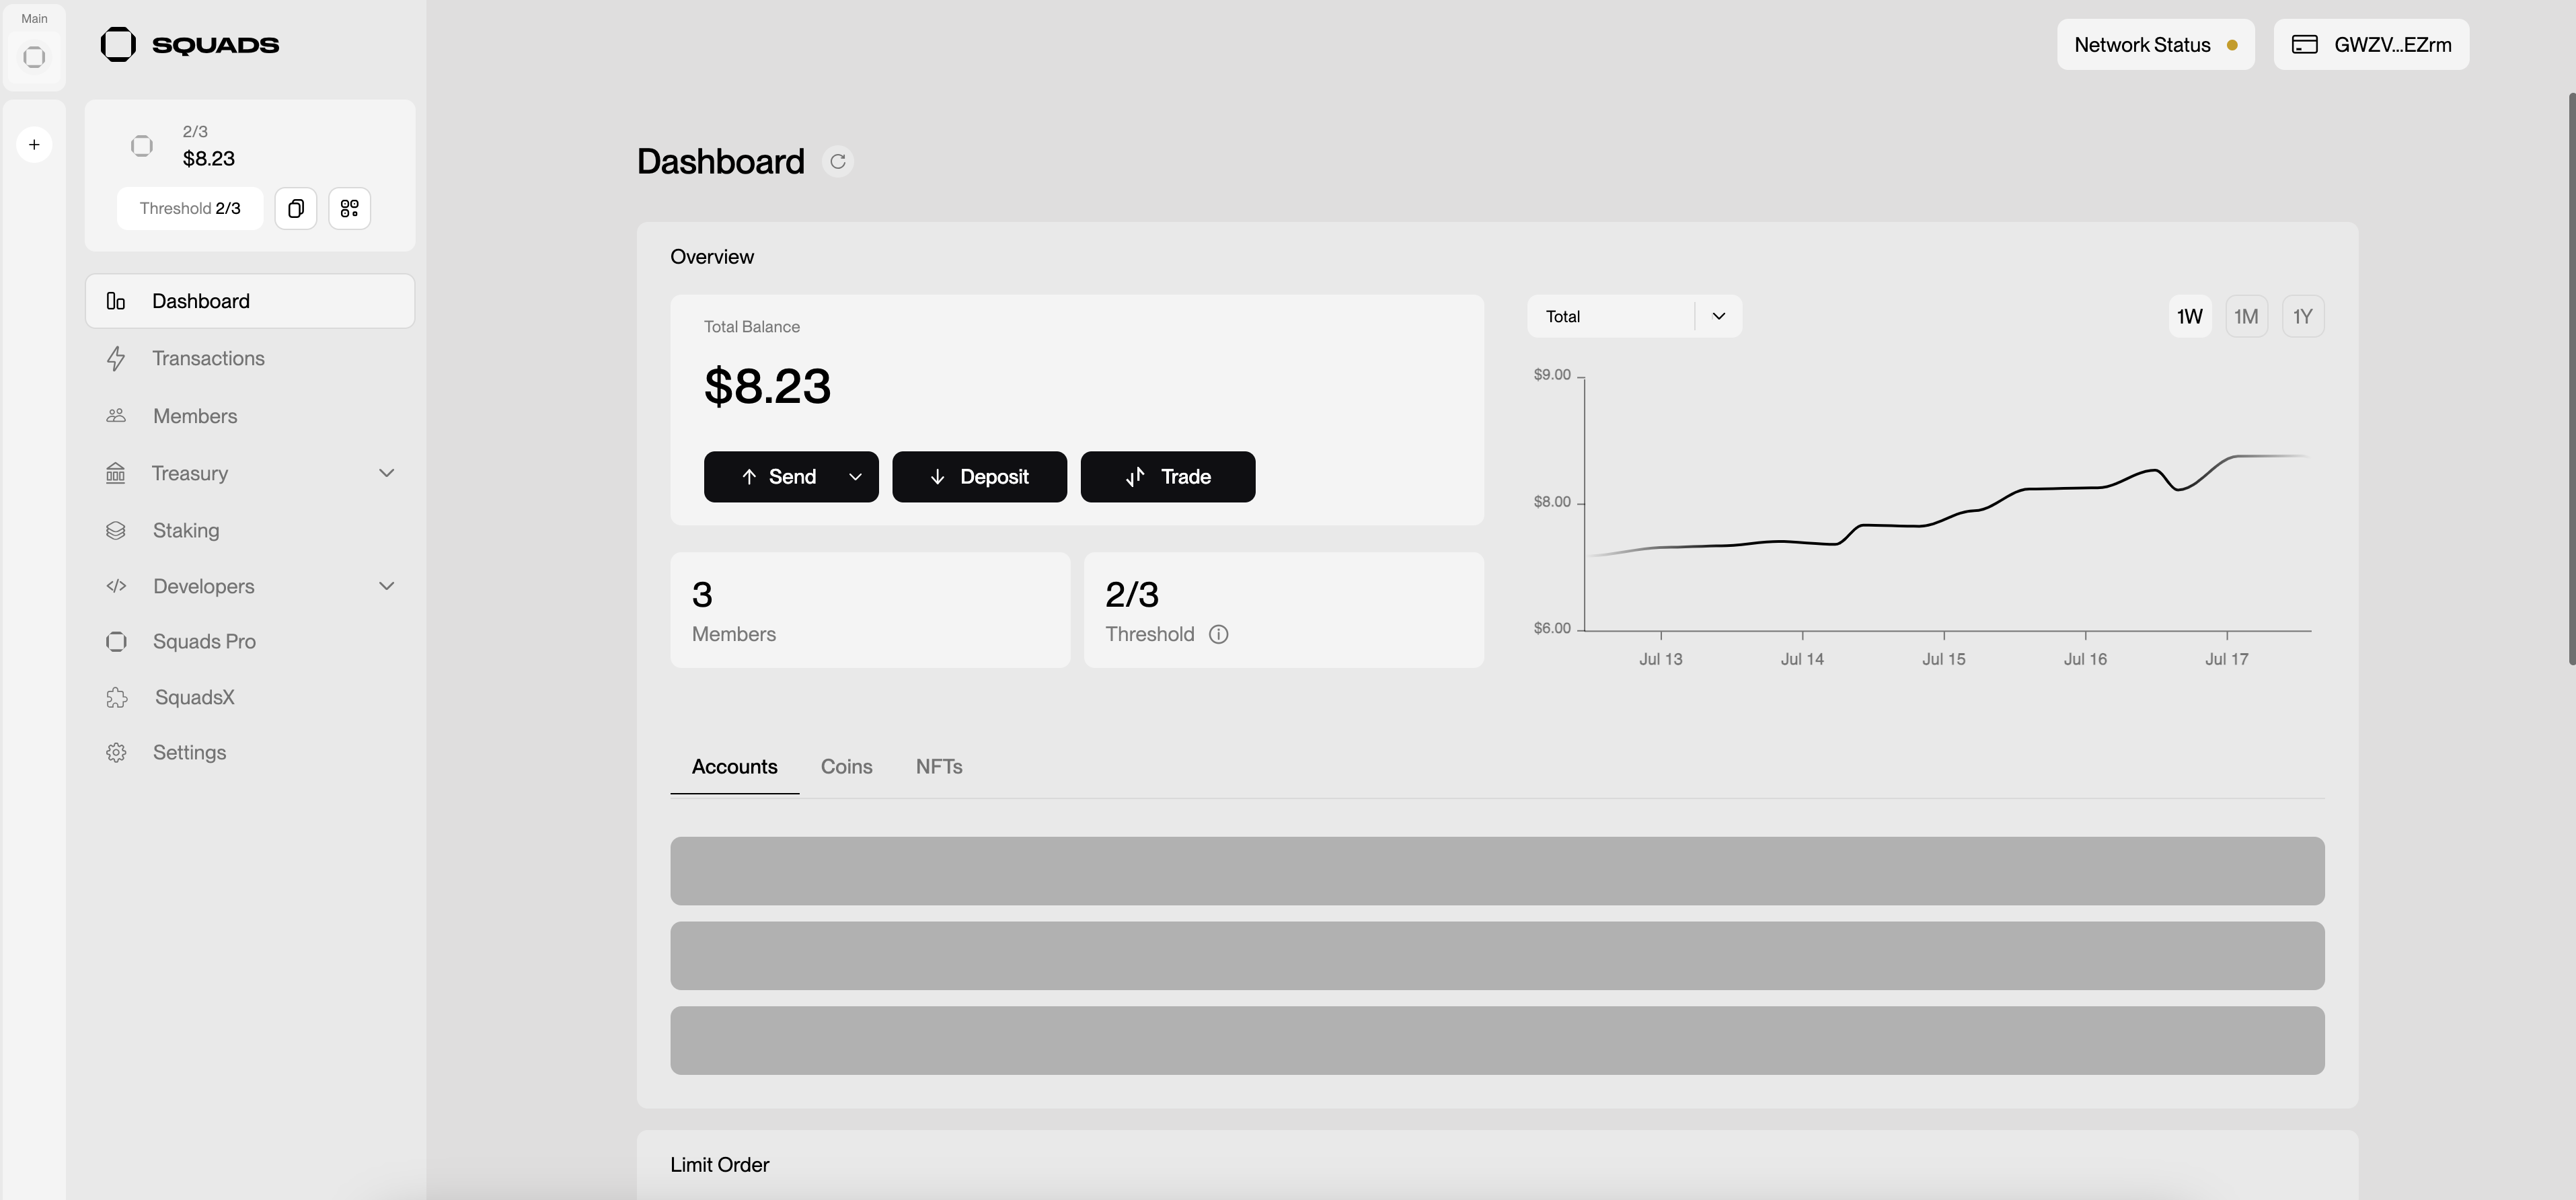
- Once the signing process is successfully confirmed, you will now have a Solana multi-signature wallet, and you will be redirected back to the Squads dashboard.
Step 2: Create and Authorize a Solana Transaction
Let’s send some SOL to your wallet.
- Click [Send] in the left sidebar on the homepage.
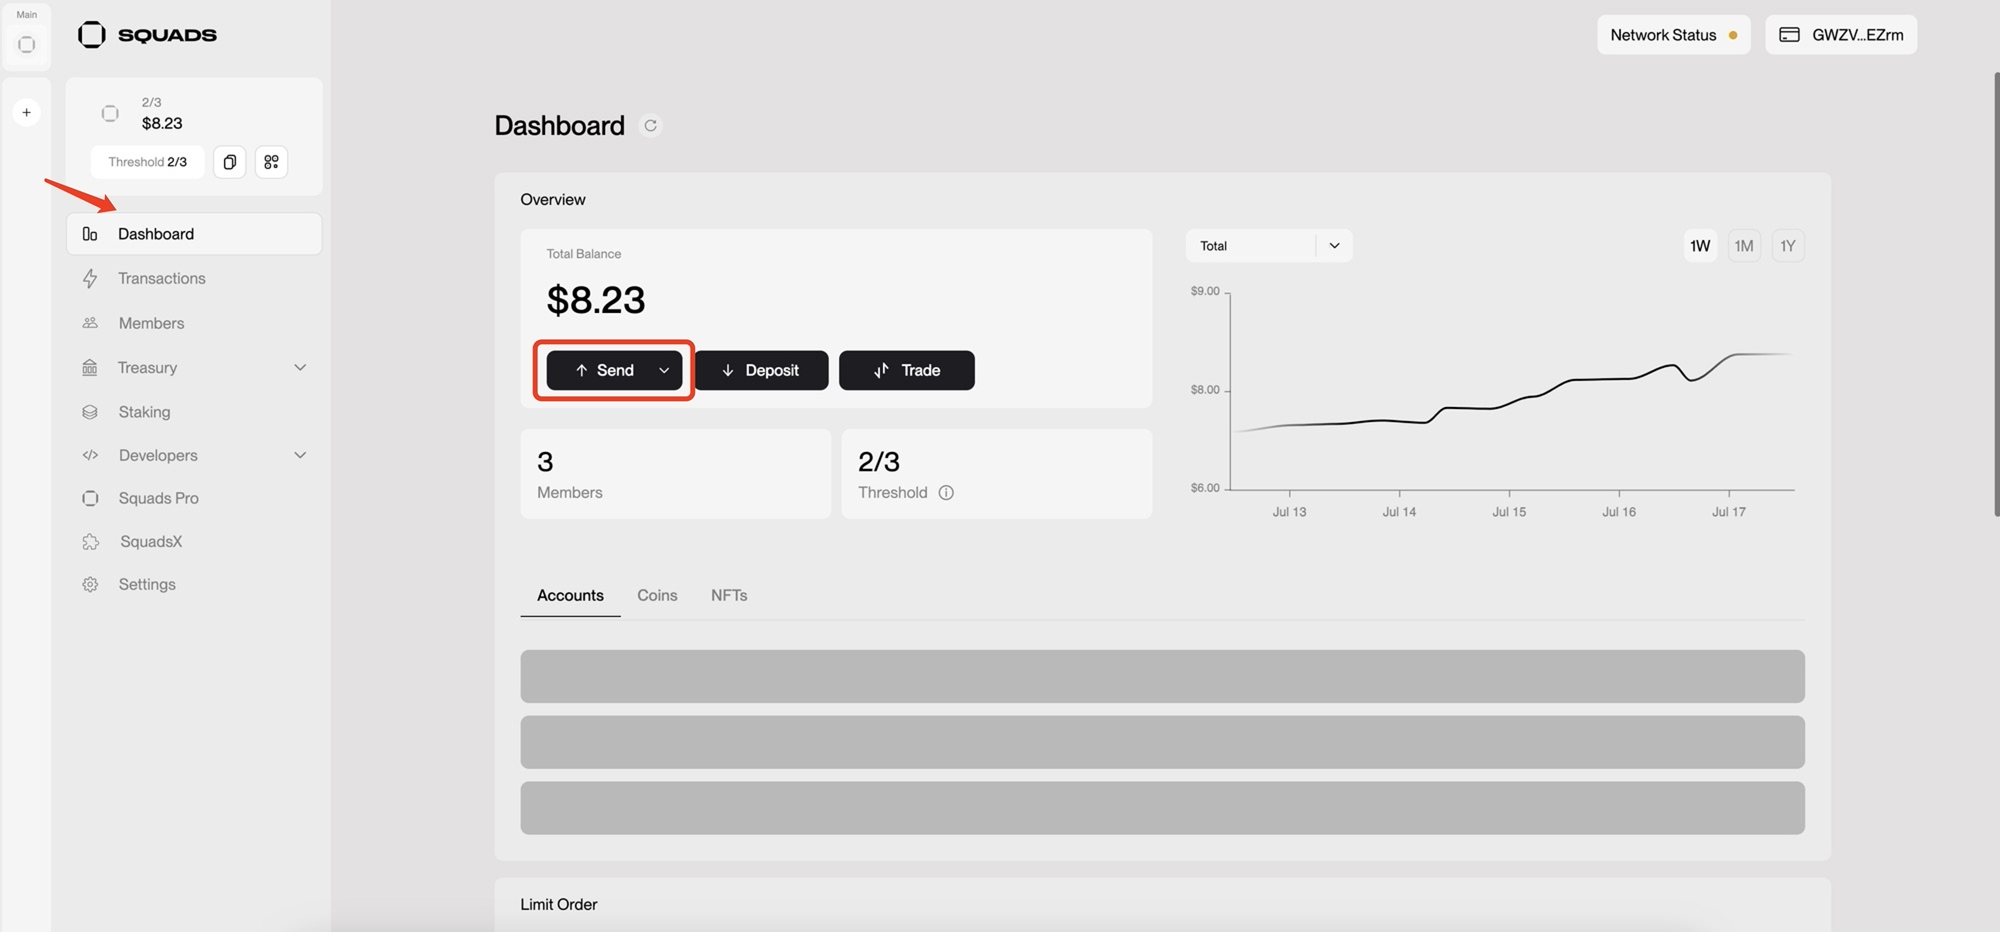
- You can enter the amount of SOL to send and the address to send it to (or select an address from your connected wallets).

- After verifying the transaction details > click [Initiate] > and you will be redirected to the first wallet to sign the transaction. However, unlike a “normal” transfer, the SOL will not be sent immediately. Instead, it will be queued, waiting for approval from the multi-signature wallet. Navigate to the [Transactions] tab to view your pending transactions.
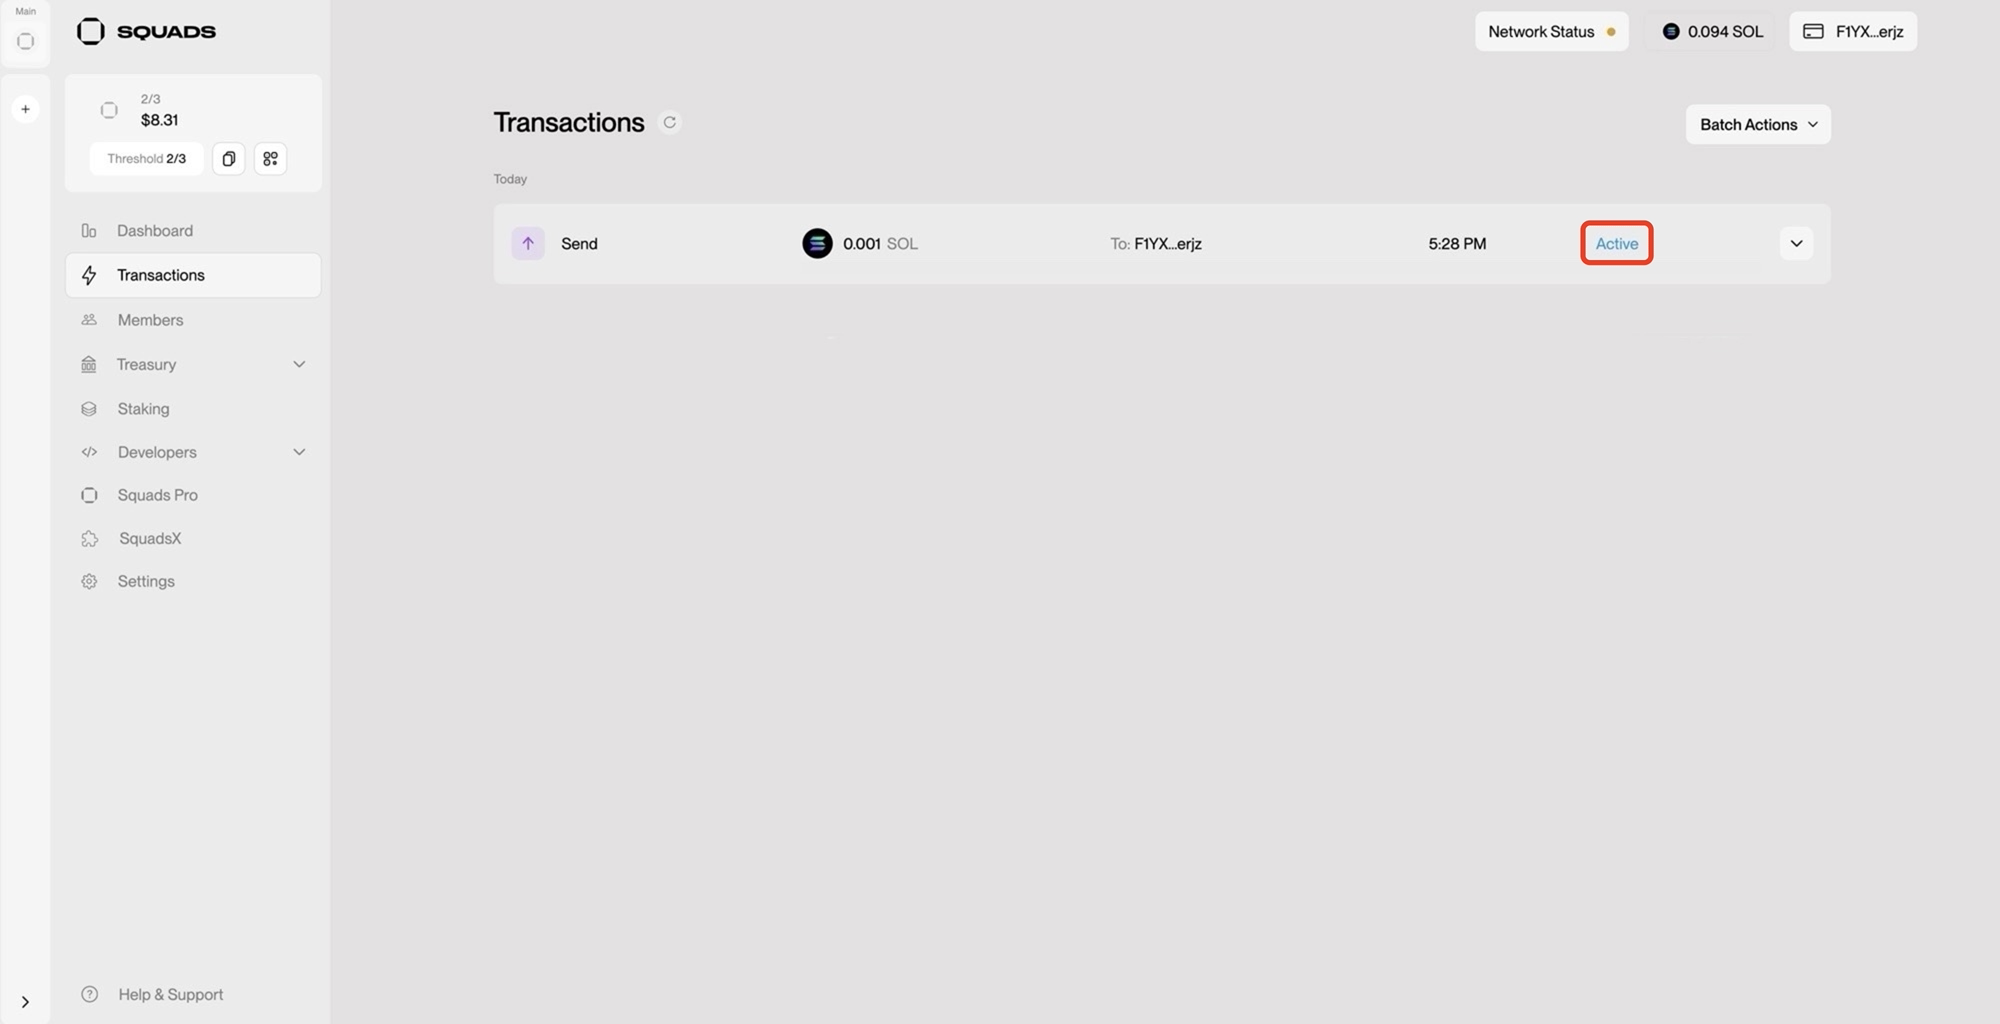
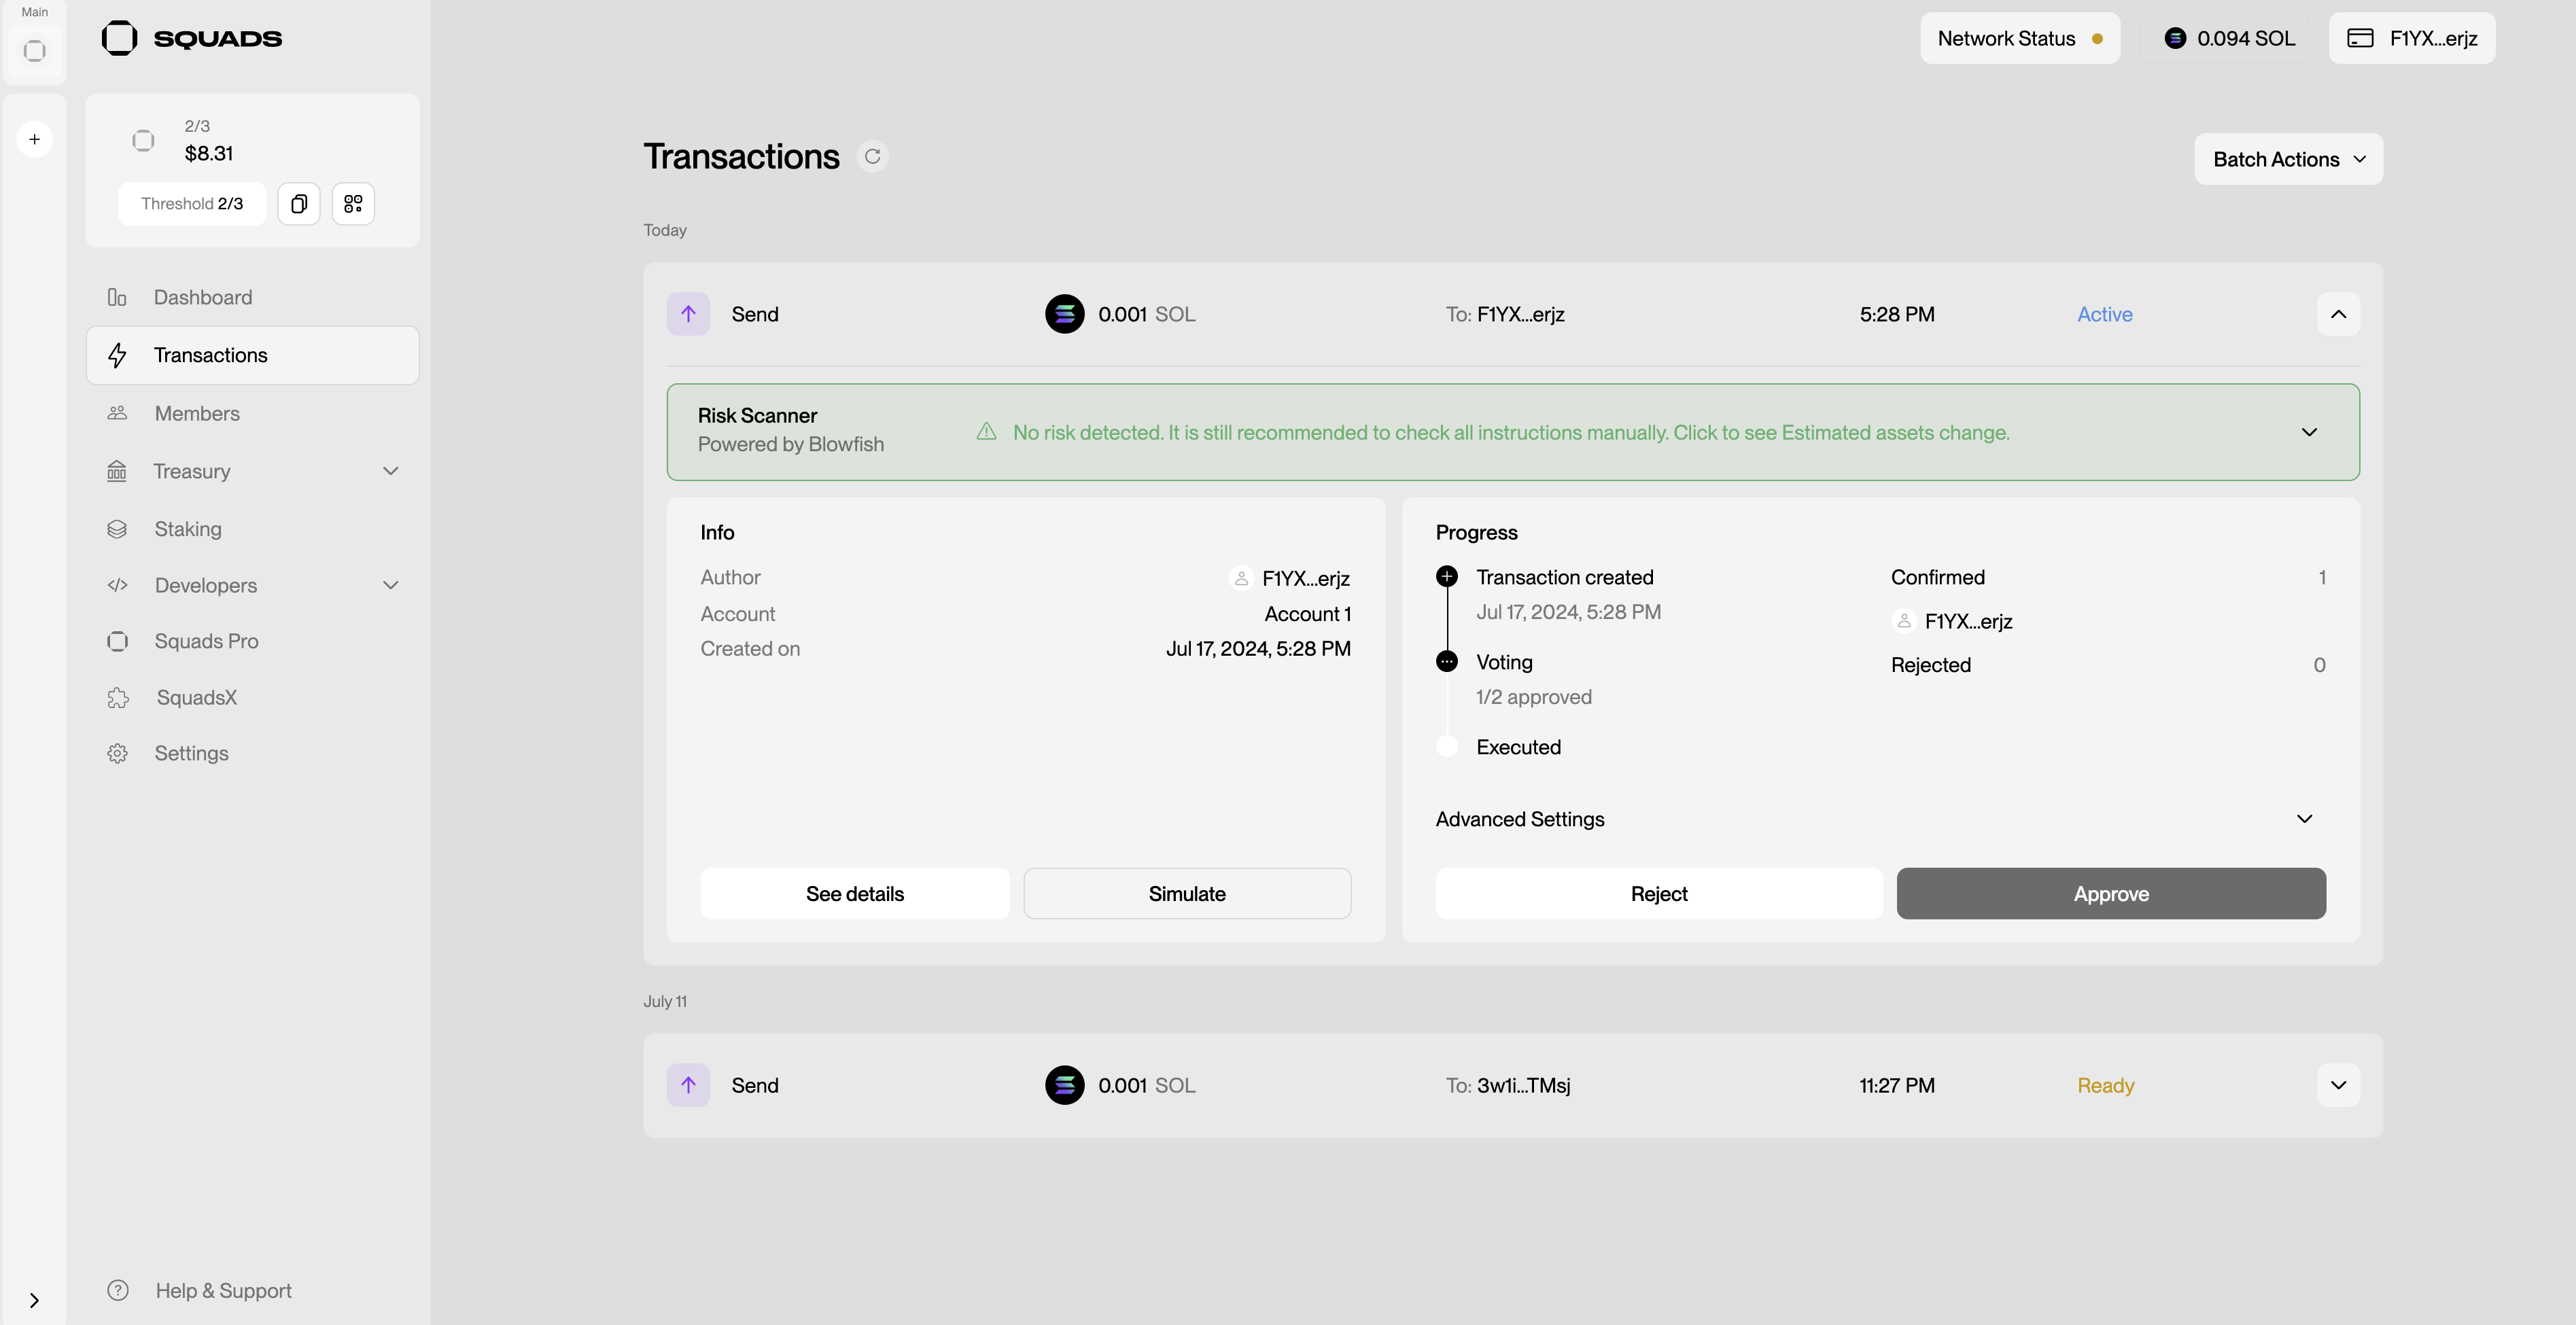
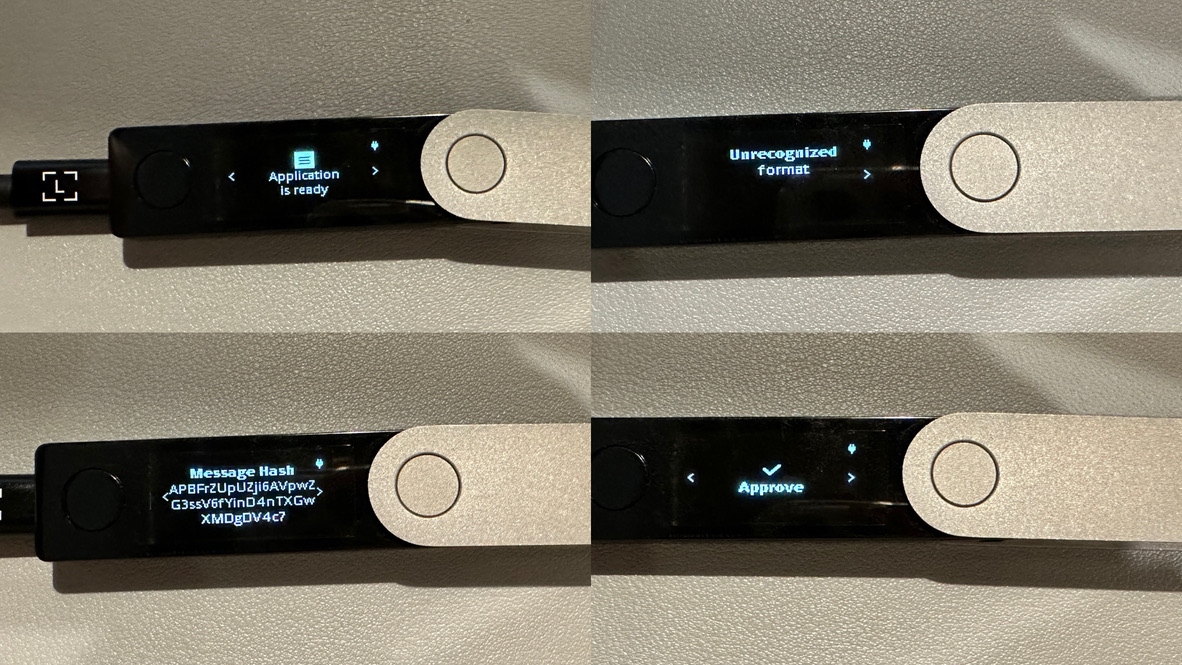
- Click to expand the transaction details: You will see that the transaction is awaiting approval from the multi-signature wallet. The transaction status should show as Active (since you have already signed the transaction). You will also see details about the transaction approval threshold specified when creating the squad. In this case, we need 2 signatures to approve the transaction. To approve the transaction, we must connect the second wallet.
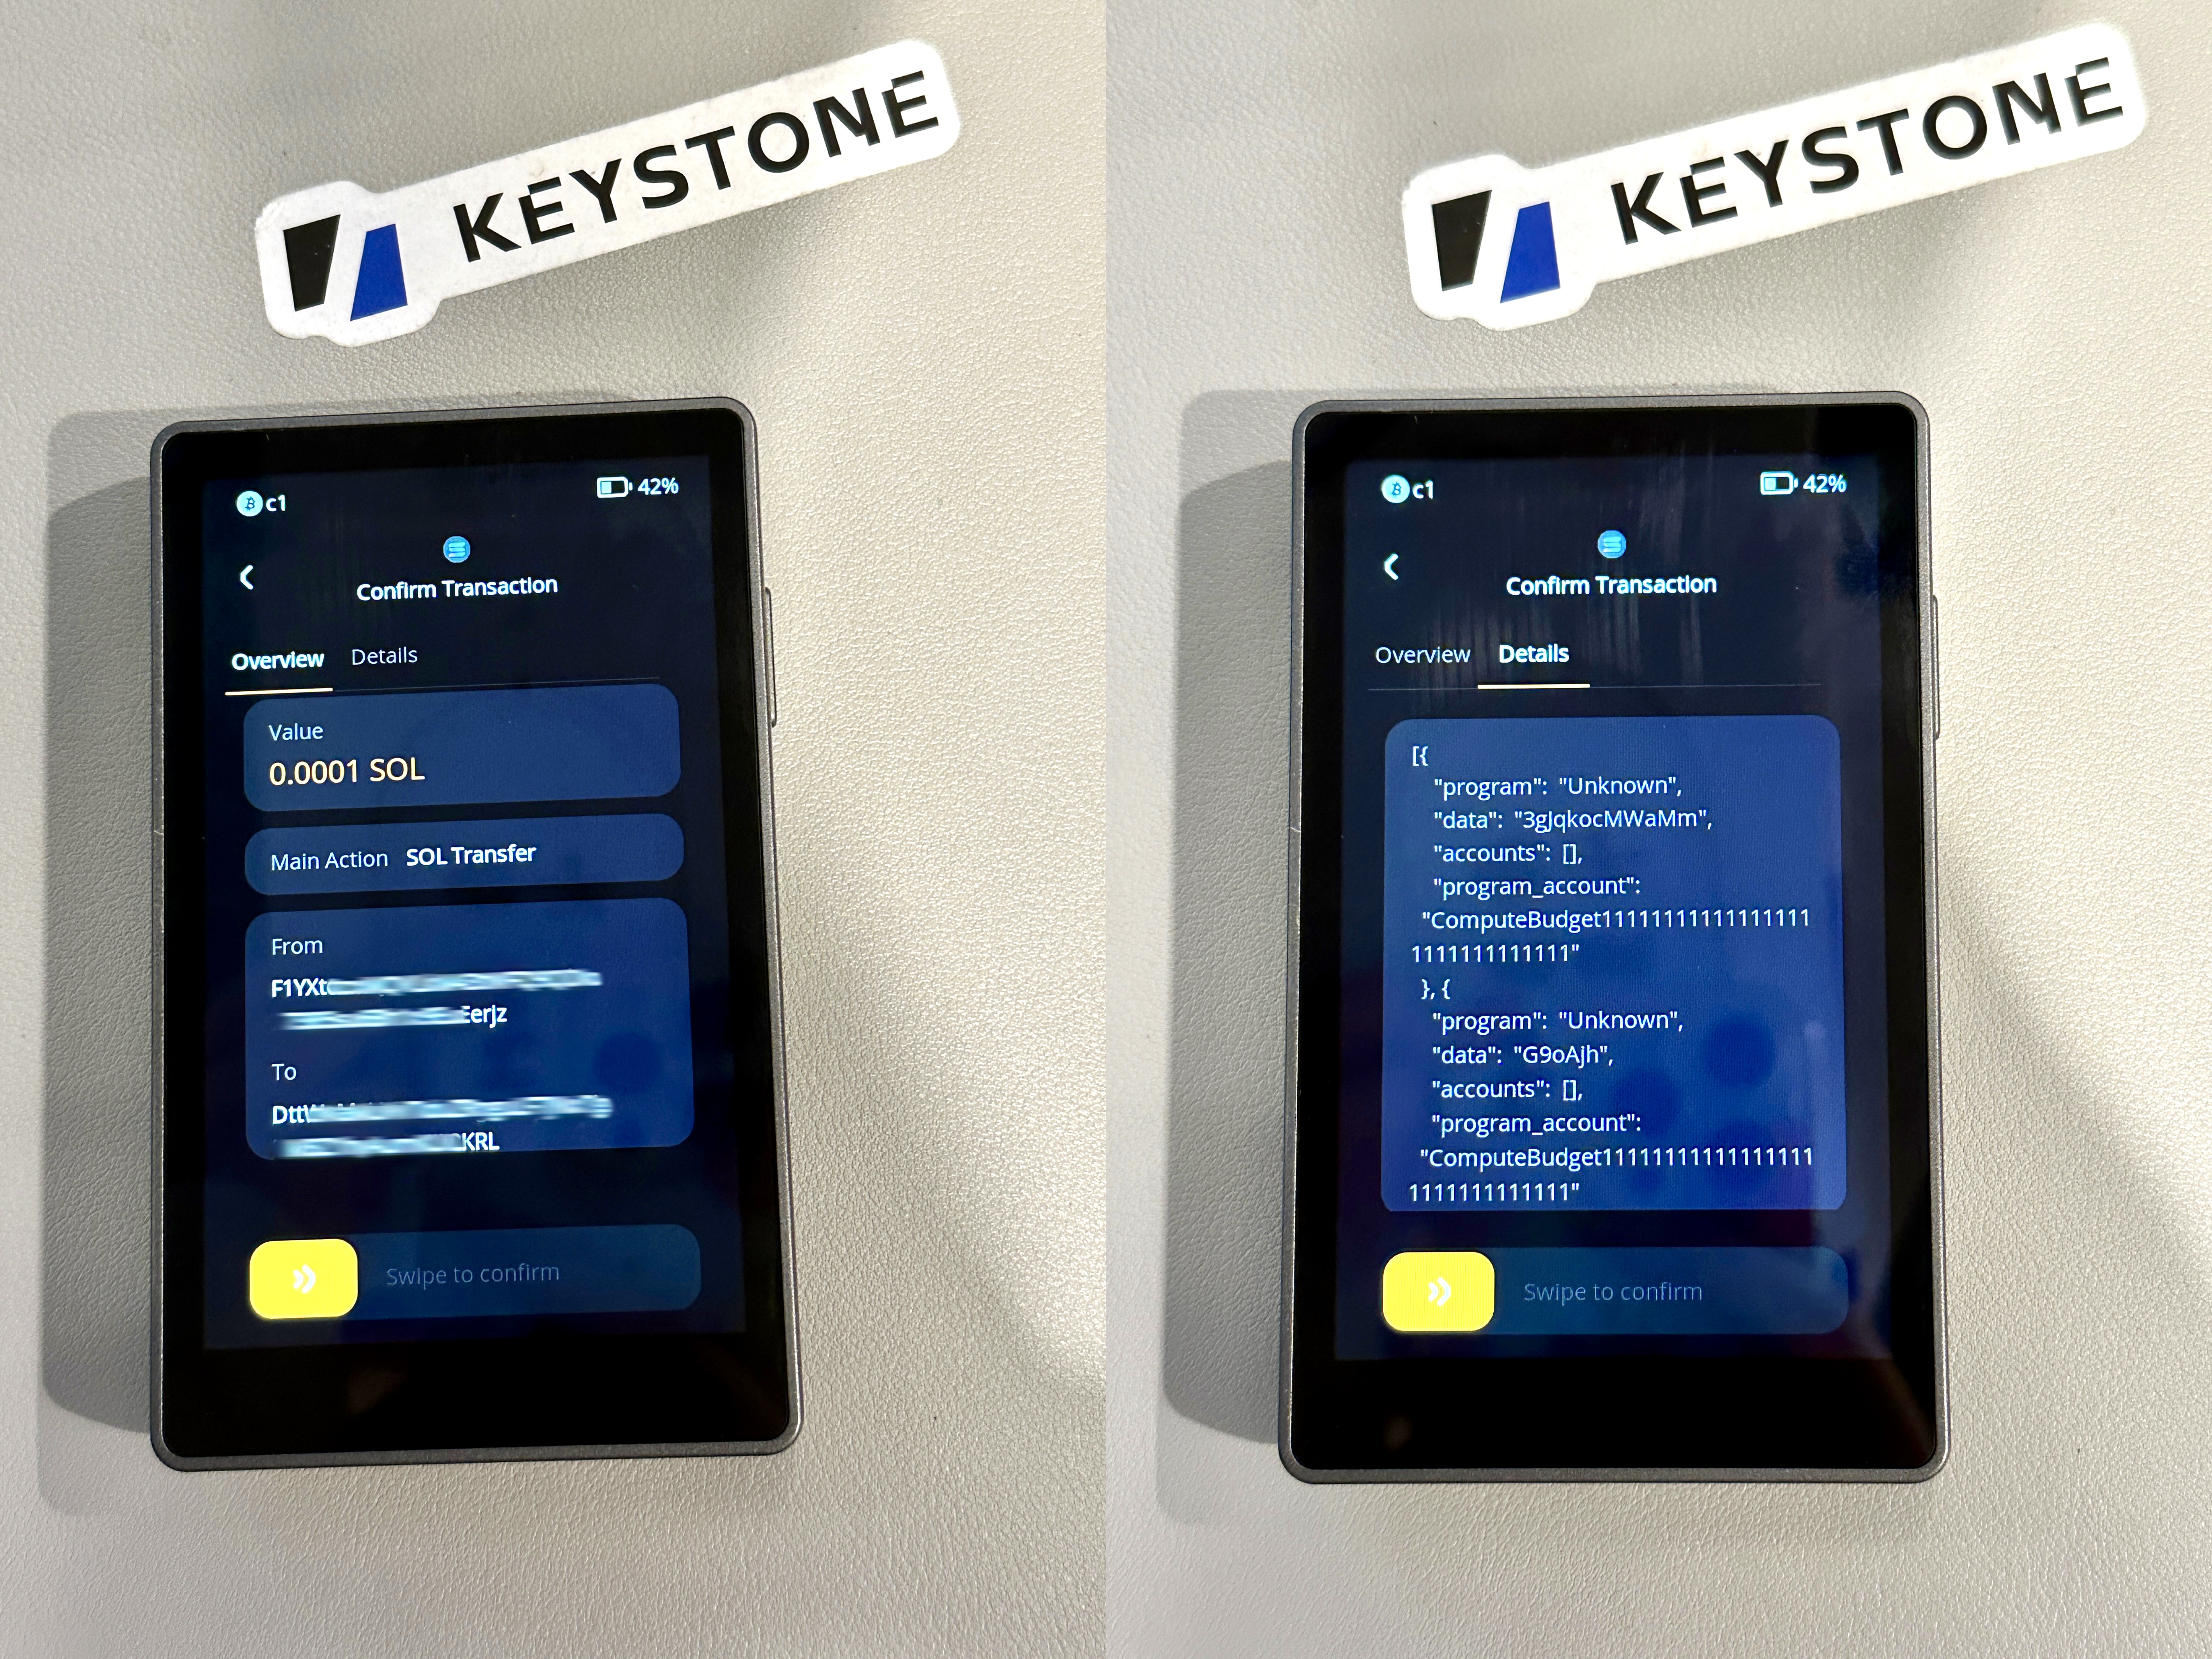
Here, we only show the signing details from the hardware wallet's side.
- The second signer can be chosen at your discretion.
- Click the wallet icon in the top right corner - select [Disconnect].
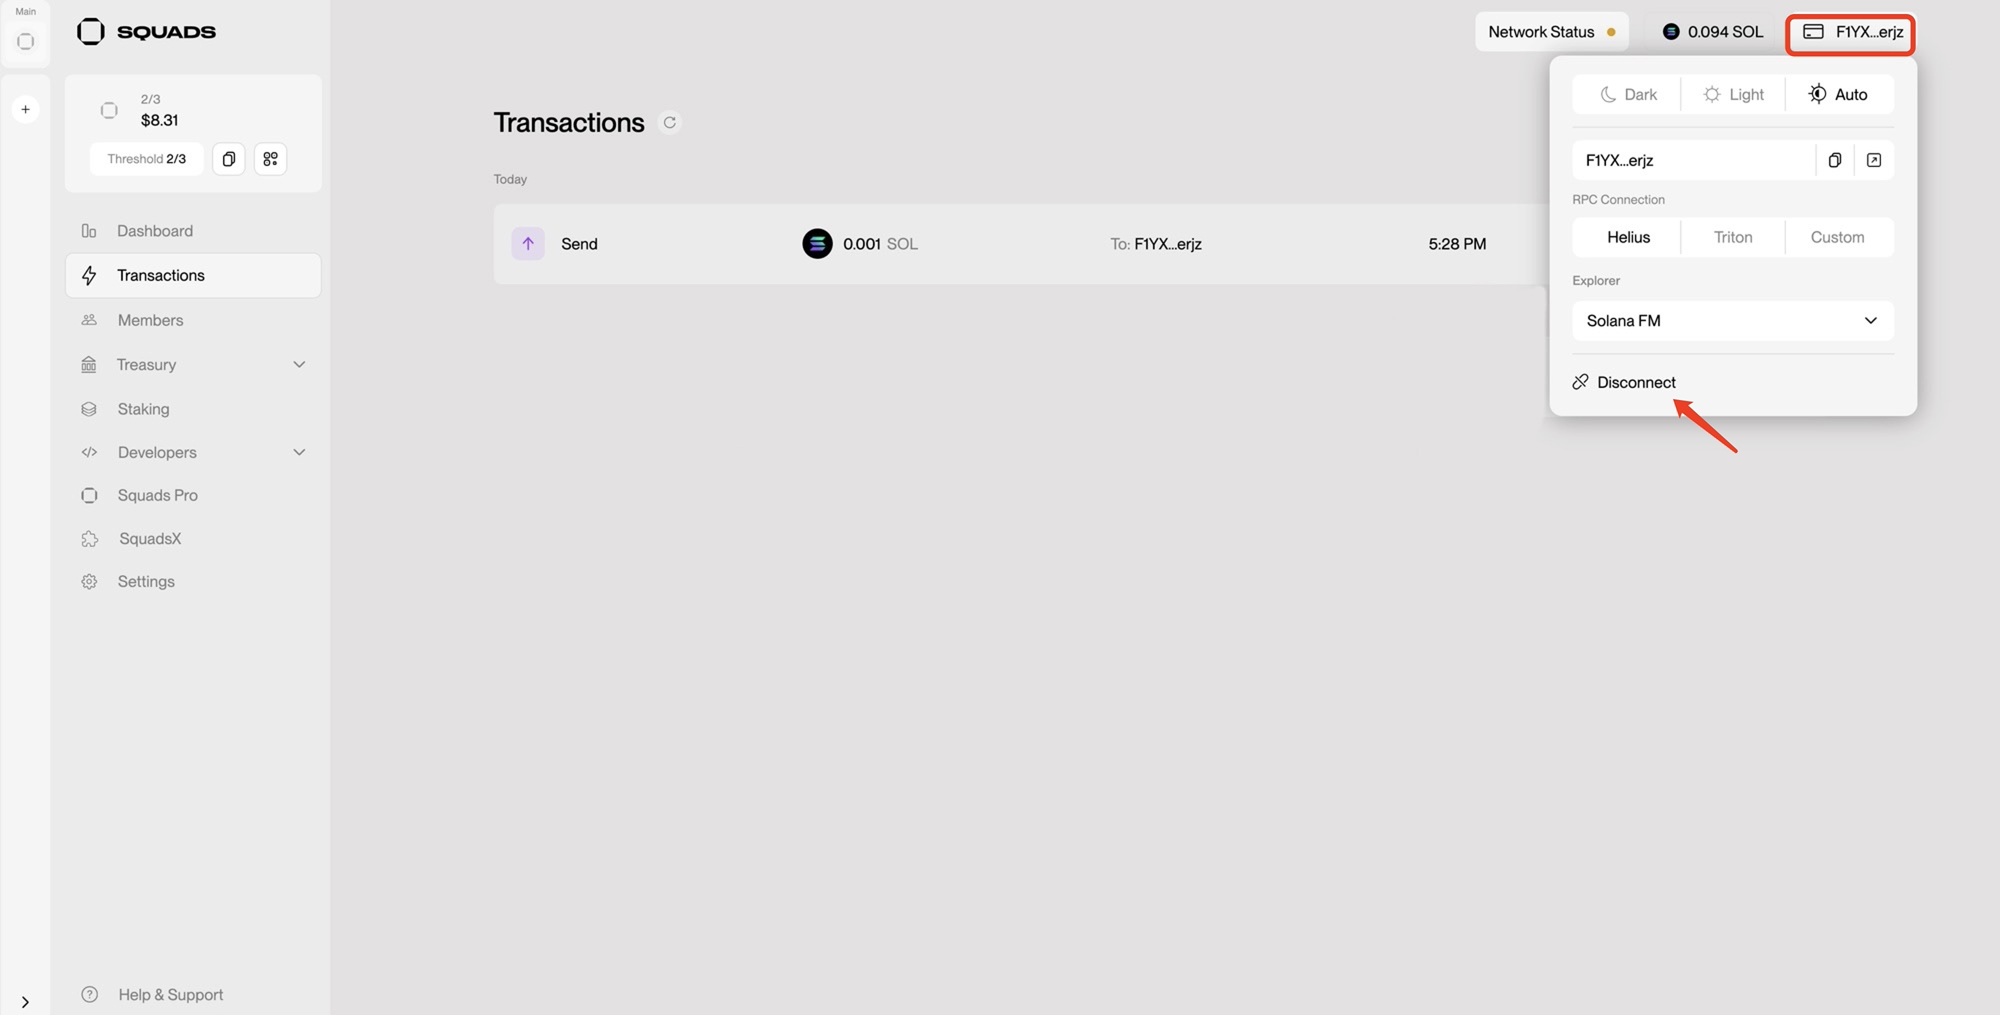
- Select to connect the second multi-signature account wallet. After a successful connection, the address will change to the current account address > click [Approve] to perform the second signature.
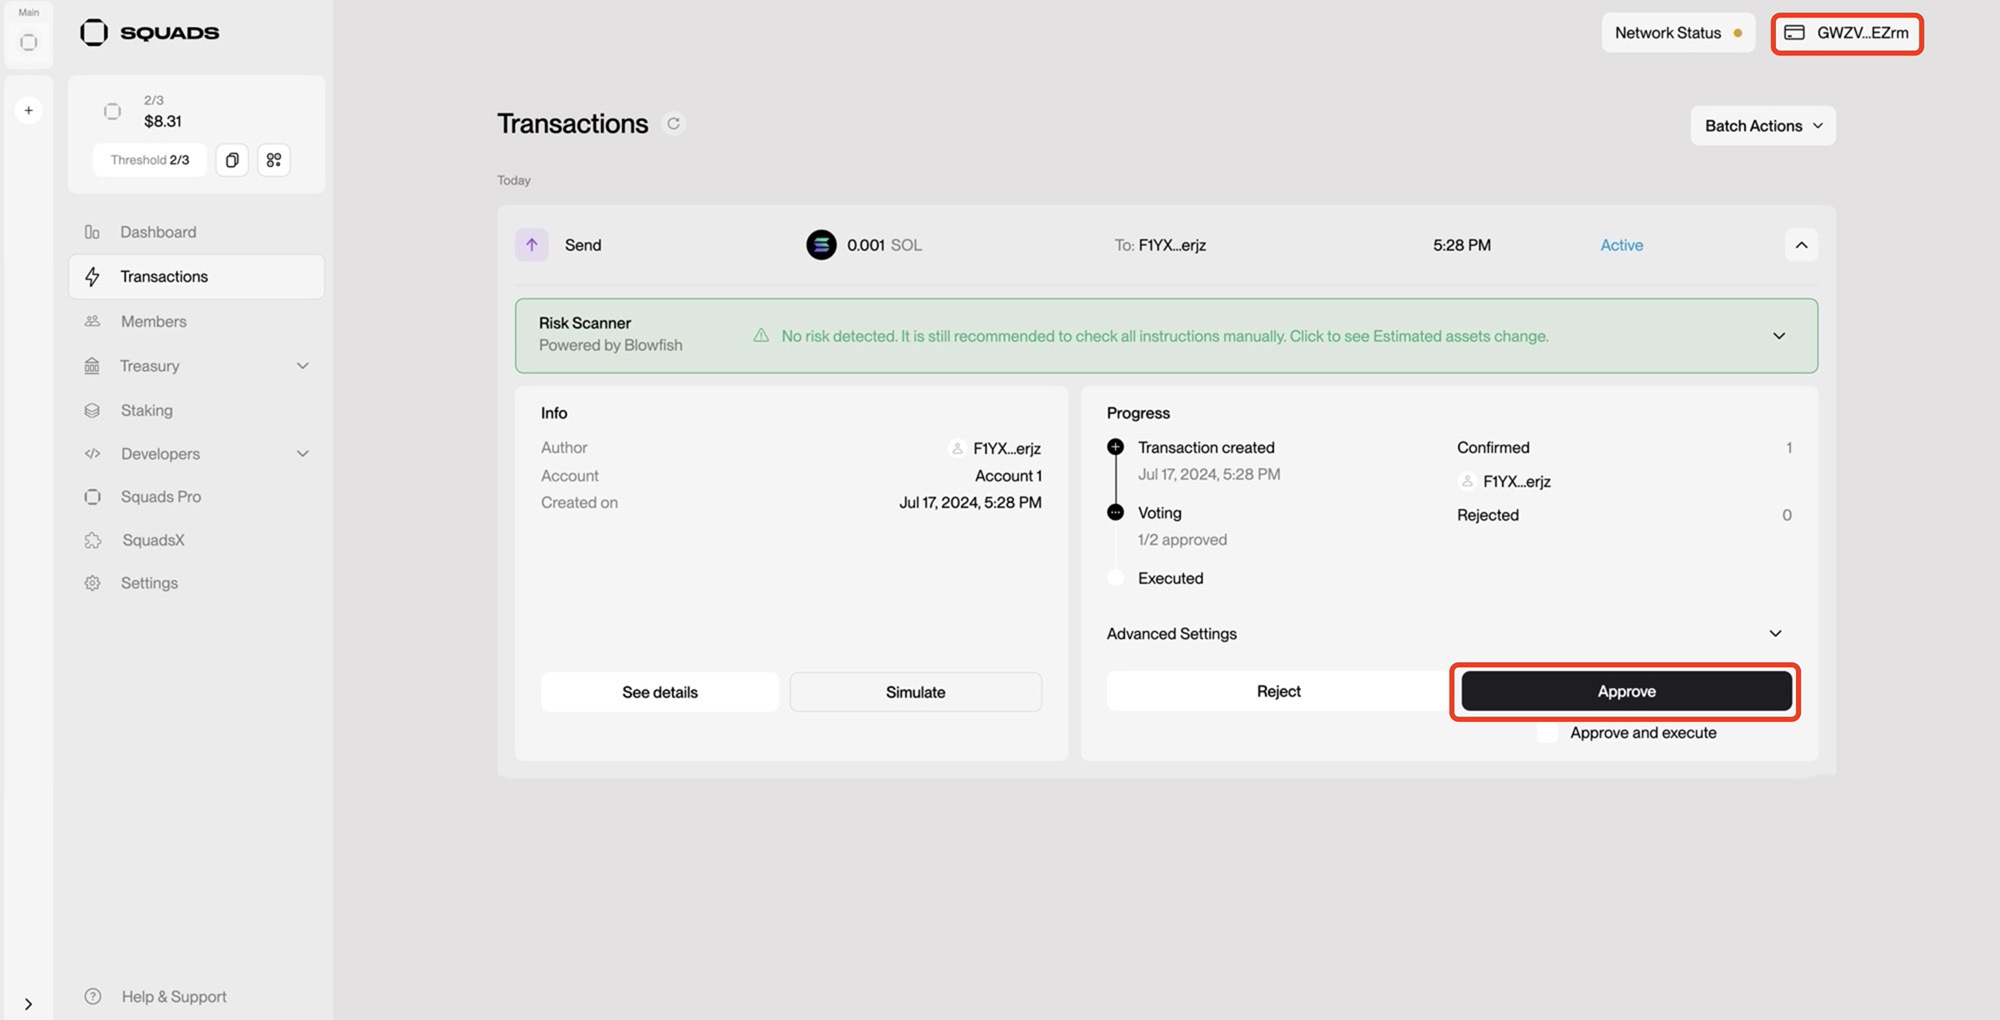
- After the second signature is successful, you should see the transaction status change from [Active] to [Ready]. This means the transaction has met the multi-signature approval threshold and is ready to be sent to the Solana network. Broadcast the transaction!
- Click [Approve] - you will see the status change to [Executed] - the transaction has been successfully broadcasted!
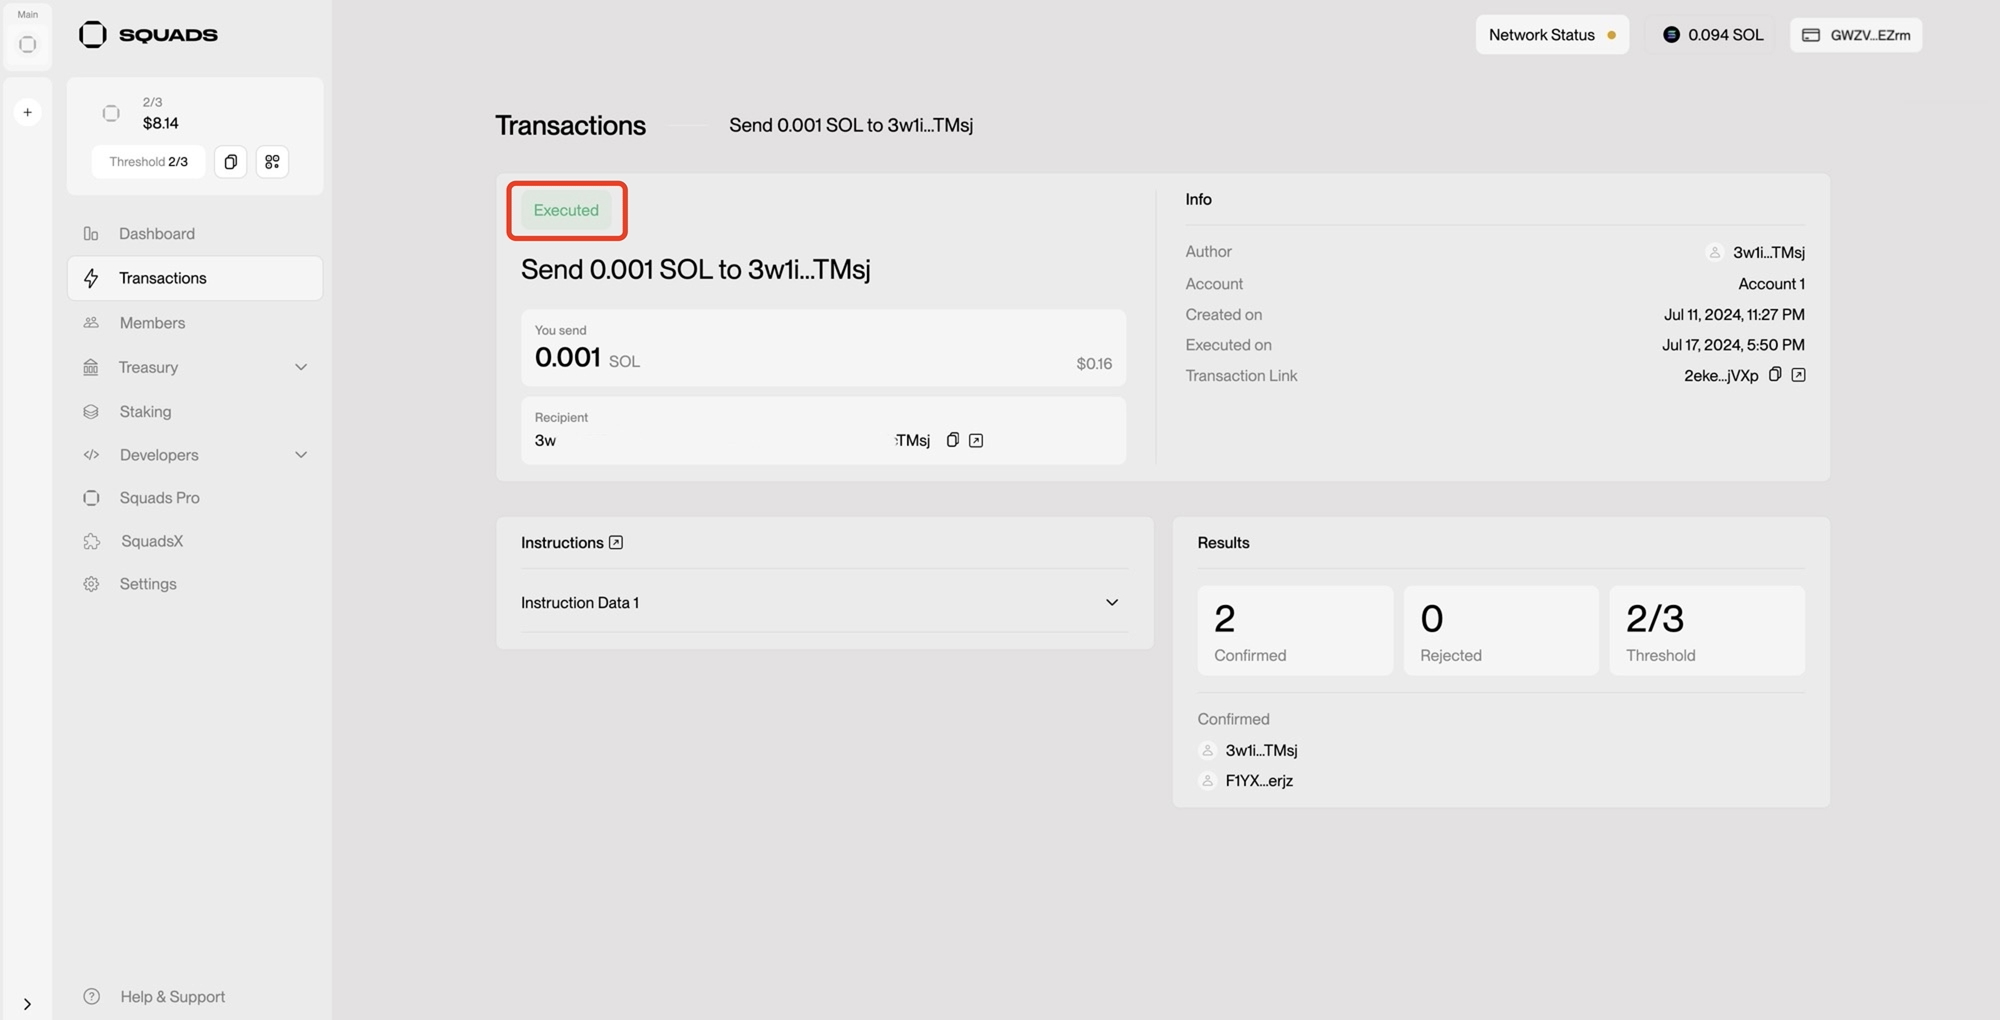
By following the above steps, you have successfully created a 2/3 multi-signature wallet in Squads and completed a multi-signature transaction. This process not only enhances the security of transactions but also ensures that each transaction undergoes multi-party review and approval. I hope this guide helps you better understand and utilize multi-signatures!