BTC-Only- Connect Nunchuk With Keystone
This guide walks you through setting up Nunchuk to work seamlessly with your Keystone 3 Pro (BTC-only version), allowing you to manage your BTC securely.
Support: BTC with Native SegWit, Nested SegWit, and Legacy
Feature: Send, Receive, etc.
1. Preparation
Before you begin, ensure you have the following:
- Ensure your Keystone 3 Pro is running firmware version 1.0.1-BTC or newer. If not, follow the instructions on how to upgrade firmware.
- The Nunchuk app V1.9.43 installed on your device. You can download it from the Google Play Store or App Store. If you need more information, visit the official Nunchuk website.
2. Binding Nunchuk with Your Keystone Hardware Wallet
On Your Keystone Hardware Wallet:
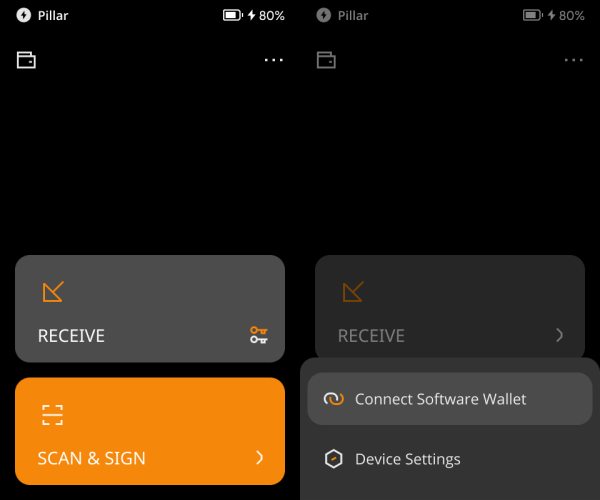
Tap the "..." icon located at the top right. Click “Connect Software Wallet”
Select "Nunchuk" from the options, and a QR code will appear.
On Nunchuk:
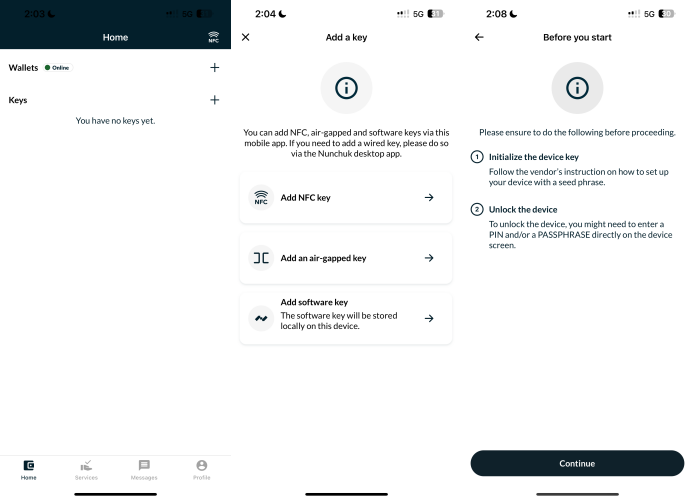
Open the Nunchuk app on your device.
Tap the plus (+) button next to "Keys,” then select "Add an air-gapped key."
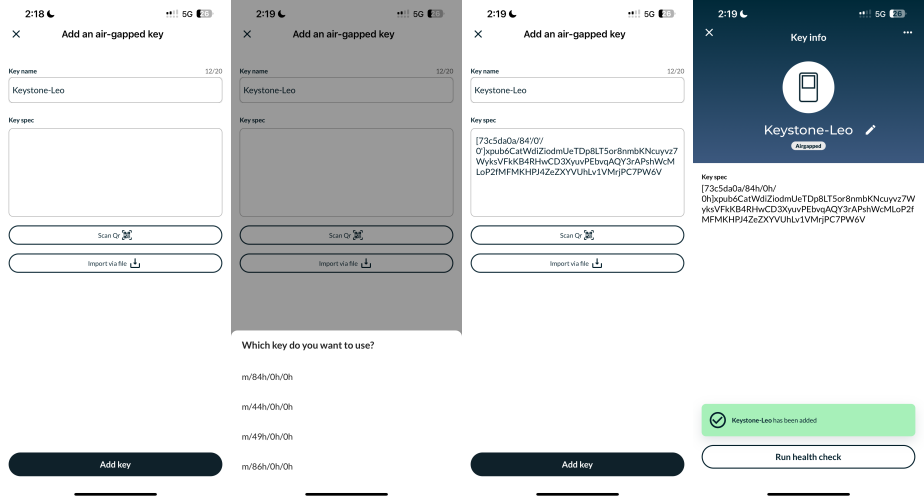
Press the "Continue" button, in the key name field, name your key.
Tap the "Scan QR" button and use your smartphone's camera to scan the QR code displayed on your Keystone device, then select a path for your Bitcoin address.
Click the "Add key" button. You have now successfully added your Key.
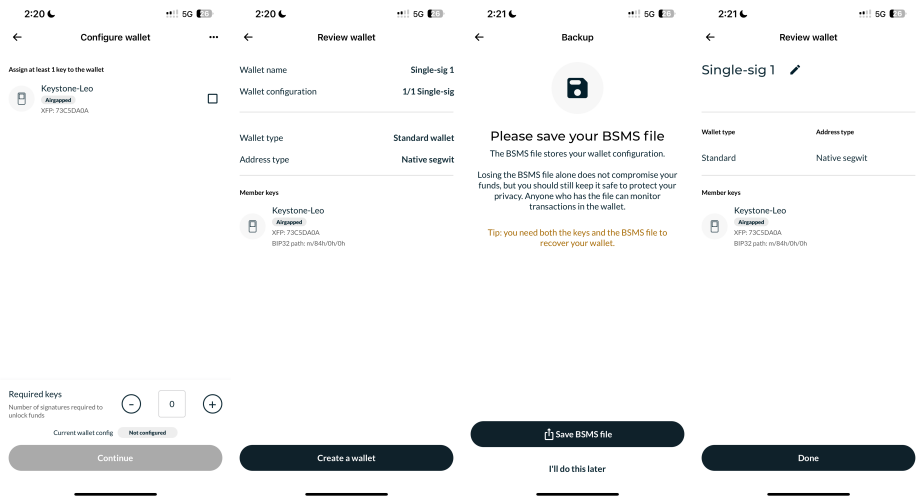
Return to the Home page, tap the plus (+) button next to "Wallets," then click on the "Create new wallet" button.
In the Wallet name field, name your wallet.
Open "Customize address type" and select a path for your Bitcoin address, then click the "Continue" button.
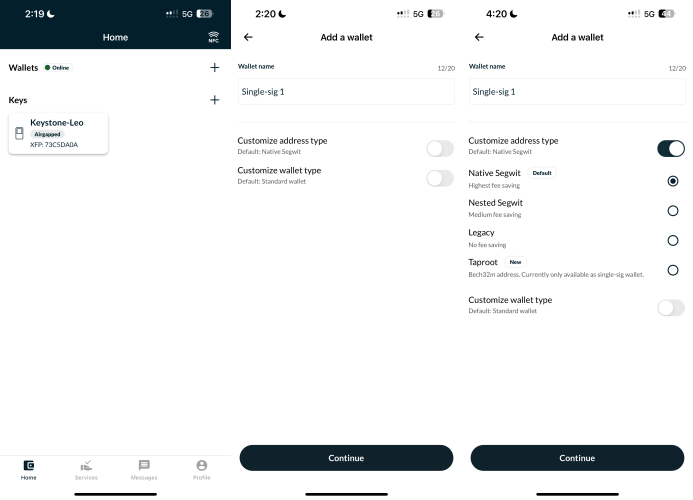
Select the key you created earlier, then click the "Continue" button again, then choose the "Create a wallet" button.
Select "I'll do this later" option, finally, click the "Done" button.
That's it! Your BTC addresses are now synchronized with Nunchuk and Keystone. You're ready to explore the app's features and perform secure transactions with your Keystone hardware wallet.
Security Note: To protect your assets, we recommend comparing the address displayed in Nunchuk with the address generated on your Keystone 3 Pro device after the connection is complete, and making sure the two addresses match exactly. Also, do not scan any external QR codes that were not generated by your Keystone device.
3. Sending and Receiving BTC with Nunchuk
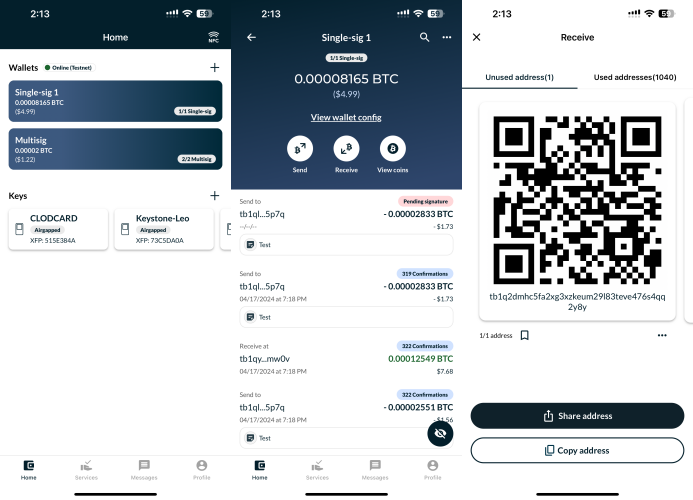
Receiving:
Click on the wallet you have created.
Click the "Receive" button.
A QR code and address will be displayed on the page for receiving funds.
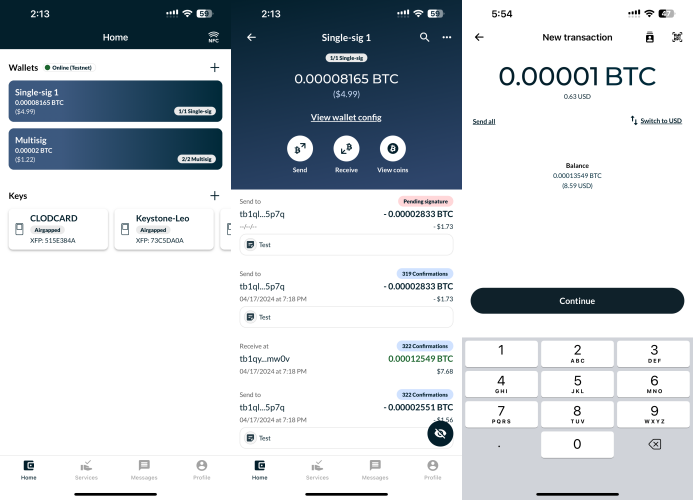
Sending
Select the wallet you have set up, and click the “Send” button.
Input the amount and select “Continue”.
Enter the recipient’s address and a note, click on “Create transaction”, then choose the “Sign” button next to the key icon.
Pick “Export transaction” and then “Export via QR”, and scan the QR code with your Keystone device and verify the transaction details are correct before signing.
In Nunchuk, choose “Import signature”, then scan the QR code displayed on your Keystone.
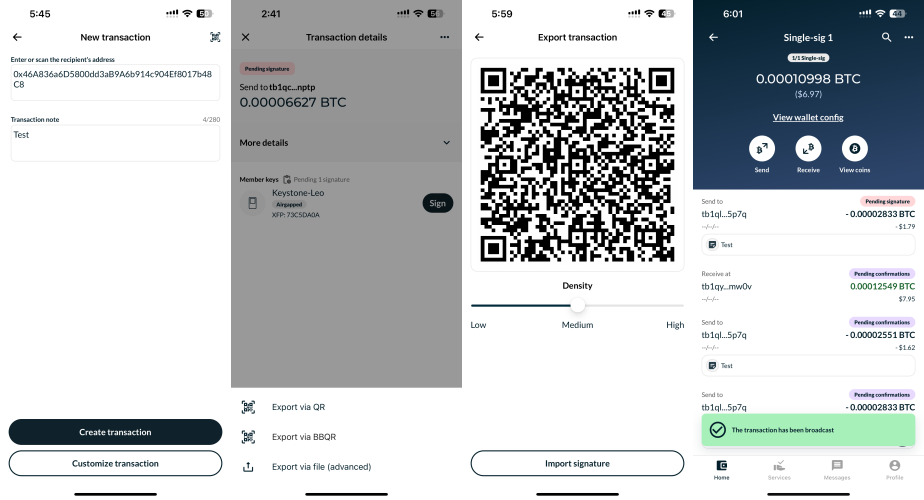
Congratulations! Your transaction is complete.