BTC-Only:How to Import a Multi-Signature Wallet
When you upgrade Keystone 3 Pro to the BTC-Only firmware version V1.0.1, it defaults to a single-signature wallet. If you need a multi-signature wallet, please upgrade the firmware to BTC-Only V1.1.0-BTC version. After the upgrade, Keystone 3 Pro can participate as a multi-signatory in creating multi-signature wallets in software wallets.
This tutorial will use Sparrow as an example to create a 2-2 multi-signature wallet and illustrate two methods to import Keystone 3 Pro into a software wallet as one of the parties in the multi-signature wallet: QR code or microSD card import.
Preparation:
- Battery check: Ensure your Keystone wallet battery is at least 20%.
- Two multi-sign participants:
- First multi-sign participant 1/2: Upgrade Keystone wallet to (BTC-Only) V1.1.0-BTC or higher single-coin firmware version.
- Second multi-sign participant 2/2: Upgrade Coldcard firmware to version V2.1.0 or higher.
- Software wallet: Install and set up Sparrow Wallet V1.8.5 or higher version on PC/Mac.
- MicroSD card (≤512GB; Default FAT32 format).
Steps:
1. Obtain Keystone's multi-sign xPub
Click on the menu icon button on the top left of the page > Go to 【Wallet Profile】> Click on 【View/Export Extended Public Key】> Click on 【Multisig Wallet】to display the QR code.

2. Collect Coldcard's extended public key and export it to the microSD card
Insert the microSD memory card into the Coldcard device.
Select【Settings】> 【Multisig Wallets】> 【Export XPUB】.

Press the (√) button to save Coldcard's XPUB document (e.g., xxcp-5271C071.json) to the microSD memory card.
Remove the microSD memory card from ColdCard and insert it into the computer. The Coldcard's extended public key document (e.g., ccxp-5271C071.json)
3. Create a 2/2 multi-signature wallet in Sparrow with Keystone and ColdCard as signatories:
Run Sparrow on PC/Mac.
Select 【Settings】>【Multi Signature】.
Choose 【Keystore 1】>【Airgapped Hardware Wallet】>【Keystone Multisig】next to【Scan】.
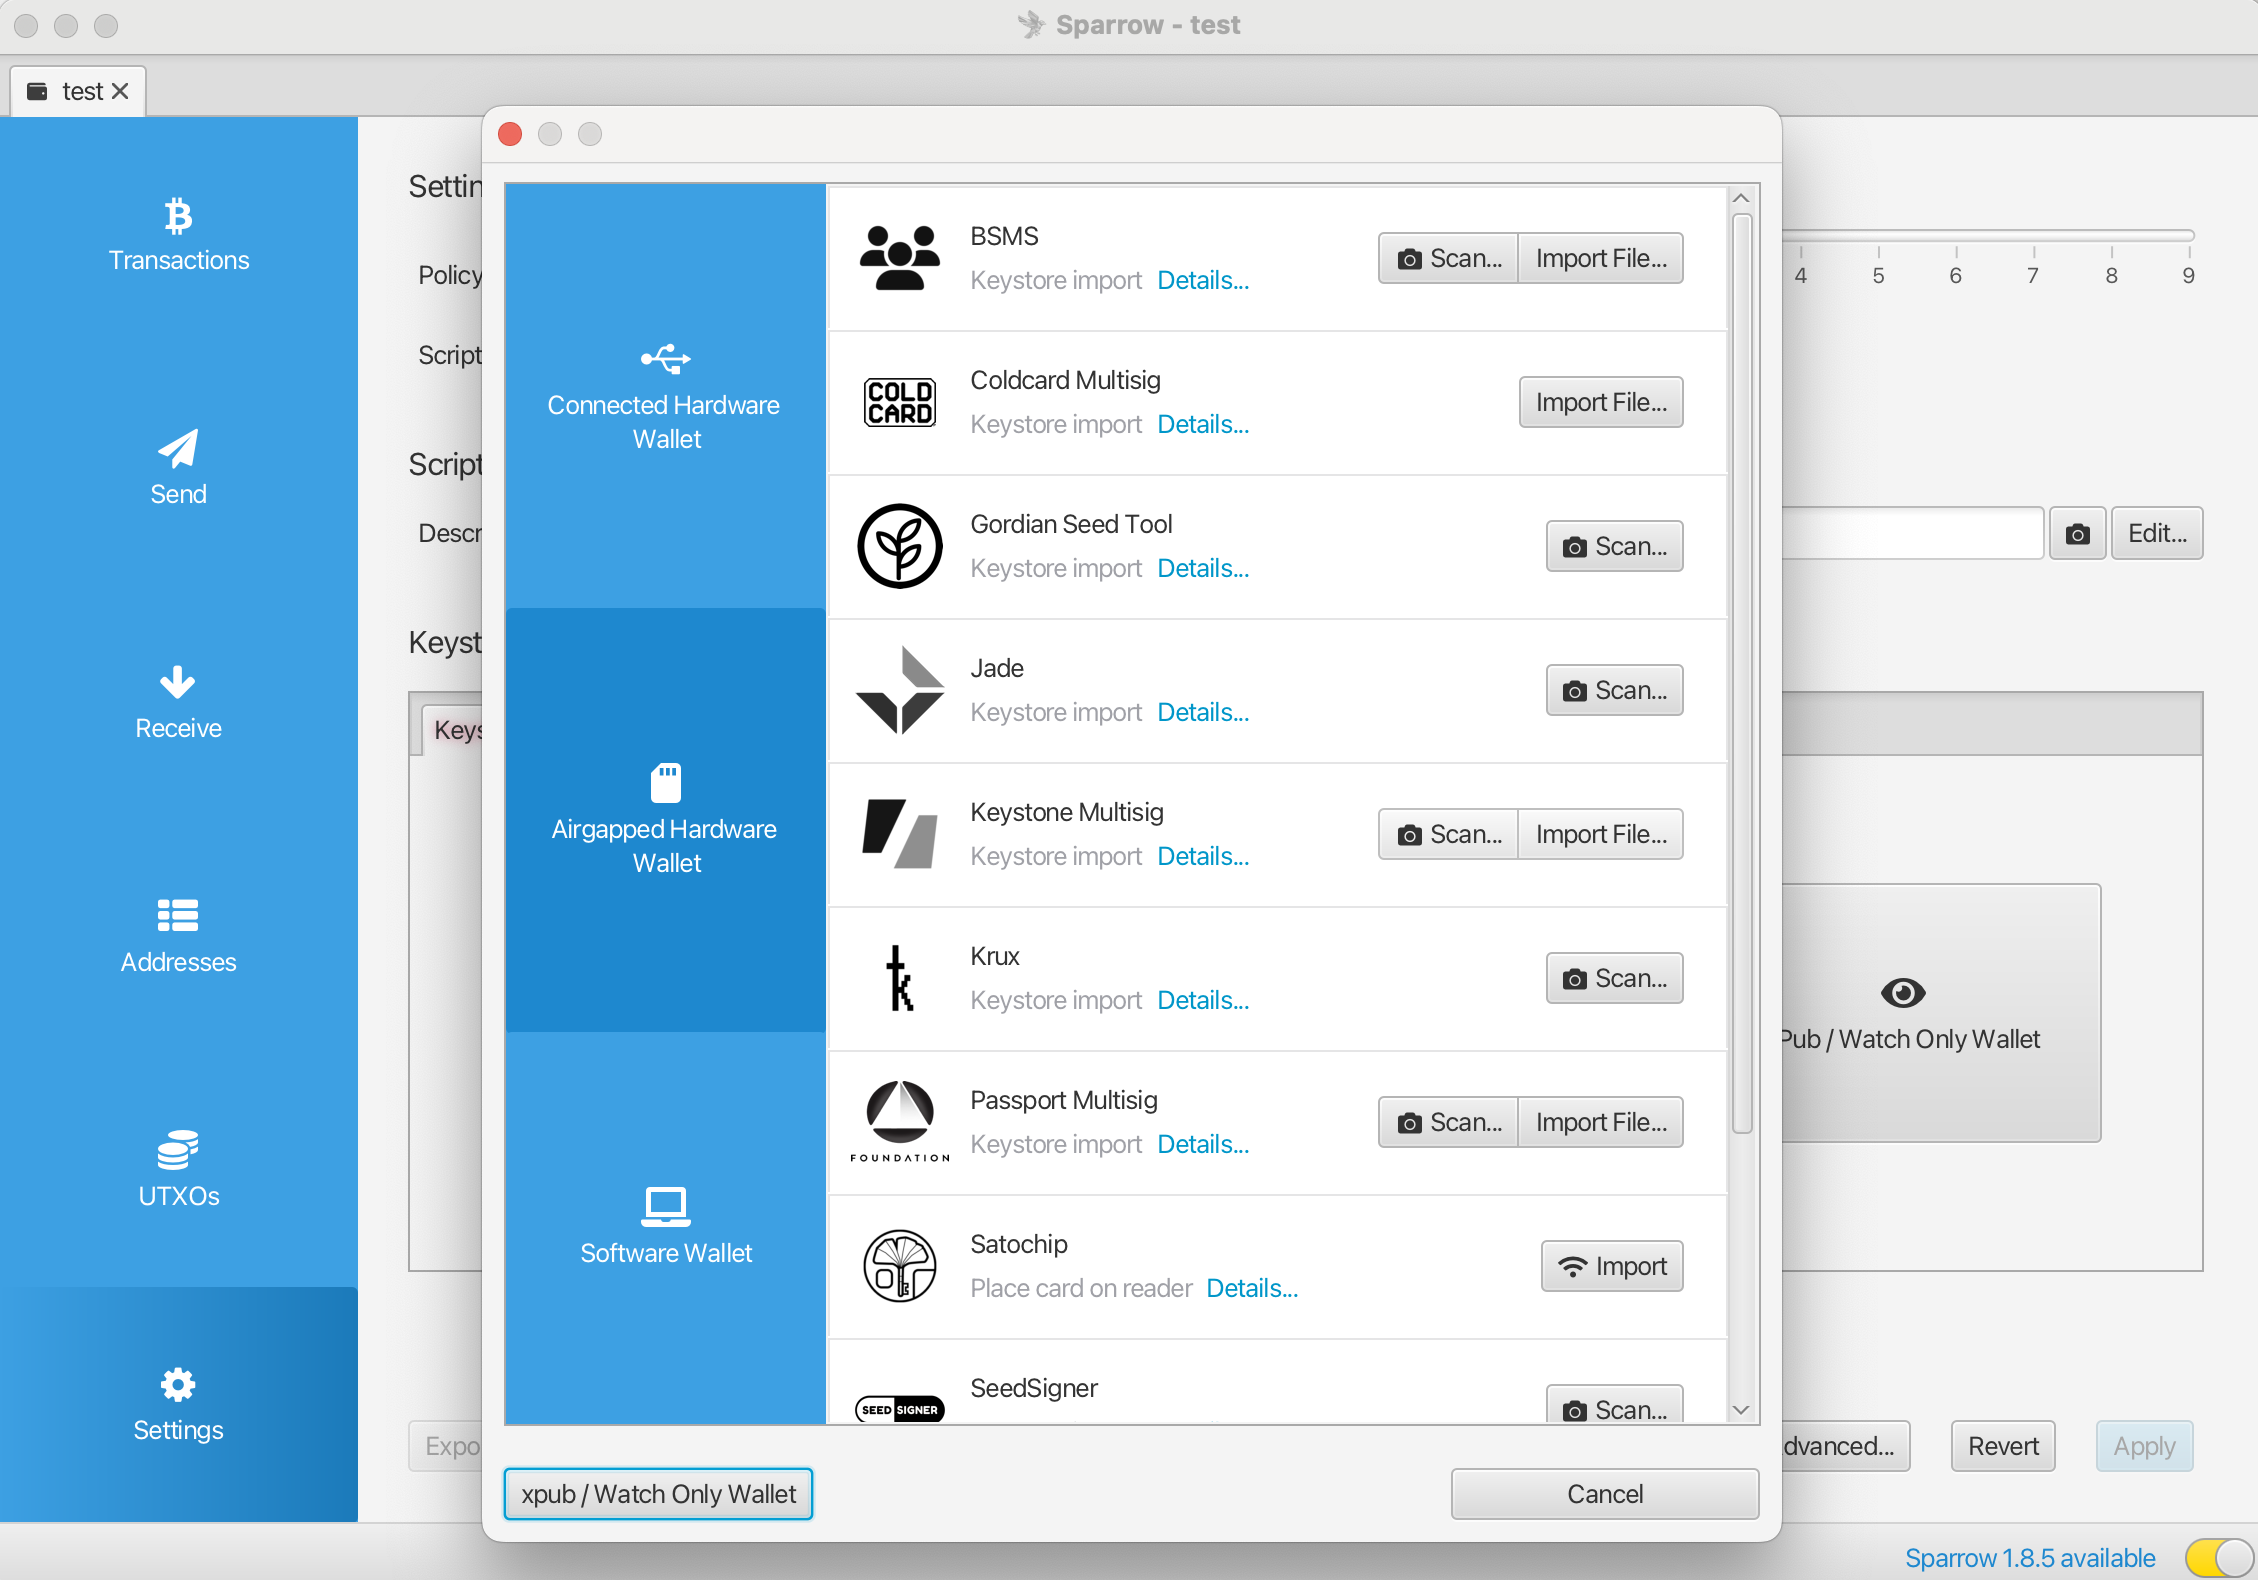
Show Keystone's multi-sign xPub to Sparrow, then scan it. 【Keystore 1】 will be displayed as 【Keystone】.
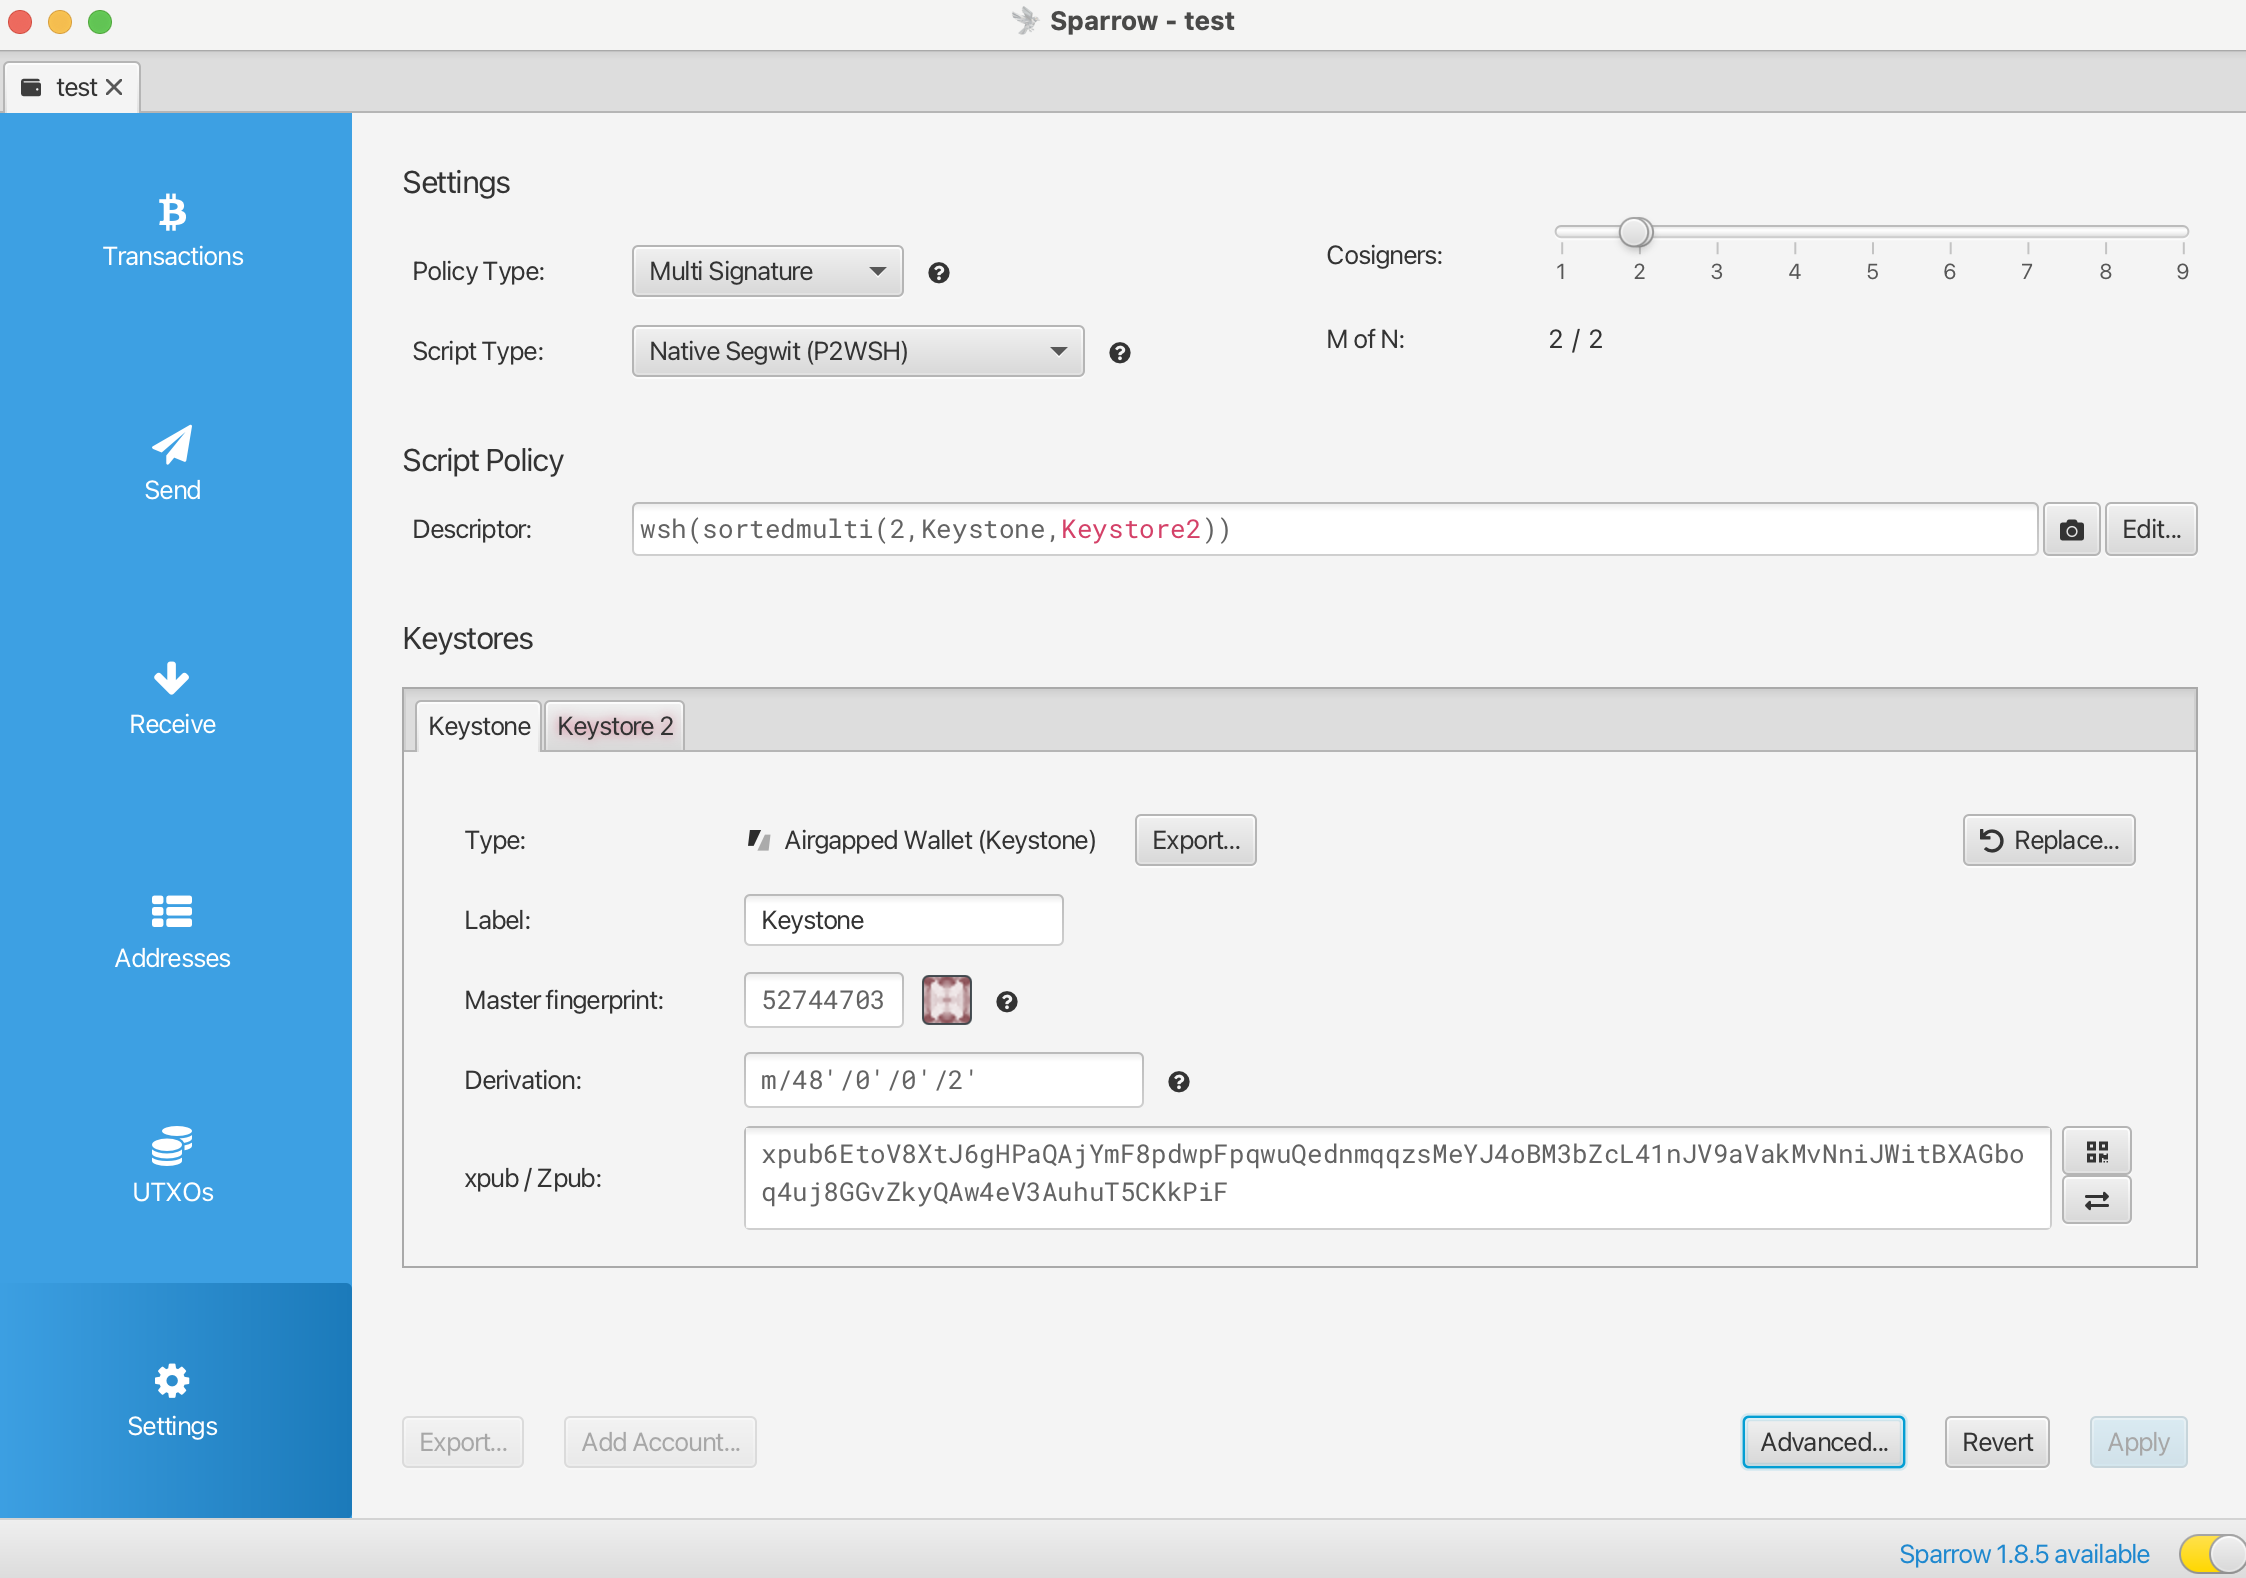
Choose 【Keystore 2】>【Airgapped Hardware Wallet】>【Coldcard Multisig】next to【Import File】, then import ColdCard's extended public key xPub from the microSD card in the computer (e.g., ccxp-5271C071.json).
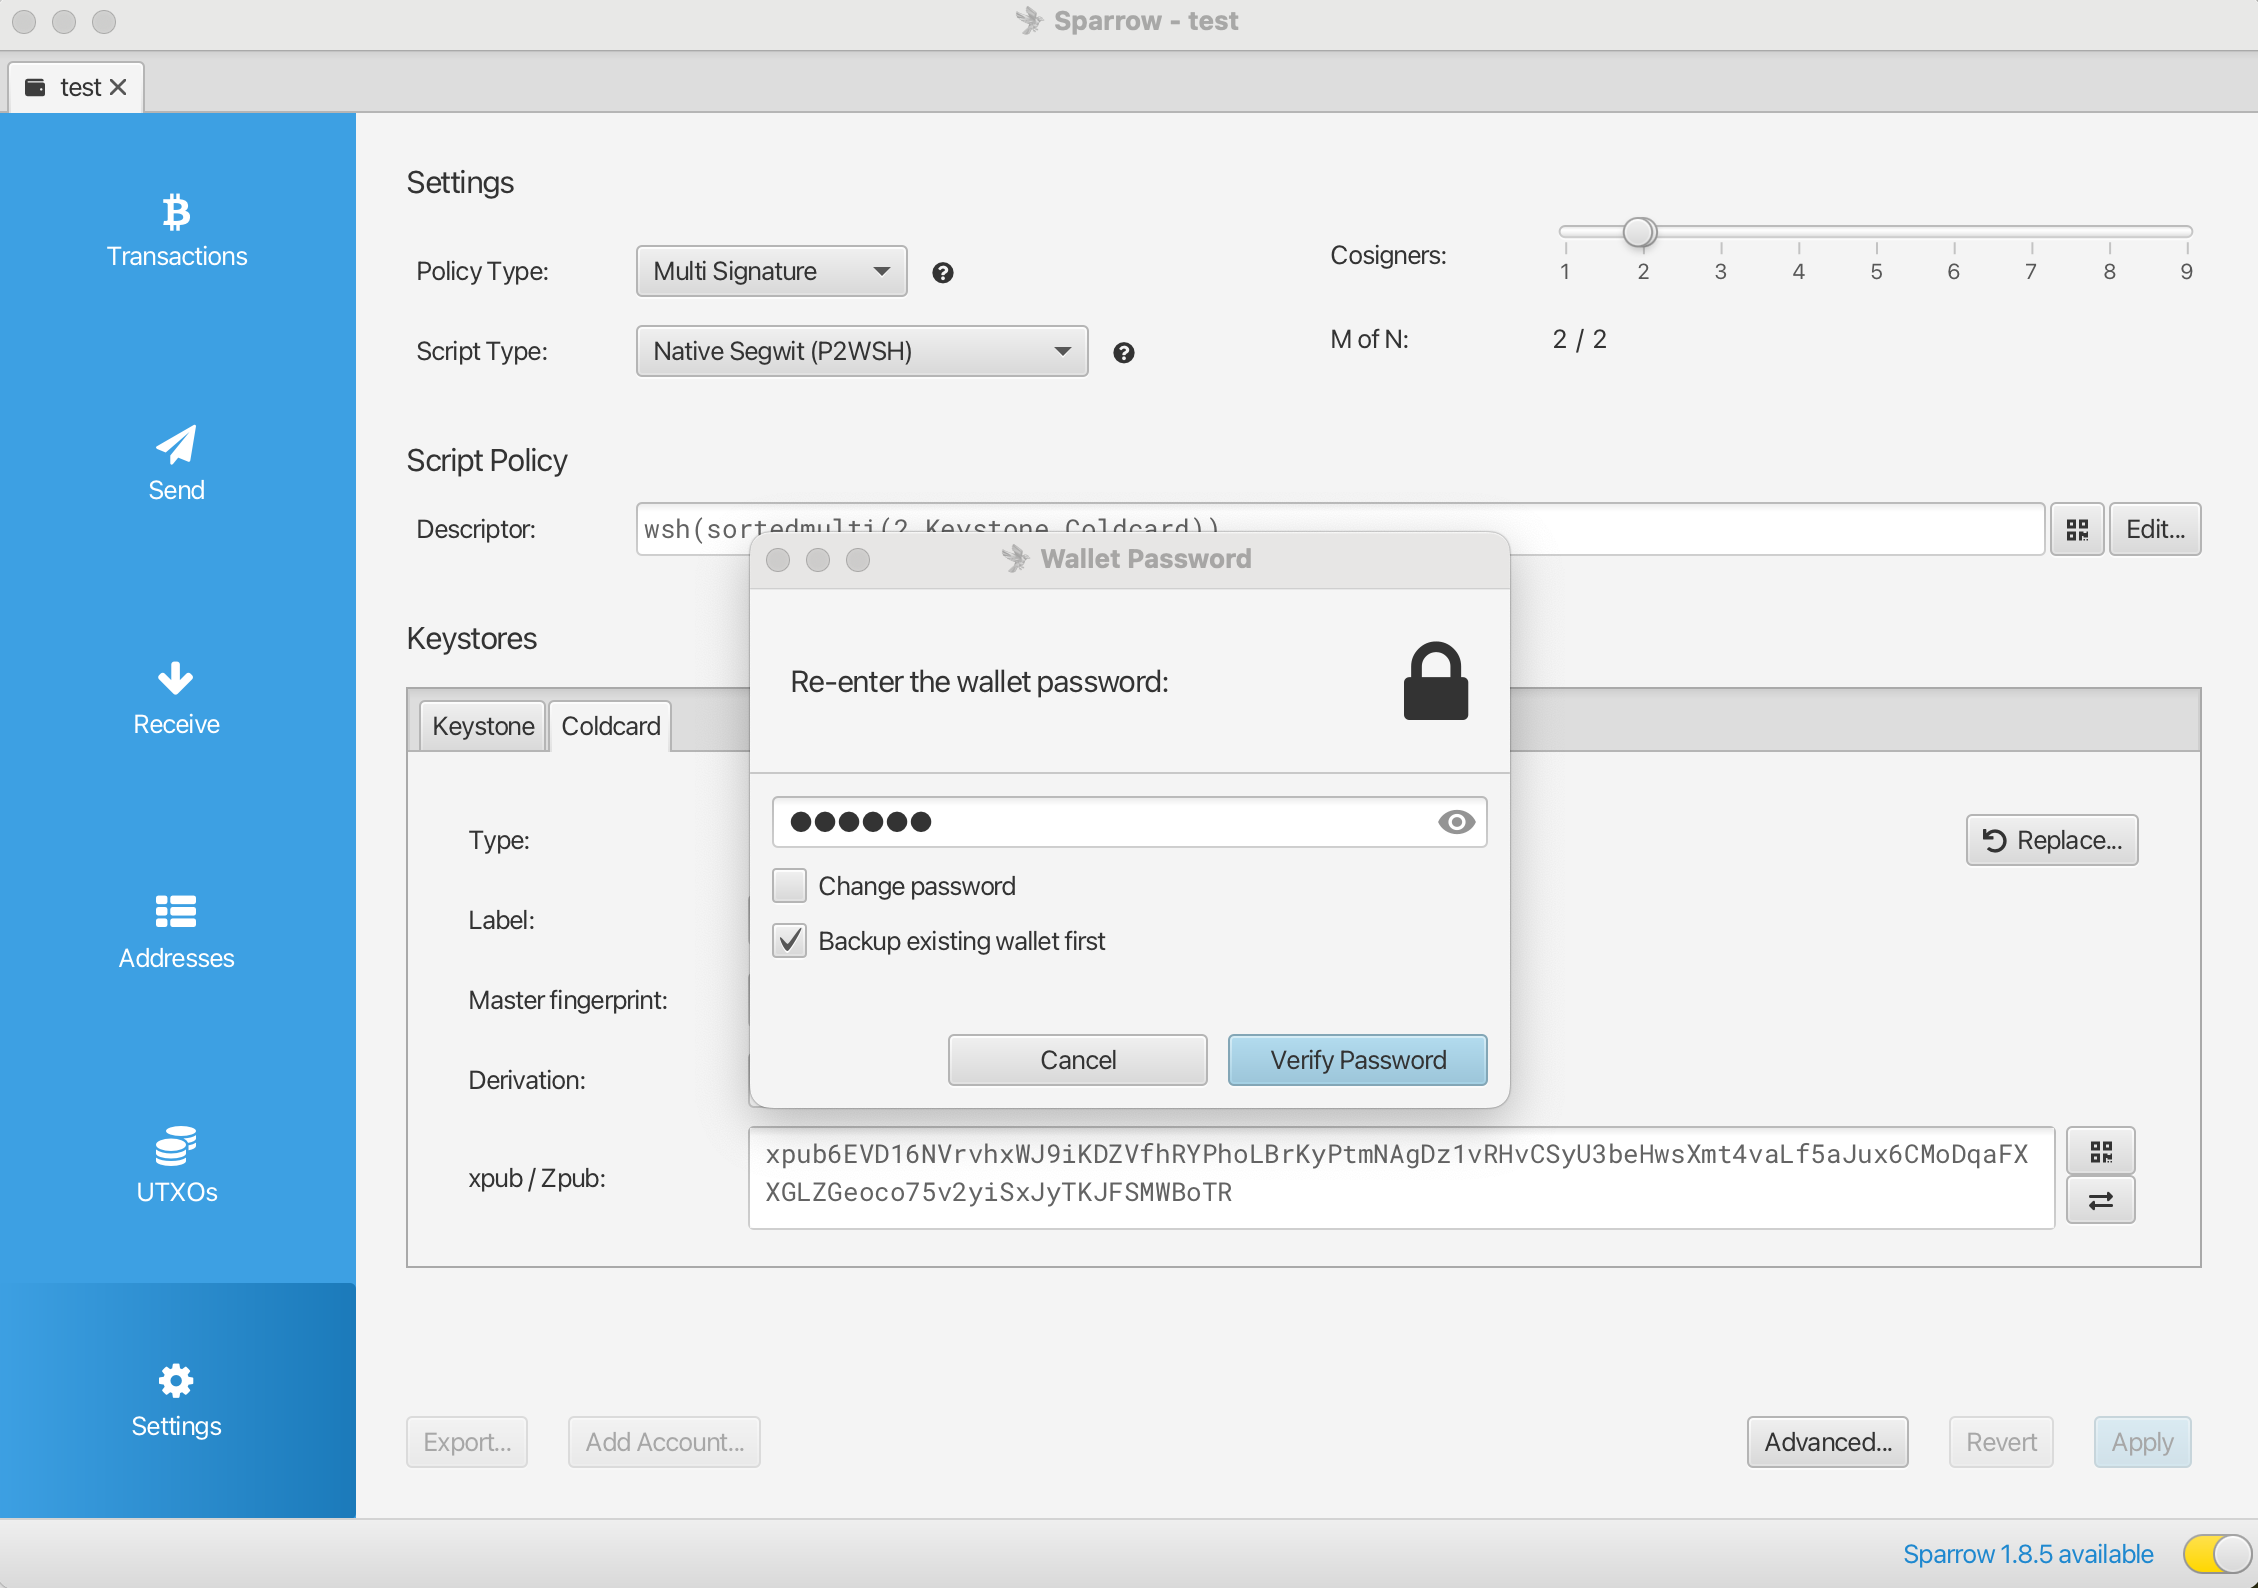
After importing two signatories, click on 【Apply】, enter Sparrow's wallet password, and click on 【Verify Password】.
Now, you have successfully created a 2/2 multi-signature wallet with Keystone 3 Pro and ColdCard as signatories. Next, you need to import the multi-signature wallet into the hardware wallet for signature. Below are the specific steps:
Method One: Import via QR Code
Importing the Multi-Sig Wallet into Keystone 3 Pro
On Sparrow Wallet:
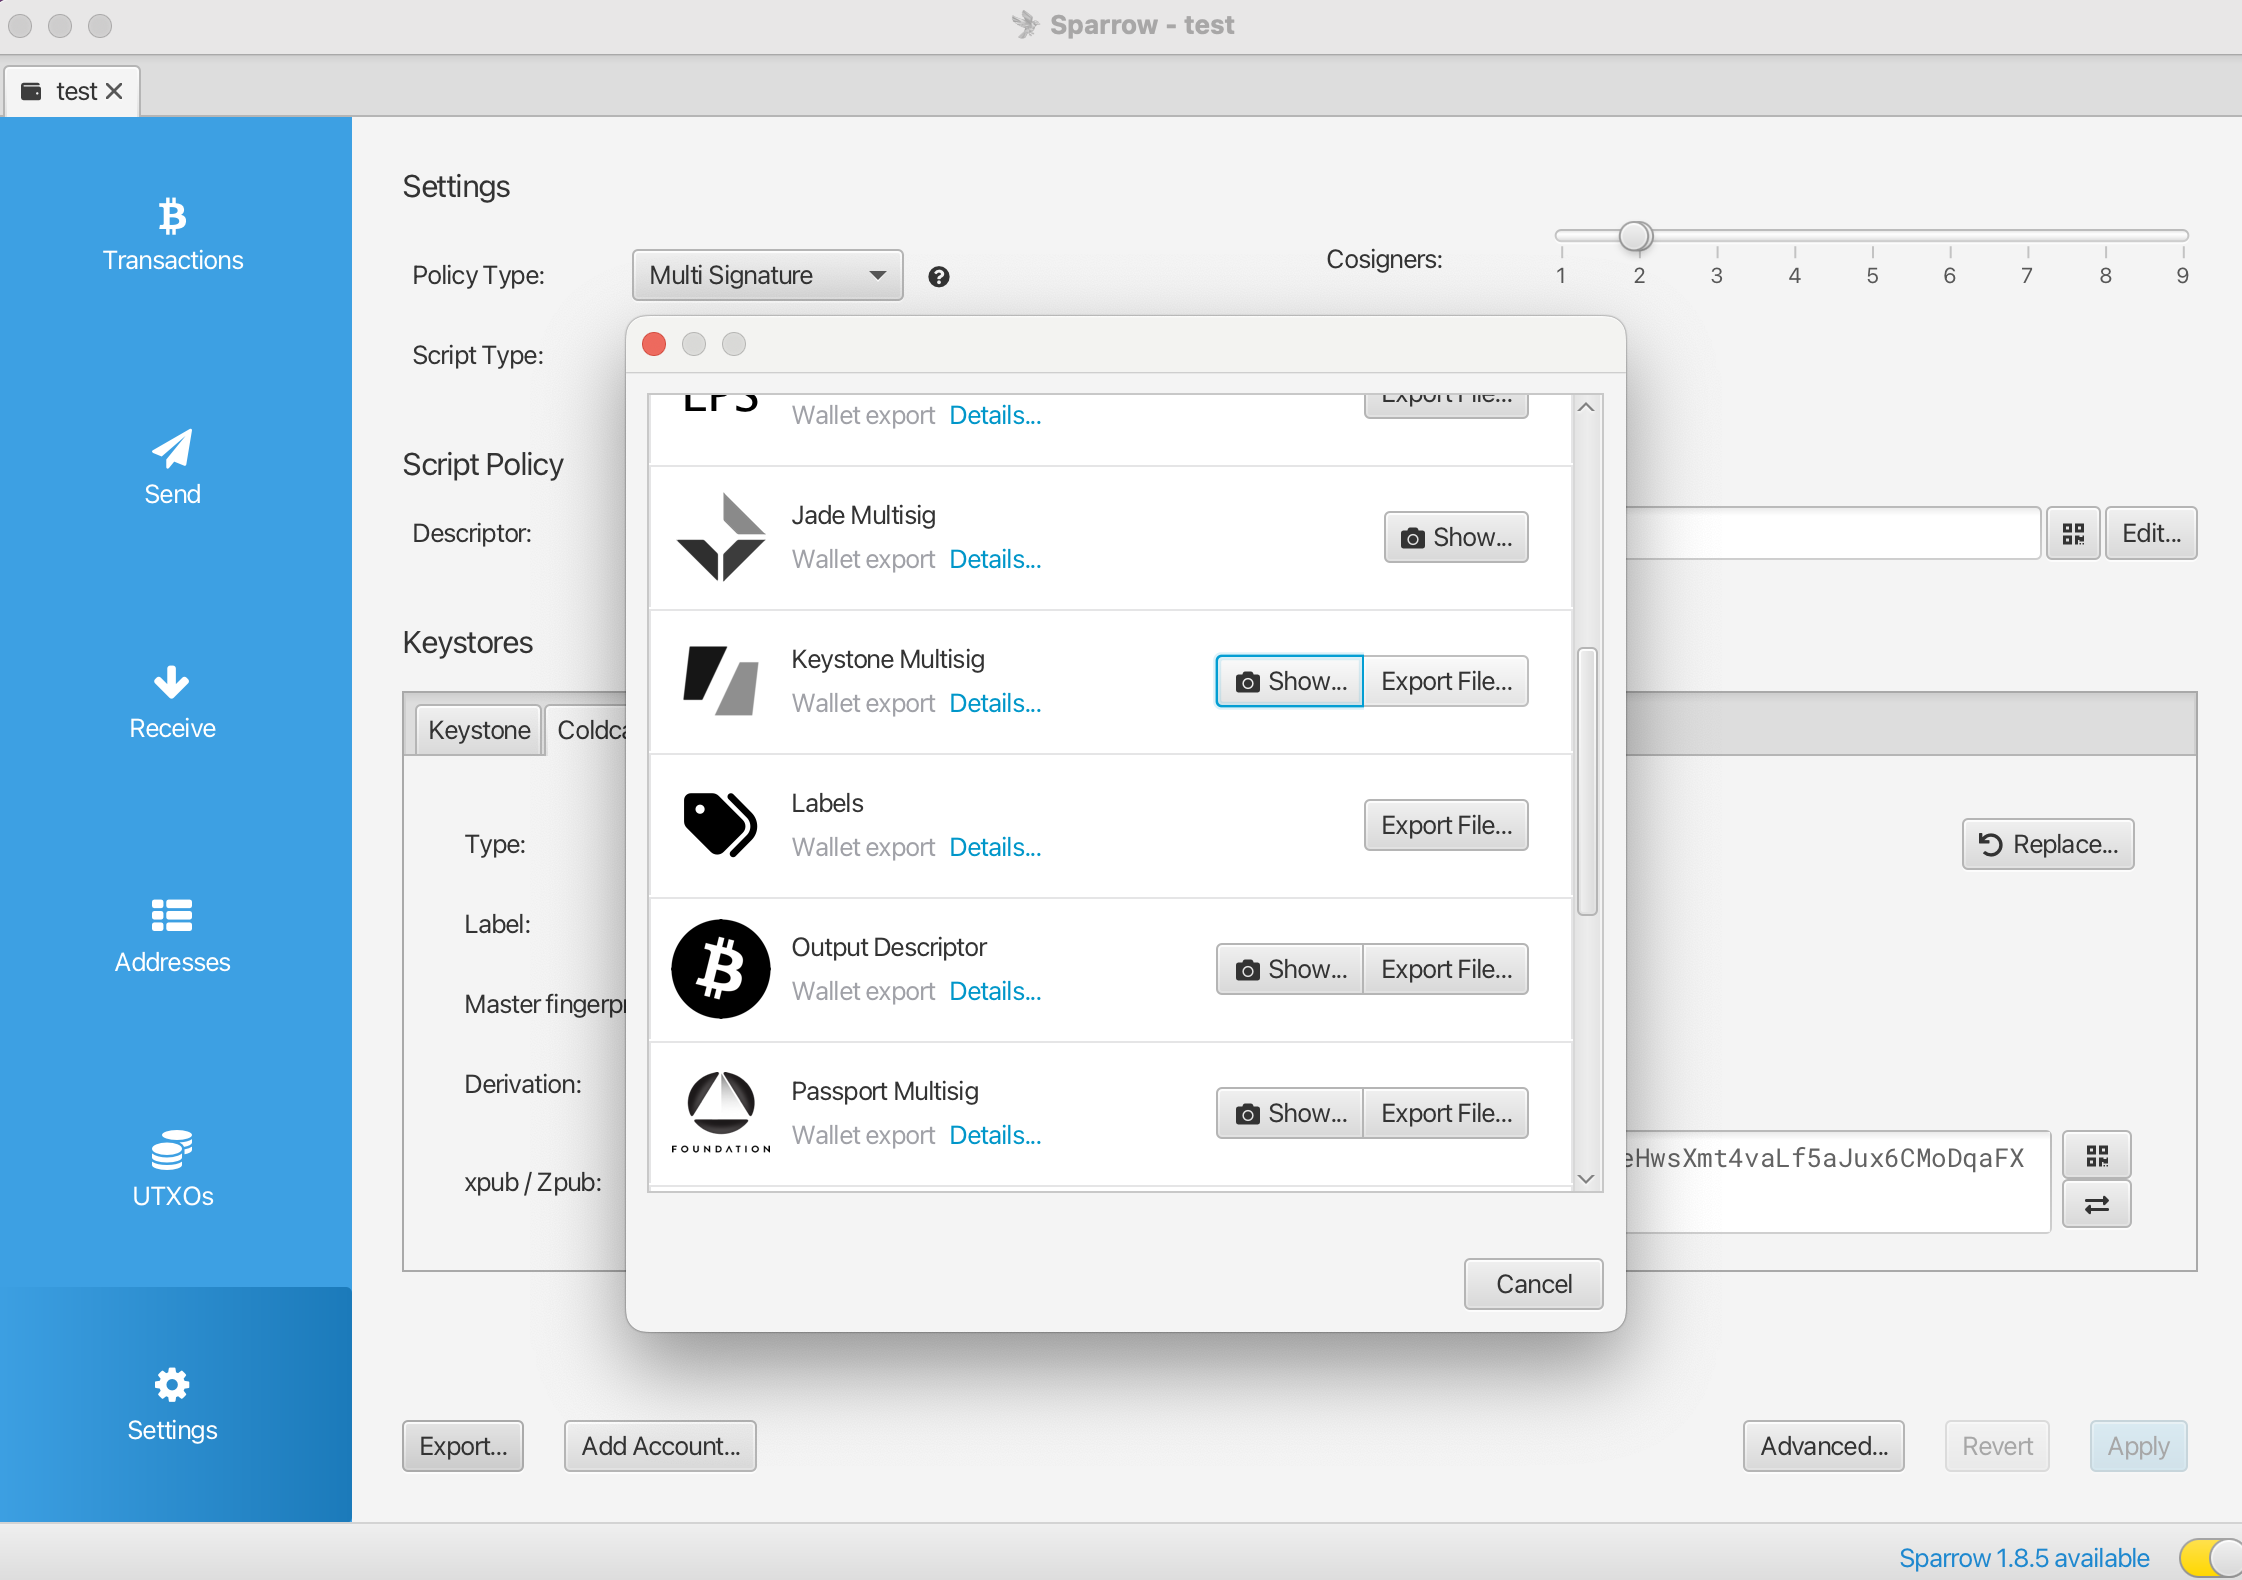
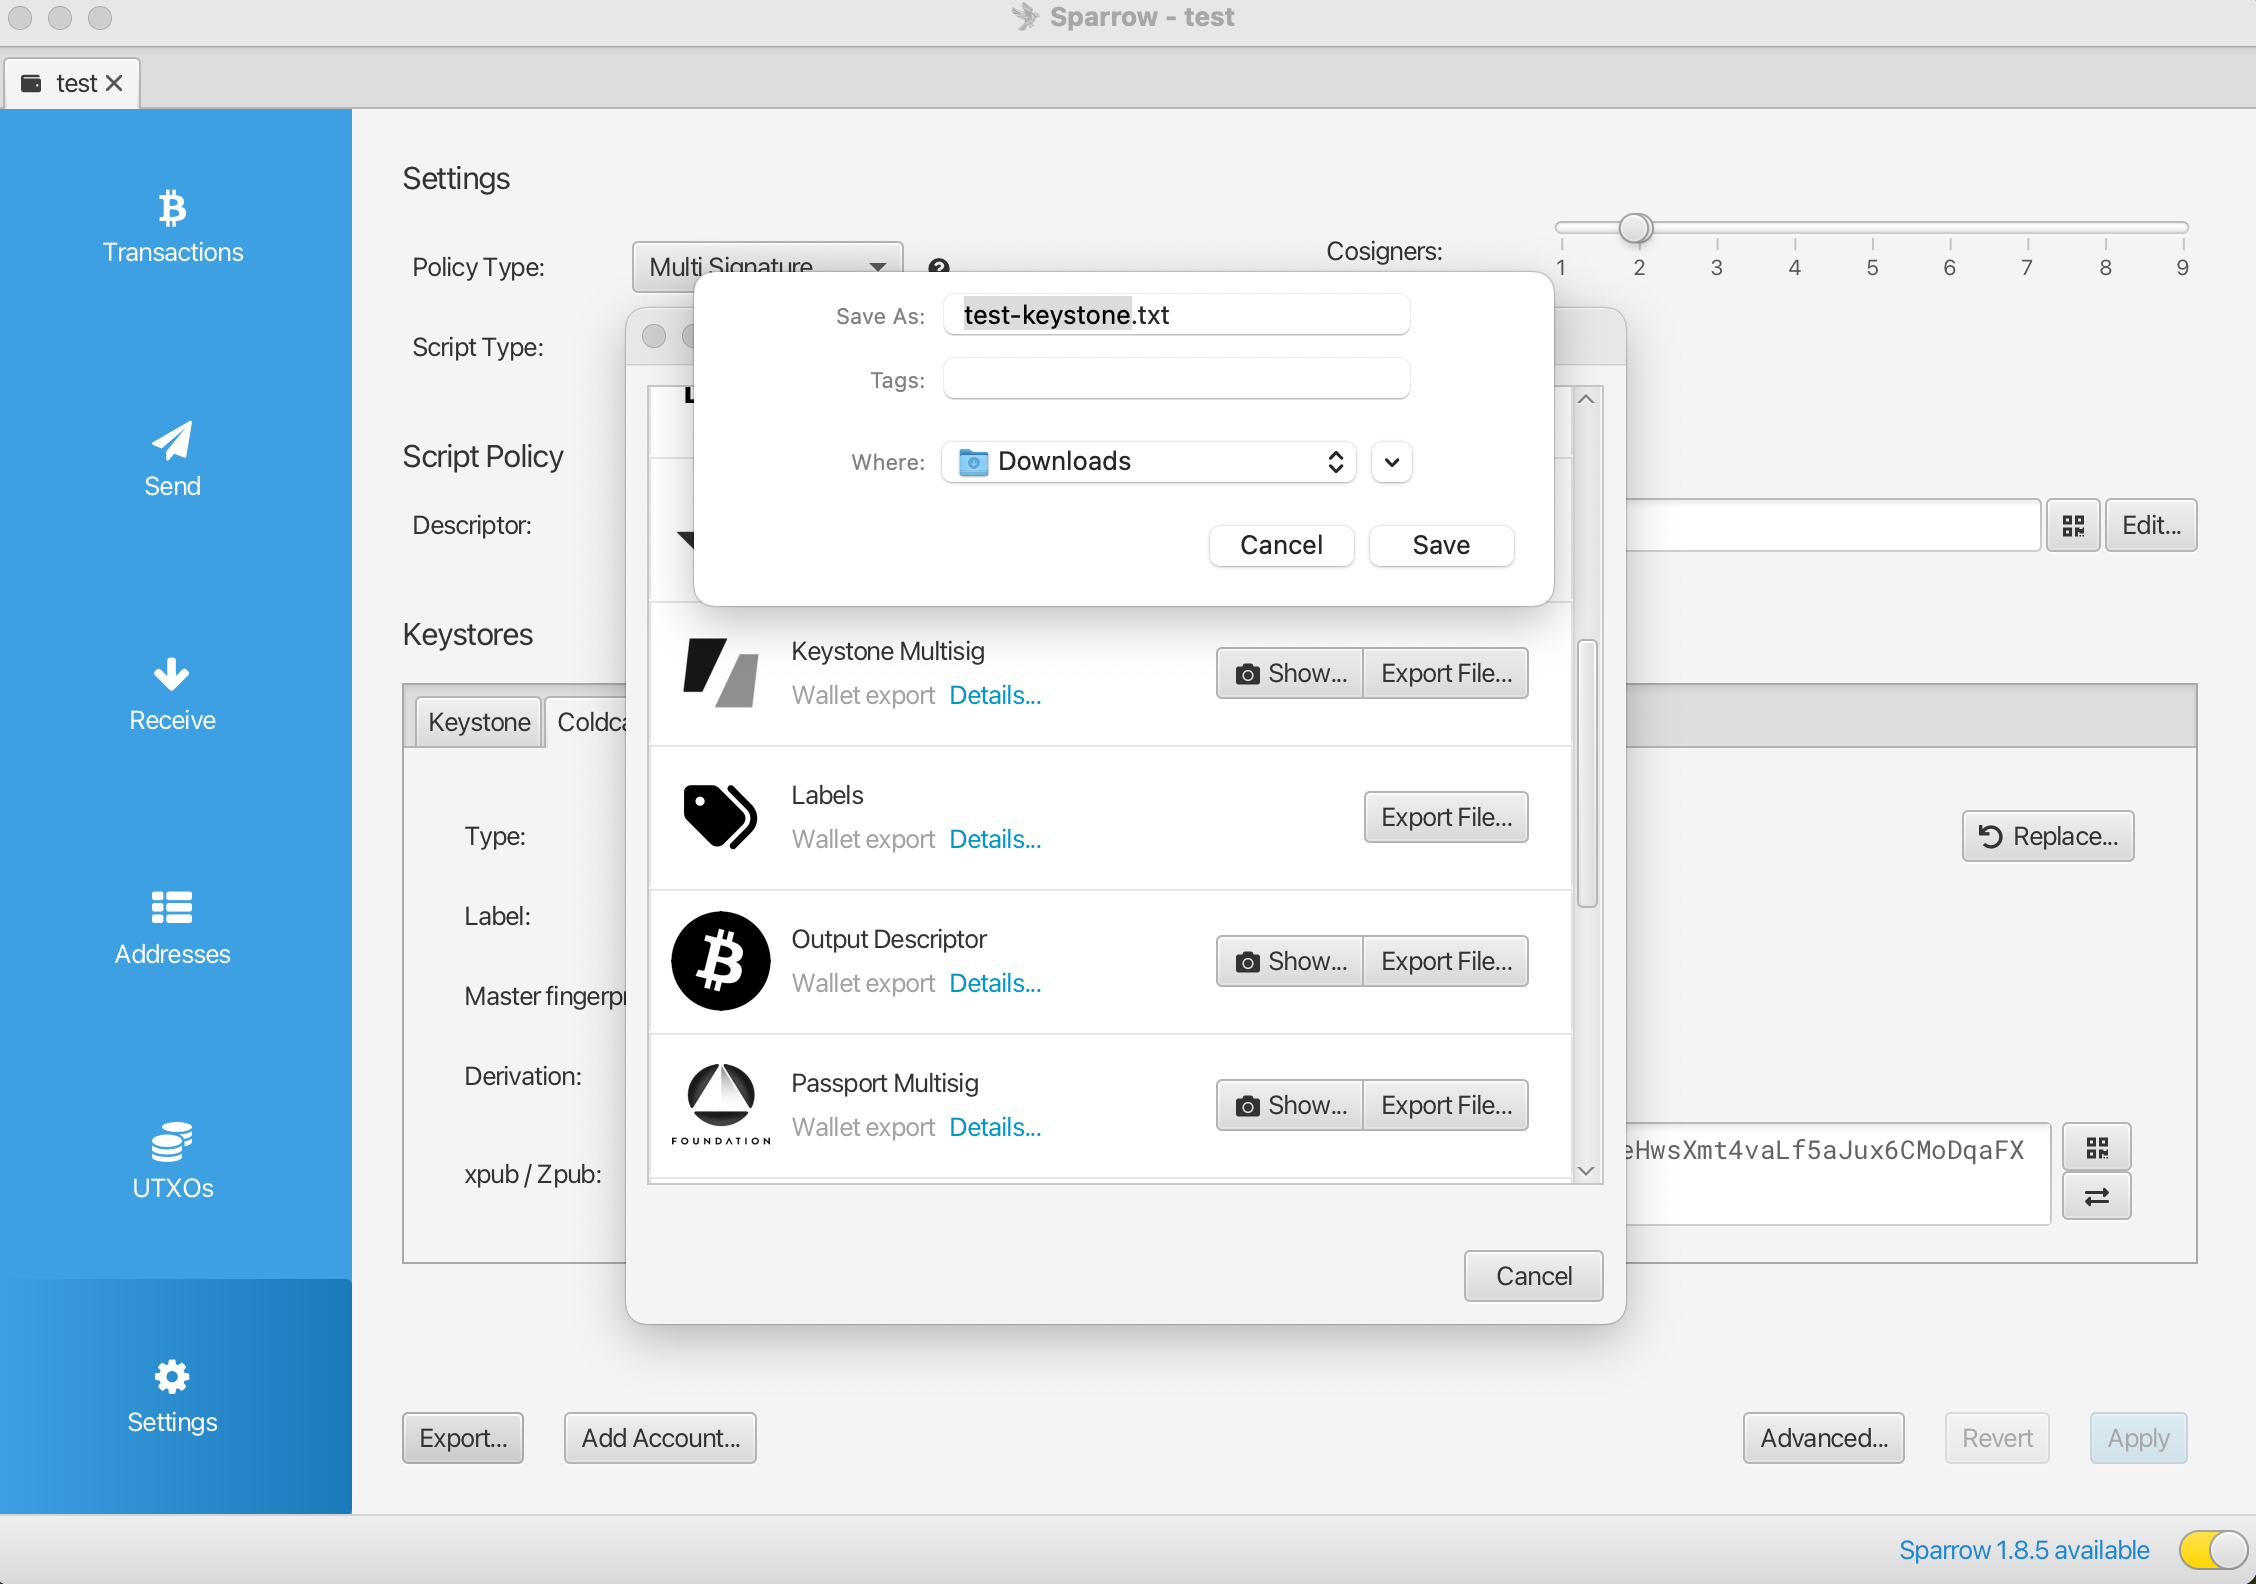
In the 【Settings】interface, click on the bottom left corner 【Export】, select "Keystone Multisig" and choose "Show QR code".
Back to Keystone 3 Pro:
Enter the Keystone homepage, click the menu icon on the top left > Go to 【Wallet Profile】> Click on 【Add MultiSig Wallet】> Click on 【Via Camera】 to display the scanning frame, scan the QR code displayed on Sparrow.
Check the Wallet Info page for Co-Signers and wallet information.
tipPlease verify the following information: Compare wallet information with your co-signers or other wallets to ensure all information matches. Securely back up your wallet configuration; otherwise, irreversible loss of assets may occur. If the information has been modified or is inconsistent, it may also result in asset loss. Always verify and protect your wallet details to prevent any discrepancies.

After confirming the information, click on 【Confirm】and enter the current wallet password.
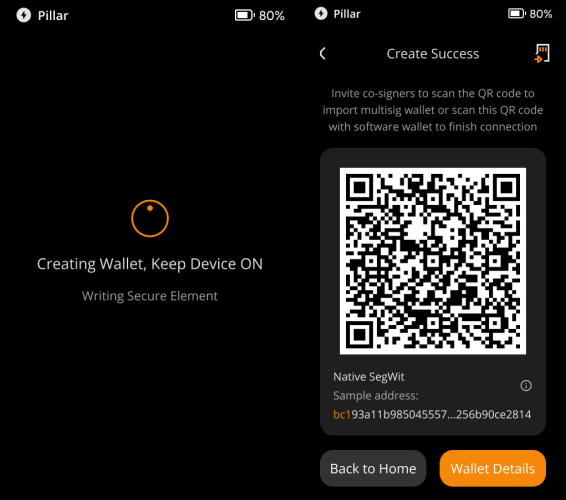
Wait for the wallet creation, please keep the device on, the device is writing to the secure chip.
When a QR code appears, the multi-signature wallet is successfully created.
Method Two: Import via SD Card
Importing the Multi-Sig Wallet into Keystone 3 Pro
On Sparrow Wallet:
In the 【Settings】interface, click on the bottom left corner 【Export】, select "Keystone Multi-sig" and choose "Export File", store it on the SD card prepared for Keystone (micro SD card needs to be FAT32 in advance).
Back to Keystone 3 Pro:
Insert the microSD memory card into the computer and then insert it into Keystone 3 Pro to import the xpub file.
Enter the Keystone homepage, click the menu icon on the top left > Go to 【Wallet Profile】> Click on 【Add MultiSig Wallet】> Click on 【Via MicroSD Card】 to display the multi-signature wallet file on the SD card, and select the multi-signature wallet file you want to import.
Check the Wallet Info page for Co-Signers and wallet information.
tipPlease verify the following information: Compare wallet information with your co-signers or other wallets to ensure all information matches. Securely back up your wallet configuration; otherwise, irreversible loss of assets may occur. If the information has been modified or is inconsistent, it may also result in asset loss. Always verify and protect your wallet details to prevent any discrepancies.

After confirming the information, click on 【Confirm】and enter the current wallet password.
Wait for the wallet creation, please keep the device on, the device is writing to the secure chip.
When a QR code appears, the multi-signature wallet is successfully created.

How the 2/2 MultiSig Wallet Receives BTC
There are three ways for this 2/2 multi-signature wallet to receive BTC: through Sparrow, Keystone 3 Pro, or ColdCard. Below demonstrates how to receive bitcoins through Sparrow or Keystone 3 Pro.
Receiving via Keystone 3 Pro
- On the Keystone 3 Pro homepage, click the menu icon on the top left to enter 【Wallet Profile】, then select 【Multisig Wallet】and 【Set as Current Wallet】.
- Return to the Keystone 3 Pro homepage, select 【Receive】to display the corresponding receiving address and QR code.
Receiving via Sparrow
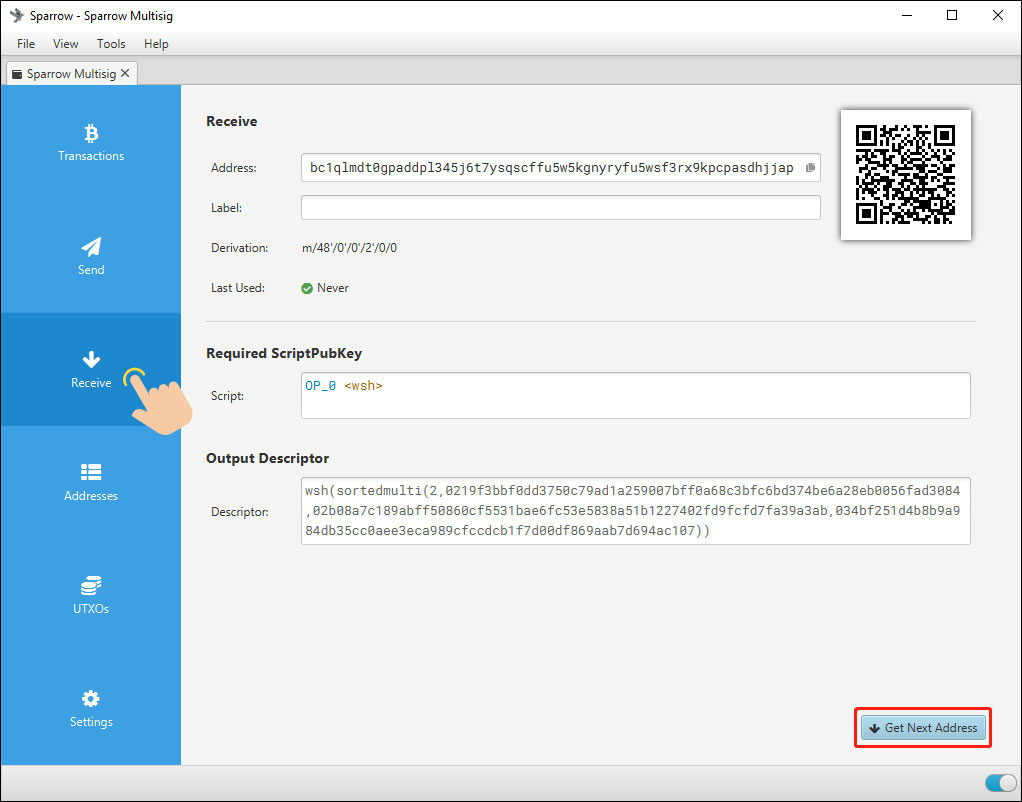
On Sparrow, click on the left sidebar 【Receive】to display a receiving address and corresponding QR code.
If you need a new address, click on 【Get Next Address】below.
How the 2/2 Multi-Sig Wallet Sends BTC
To send BTC, it needs to be done through the software wallet. Below demonstrates how to initiate a transaction with Sparrow's 2/2 multi-signature wallet.
Creating a BTC transaction on Sparrow
Click on 【Send】> Set the receiving address, label, amount, and fee> Click on 【Create Transaction】.
Click on 【Finalize Transaction for Signing】.
Signing with Keystone
On Sparrow:
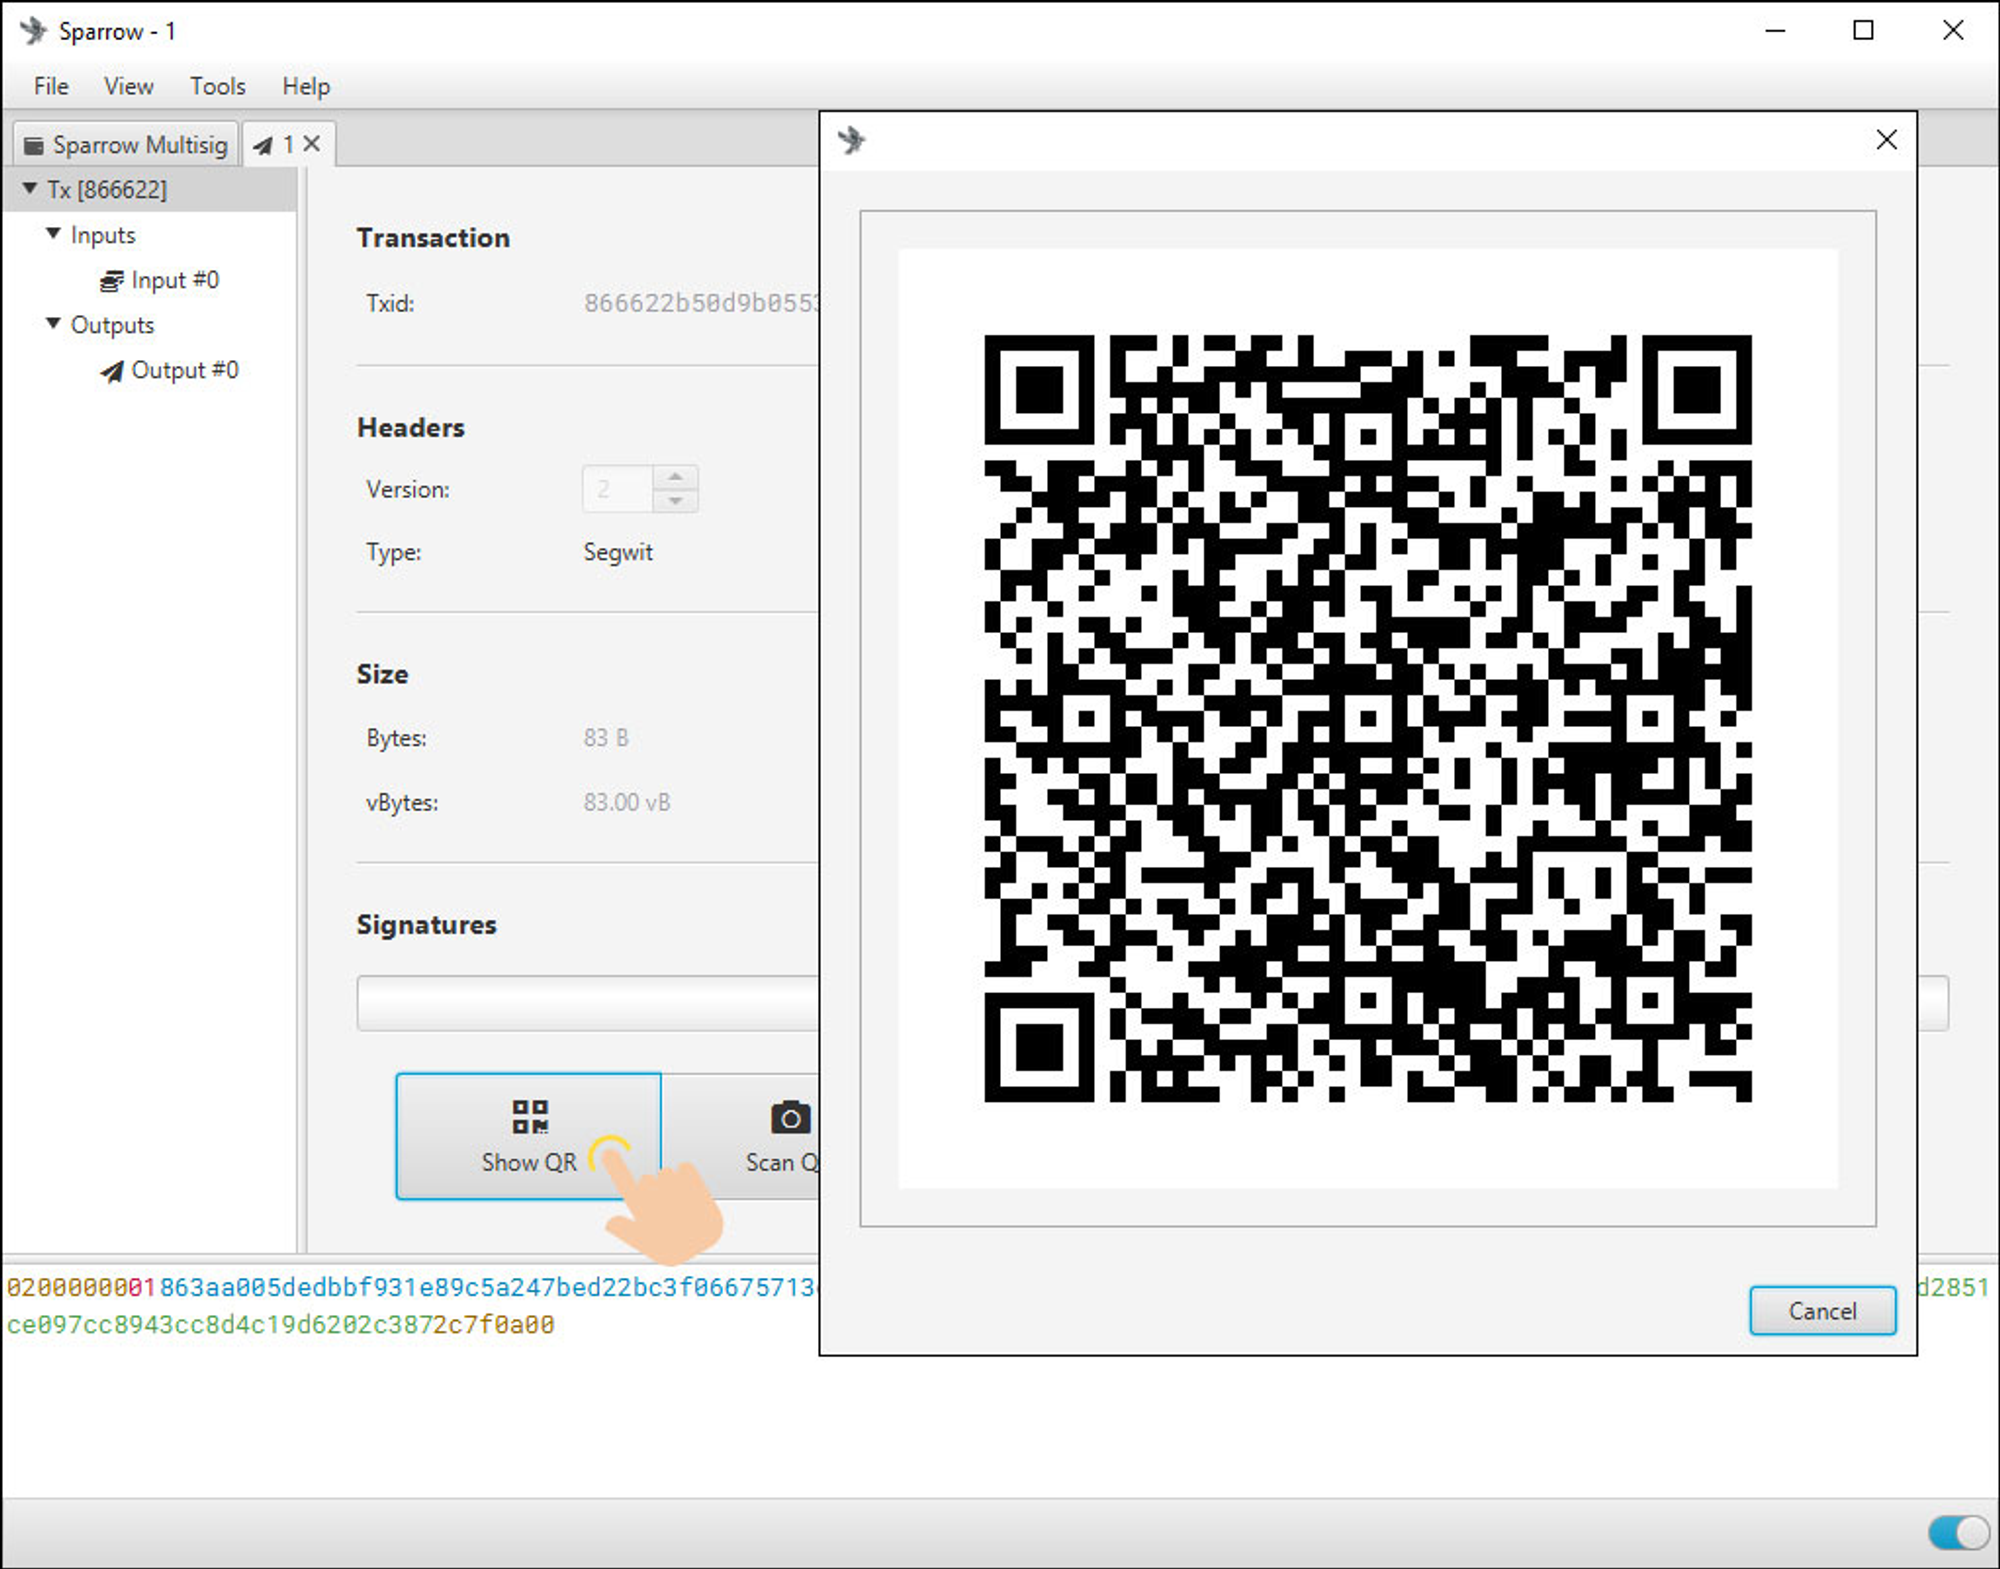
- Click on 【Show QR】, Sparrow Wallet displays the QR code format of the unsigned transaction data.
Keystone: Click on the menu icon on the top left to enter 【Wallet Profile】> Click on 【Multisig Wallet】> Enter wallet details, click 【Set as Current Wallet】> Return to the main interface, click on the bottom 【Scan】 button and scan the QR code displayed by Sparrow.
Click on 【Sign】> Enter password> Click 【Confirm】and authorize the transaction. The device will display the signed transaction data in QR code format.
On Sparrow, click on 【Scan QR】, then scan the QR code displayed on Keystone.
Signing with ColdCard
- Insert the microSD card into PC/Mac.
- On Sparrow Wallet, click on 【Save PSBT】and save the file to the root directory of the microSD card.
- Remove the microSD card from PC/Mac and insert it into ColdCard.
- Select the transaction file under [Prepare Sign] > Choose the transaction file.
- Confirm and export part of the signed multi-sign transaction file to the microSD card.
- Remove the microSD card from ColdCard and insert it into PC/Mac.
- On Sparrow Wallet, click on 【Load PSBT】, then select and open the signed transaction file.
Broadcasting on Sparrow
Make sure the Sparrow Wallet is successfully connected to the node. Click on 【Broadcast Transaction】.