Keplr (Extension)
Welcome to the tutorial that will guide you through the process of connecting your Keystone hardware wallet with the Keplr Extension. In this tutorial, you'll learn how to establish the connection of Keplr Extension. Let's dive in!
1. Prepare
Before we begin, please ensure you have the following:
- Firmware version 1.7.4 or newer running on Keystone 3 Pro.
- Download the latest version of the Keplr extension.
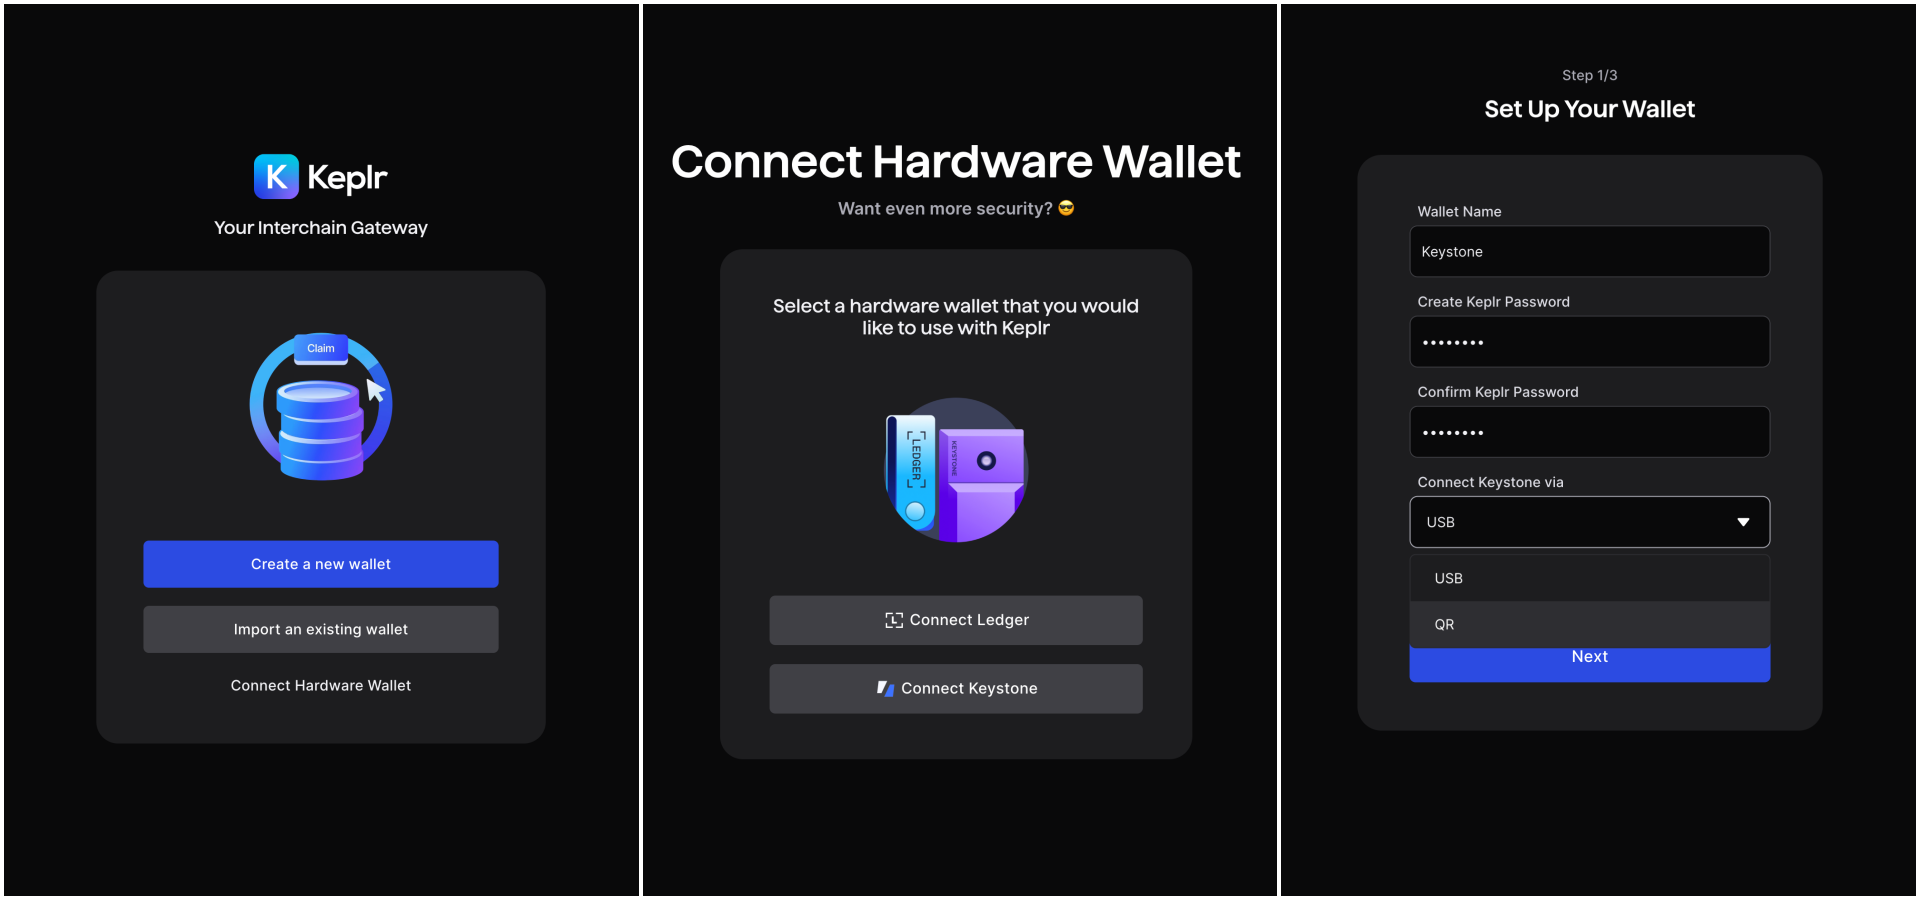
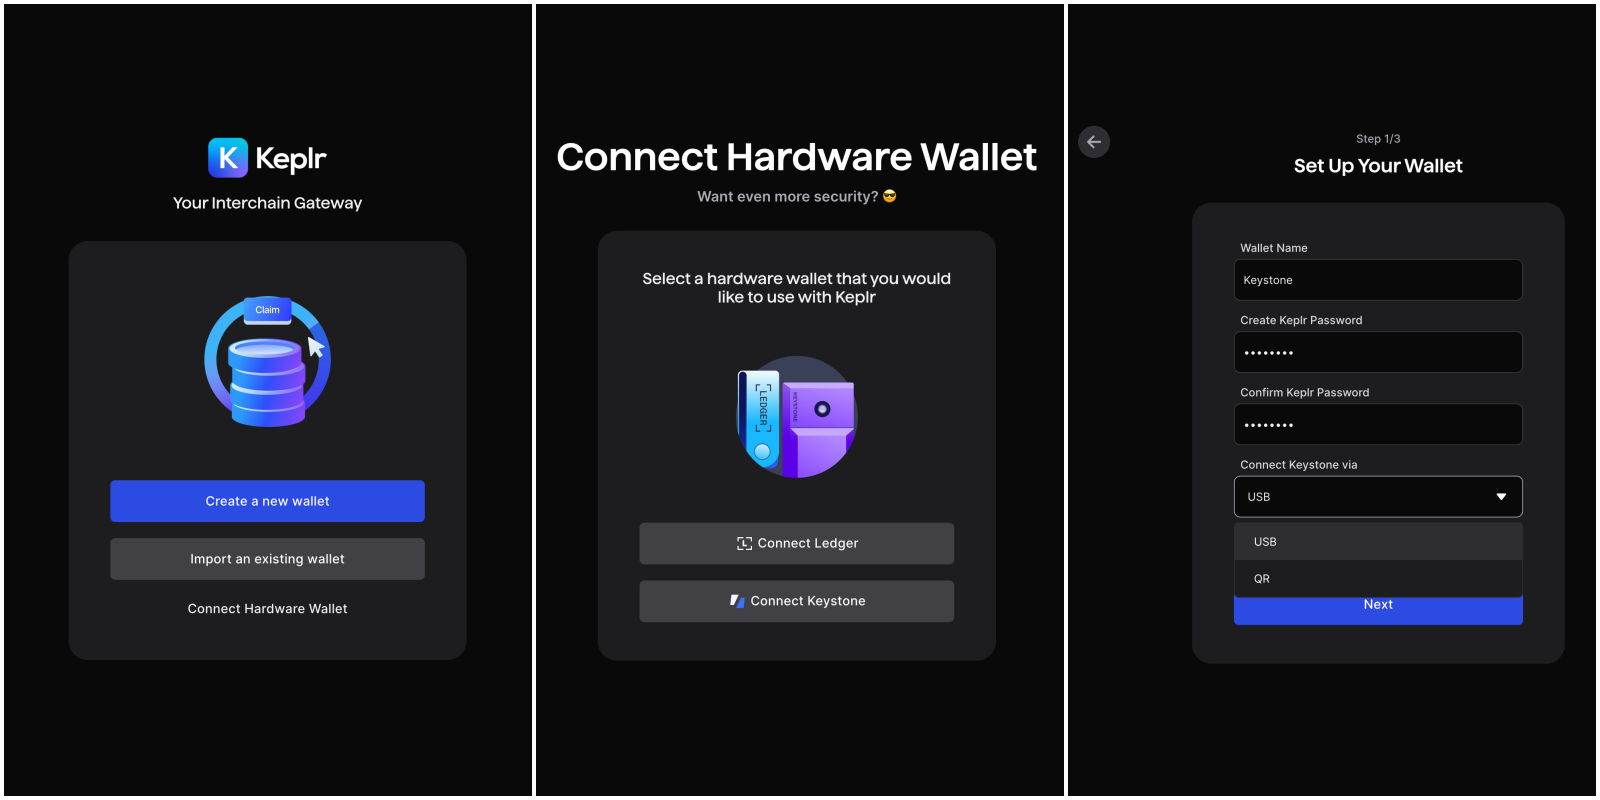
2. Connect Keystone Hardware Wallet to Keplr Extension
a. Via QR code
On Your Keystone Hardware Wallet:
- Click the “…” icon and select “Connect Software Wallet”.
- Select “Keplr”, and a QR code for linking will be displayed.
On Keplr Extension:
Launch the Keplr Extension and select”Connect Hardware Wallet” and “Connect Keystone”.
Name the wallet, set a password, and select QR code scan as the connection method.
Read the connection instruction on the Keplr page,then scan the QR code on your Keystone device.
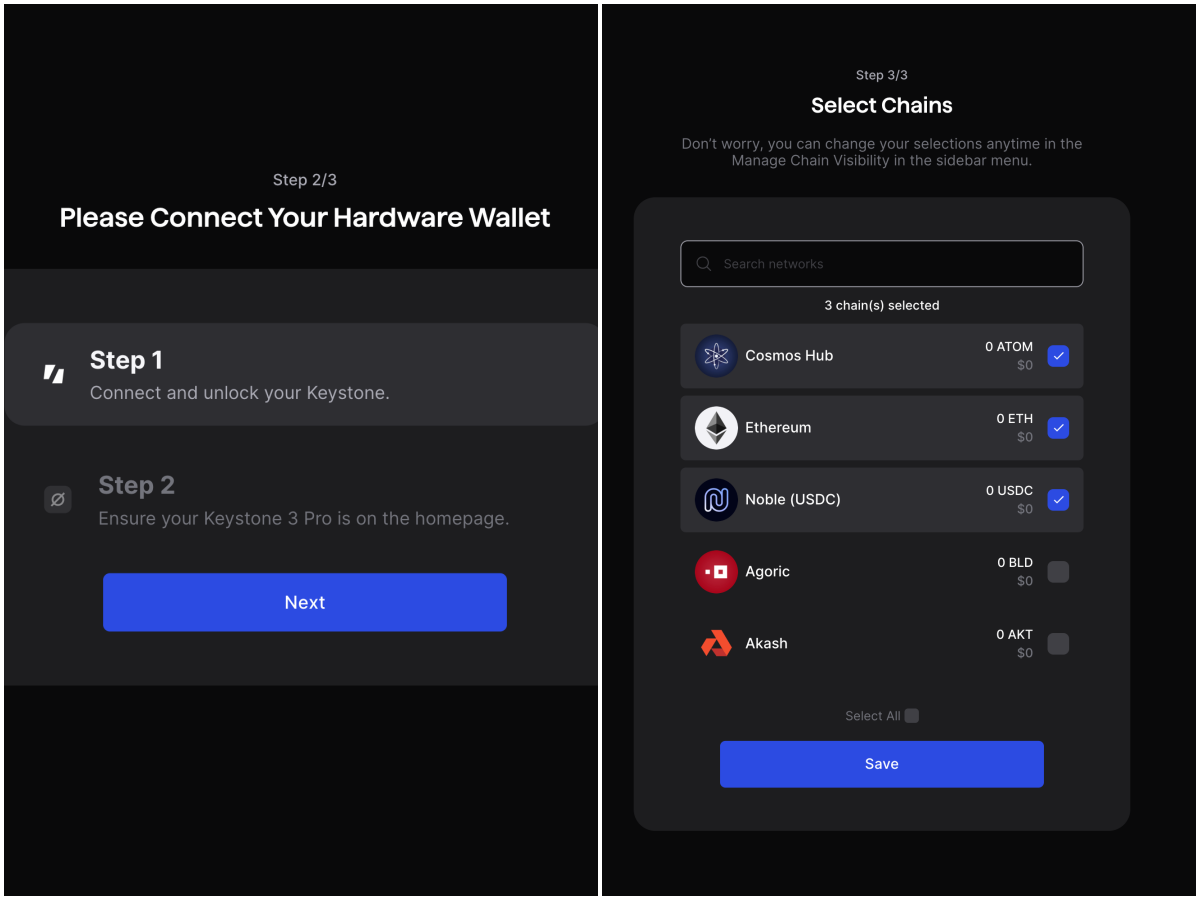
Select the desired chains and assets, then click “Save.”

Once the “Account Created”message appears on the Keplr Extension page, your connection is complete. You can now click ”Close” on Keystone and start exploring all the features Keplr offers!
b. Via USB
On Keplr Extension:
Launch the Keplr Extension and select”Connect Hardware Wallet” and “Connect Keystone”.
Name the wallet, set a password, and select USB as the connection method.
On Your Keystone Hardware Wallet:
Connect your device to PC using a USB. On the “Connect to This Device” pop-up page on your Keystone device, select “Approve.”
A “Connect Request” page will then appear. Click “Approve” and enter your PIN.
On the Keplr page, select the chains and assets you wish to manage, then click “Save.”
Once the “Account Created” message appears on Keplr Extension page, your connection is complete. You can now click ”Close” on Keystone and start exploring all the features Keplr Offers!
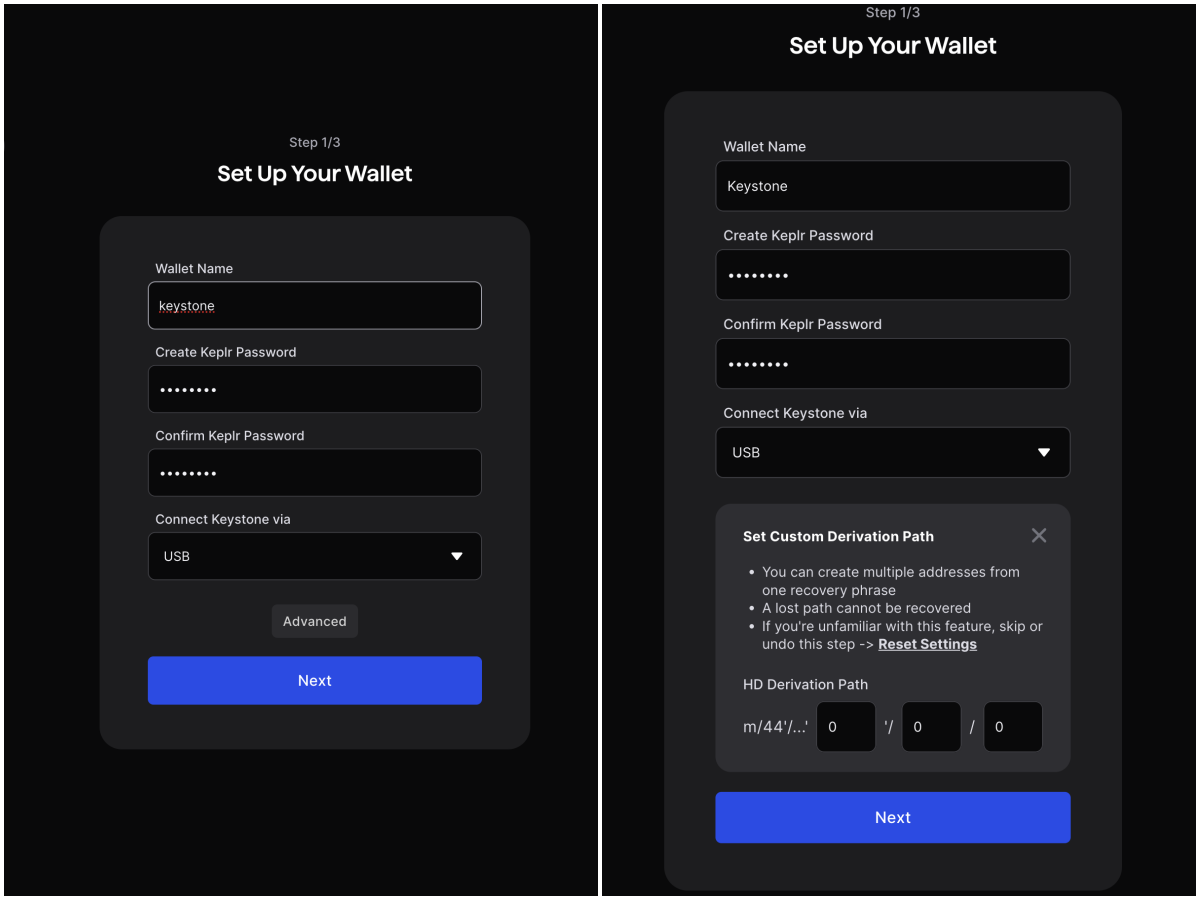
3. Advanced Feature: Set Custom Derivation Path
For advanced users,click “Advanced” to customize the derivation path when selecting USB as the connection method.
4. Send
a. On Keplr Extension
On the home page, select “Send” to enter the send page, select the asset you want to send
Enter the recipient’s address or the ICNS name. After verifying the address,tap ”Next”.
Enter the amount, tap “Next,” and confirm the information, then a QR code for signing will be displayed.

b. Sign the Transaction
- Tap the scan icon at the bottom right of the Keystone homepage and scan the QR code on the Keplr Extension > Confirm the transaction details > Slide “Swipe to Confirm” > Keystone will generate a QR code for confirming.
- Return to Keplr Extension, click "Get Signature" and scan the QR code generated by the Keystone page to complete the transaction.
5. Stake
a. On Keplr Extension
On the home page, select “Staked” and click “Stake with Keplr Dashboard” to enter the stake page.
Select the chain you want to stake and the provider you need.
Enter the amount, tap “Stake,” and confirm the information, then a QR code for signing will be displayed.
b. Sign the Transaction
- Tap the scan icon at the bottom right of the Keystone homepage and scan the QR code on the Keplr Extension > Confirm the transaction details > Slide “Swipe to Confirm” > Keystone will generate a QR code for confirming.
- Return to Keplr Extension, click "Get Signature" and scan the QR code generated by the Keystone page to complete the transaction.
Security Note: To protect your assets, we recommend comparing the address displayed in Keplr with the address generated on your Keystone 3 Pro device after the connection is complete, and making sure the two addresses match exactly. Also, do not scan any external QR codes that were not generated by your Keystone device.