Helium Wallet (Mobile)
Welcome to this tutorial, which will guide you through connecting your Keystone hardware wallet to the Helium Wallet Mobile. In this tutorial, you'll learn how to connect and explore the basic features of the Helium Wallet, including sending transactions. Let's dive in!
1. Prepare
Before we begin, please ensure you have the following:
- Firmware version 1.7.0 or newer running on Keystone 3 Pro.
- Helium Wallet installed on mobile phones.
Now you are ready to connect Keystone with Helium Wallet and explore its features!
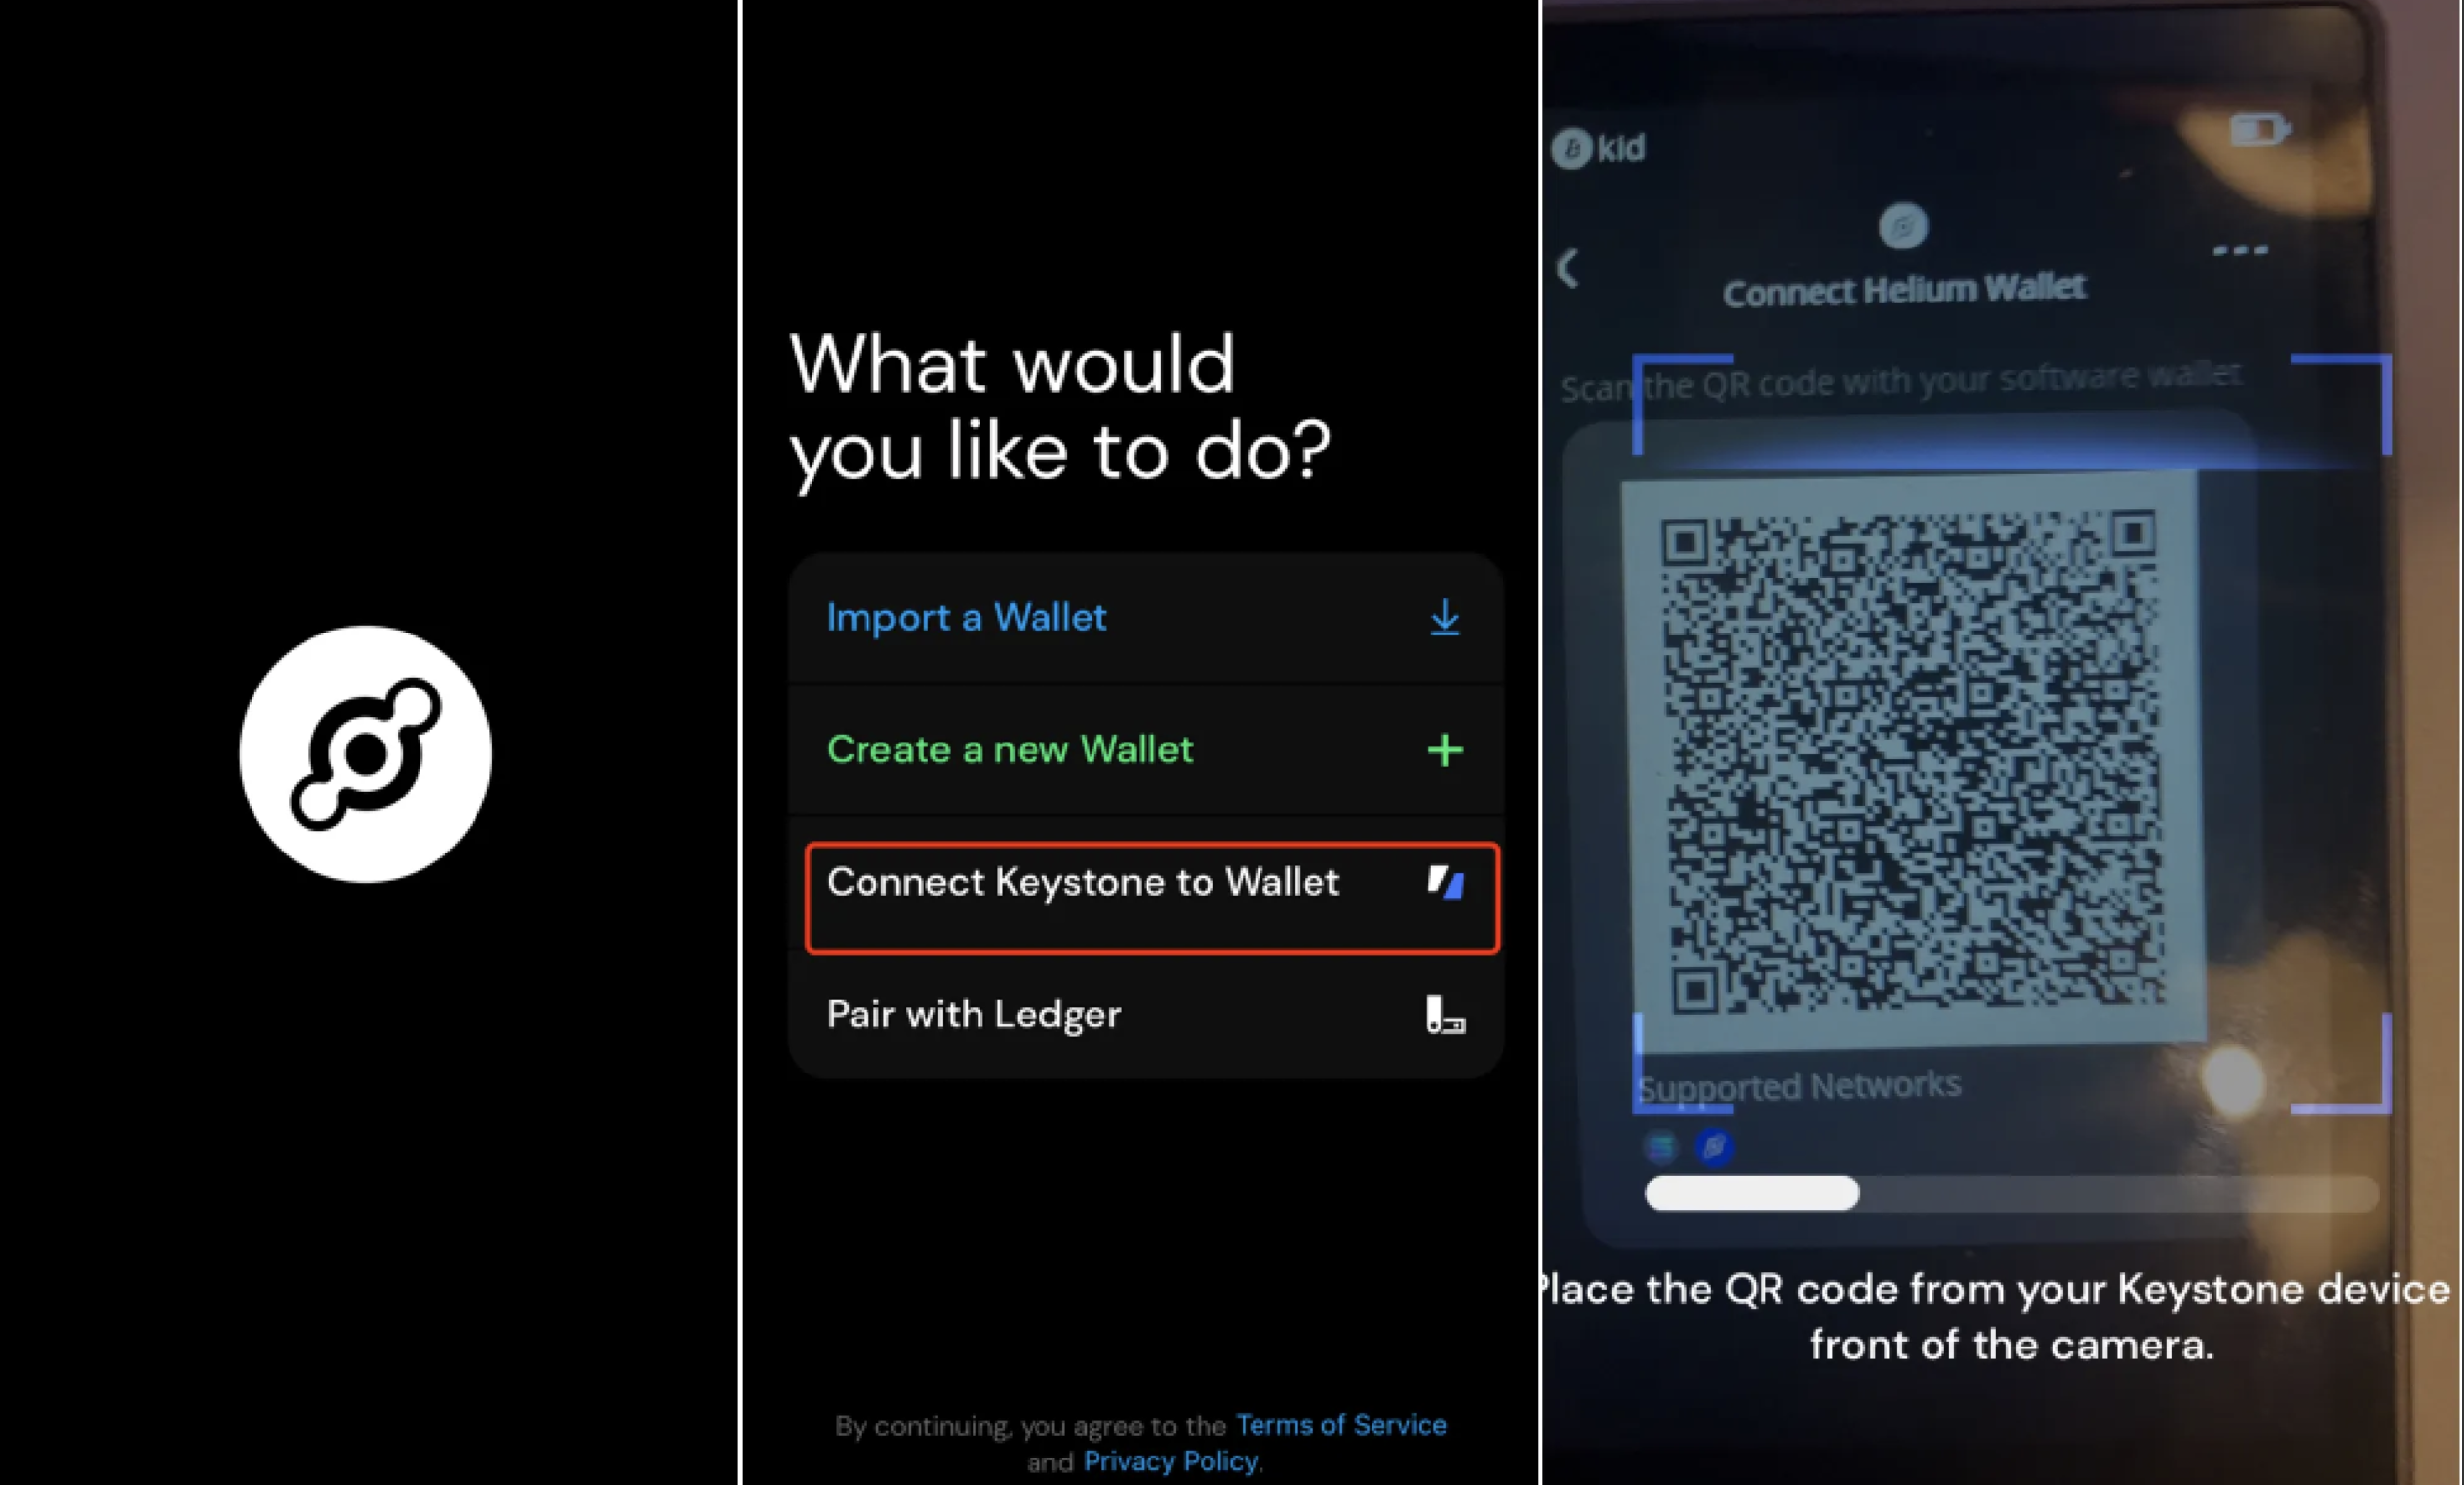
2. Connect Keystone Hardware Wallet with Helium Wallet Mobile
On Your Keystone Hardware Wallet:
- Tap the “…” icon and choose Helium Wallet.
- A QR code will appear, ready to be scanned with Helium Wallet.
On Helium Wallet:
Launch the Helium Wallet and select “Connect Keystone to Wallet”, use the camera to scan the QR code displayed on your Keystone hardware wallet.
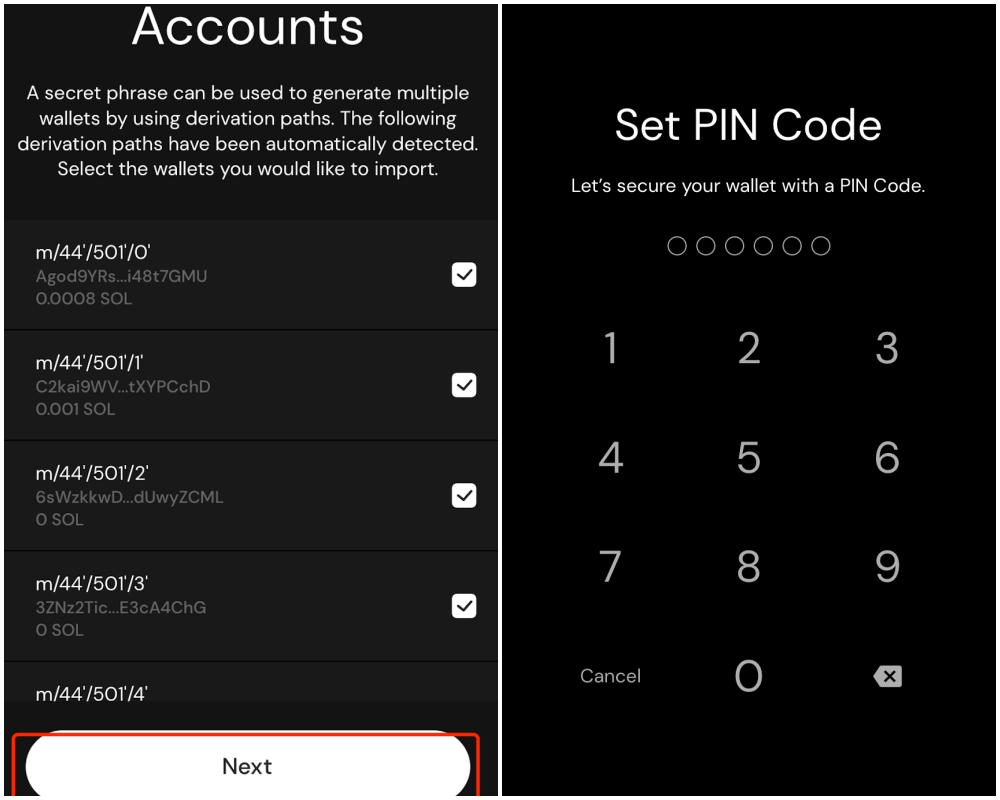
Select accounts, click “Next” to connect and then name your wallet.
Set a PIN for the wallet and confirm. Now you can access and use the wallet on Helium Wallet.
Once you’ve successfully bound your Keystone wallet with Helium Wallet, you can securely explore the various features it offers!
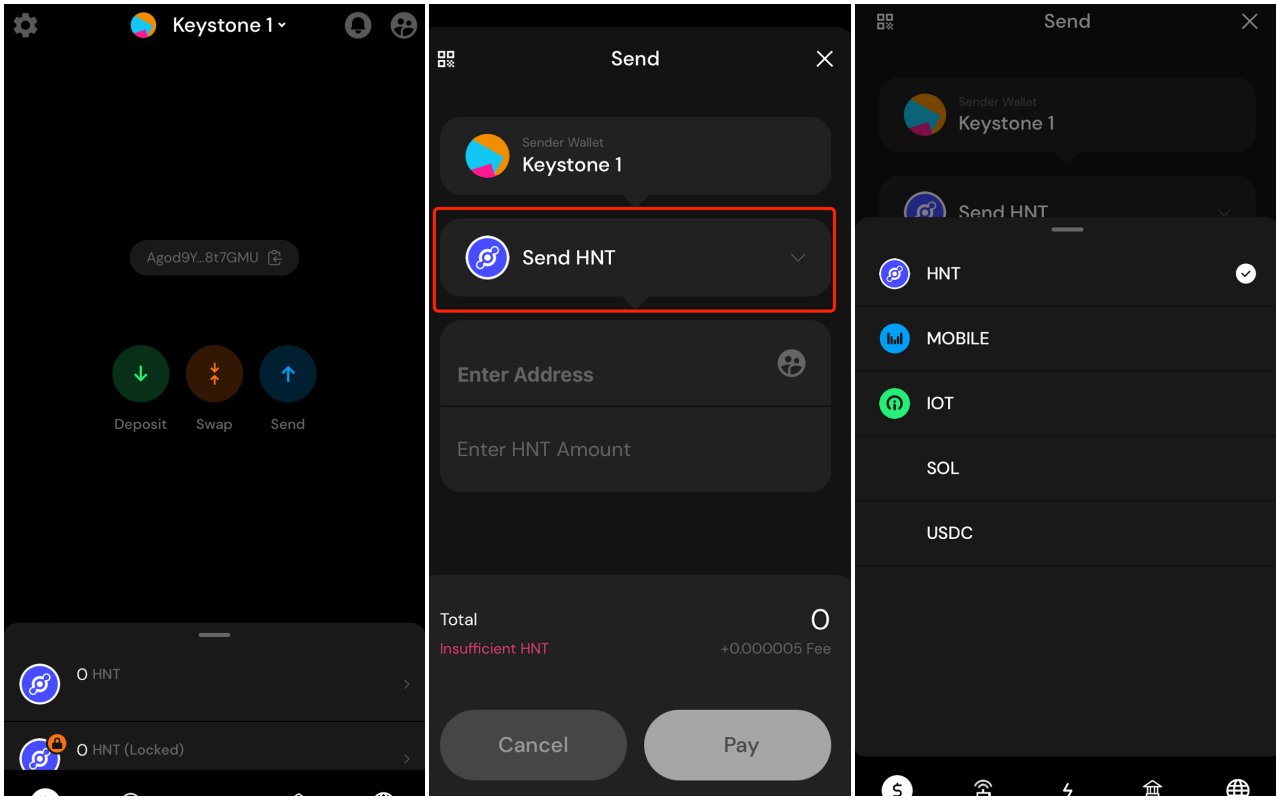
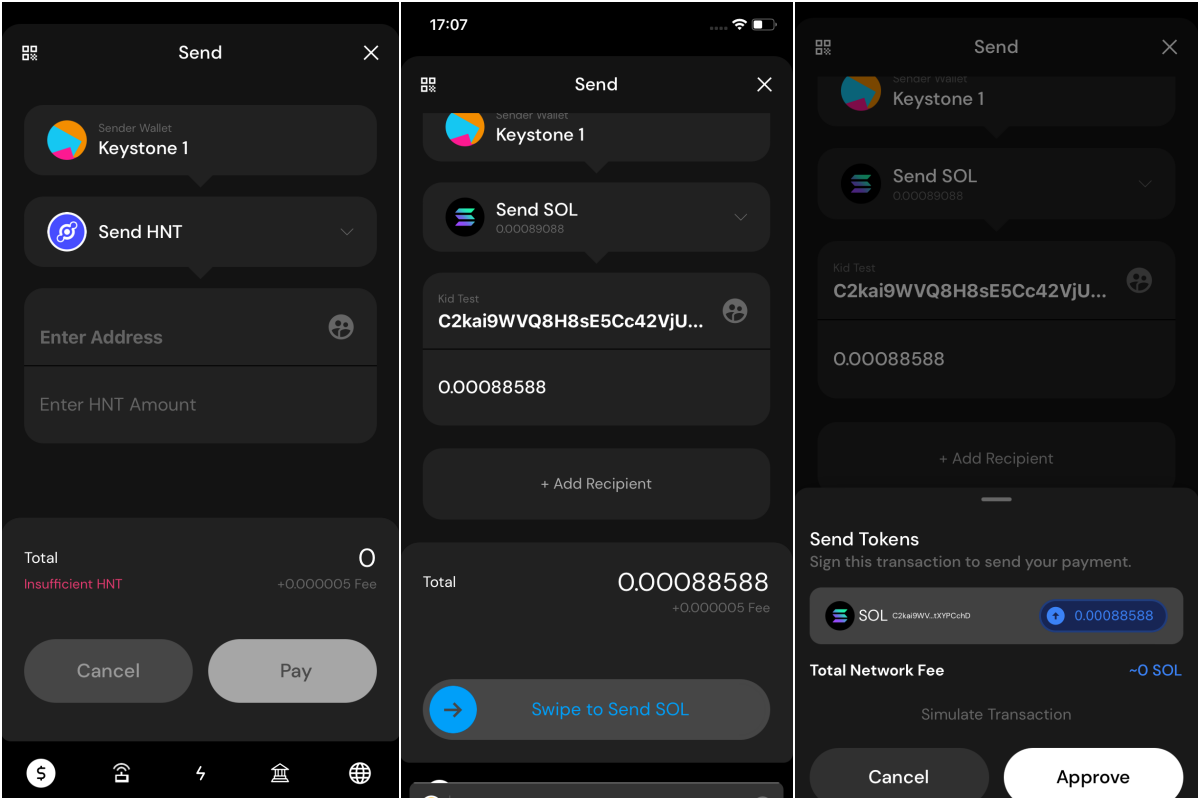
3. Send via Helium Wallet with Keystone Connected
On Helium Wallet
On the wallet homepage, select “send” to enter the send page.
Select the coin you want to send.
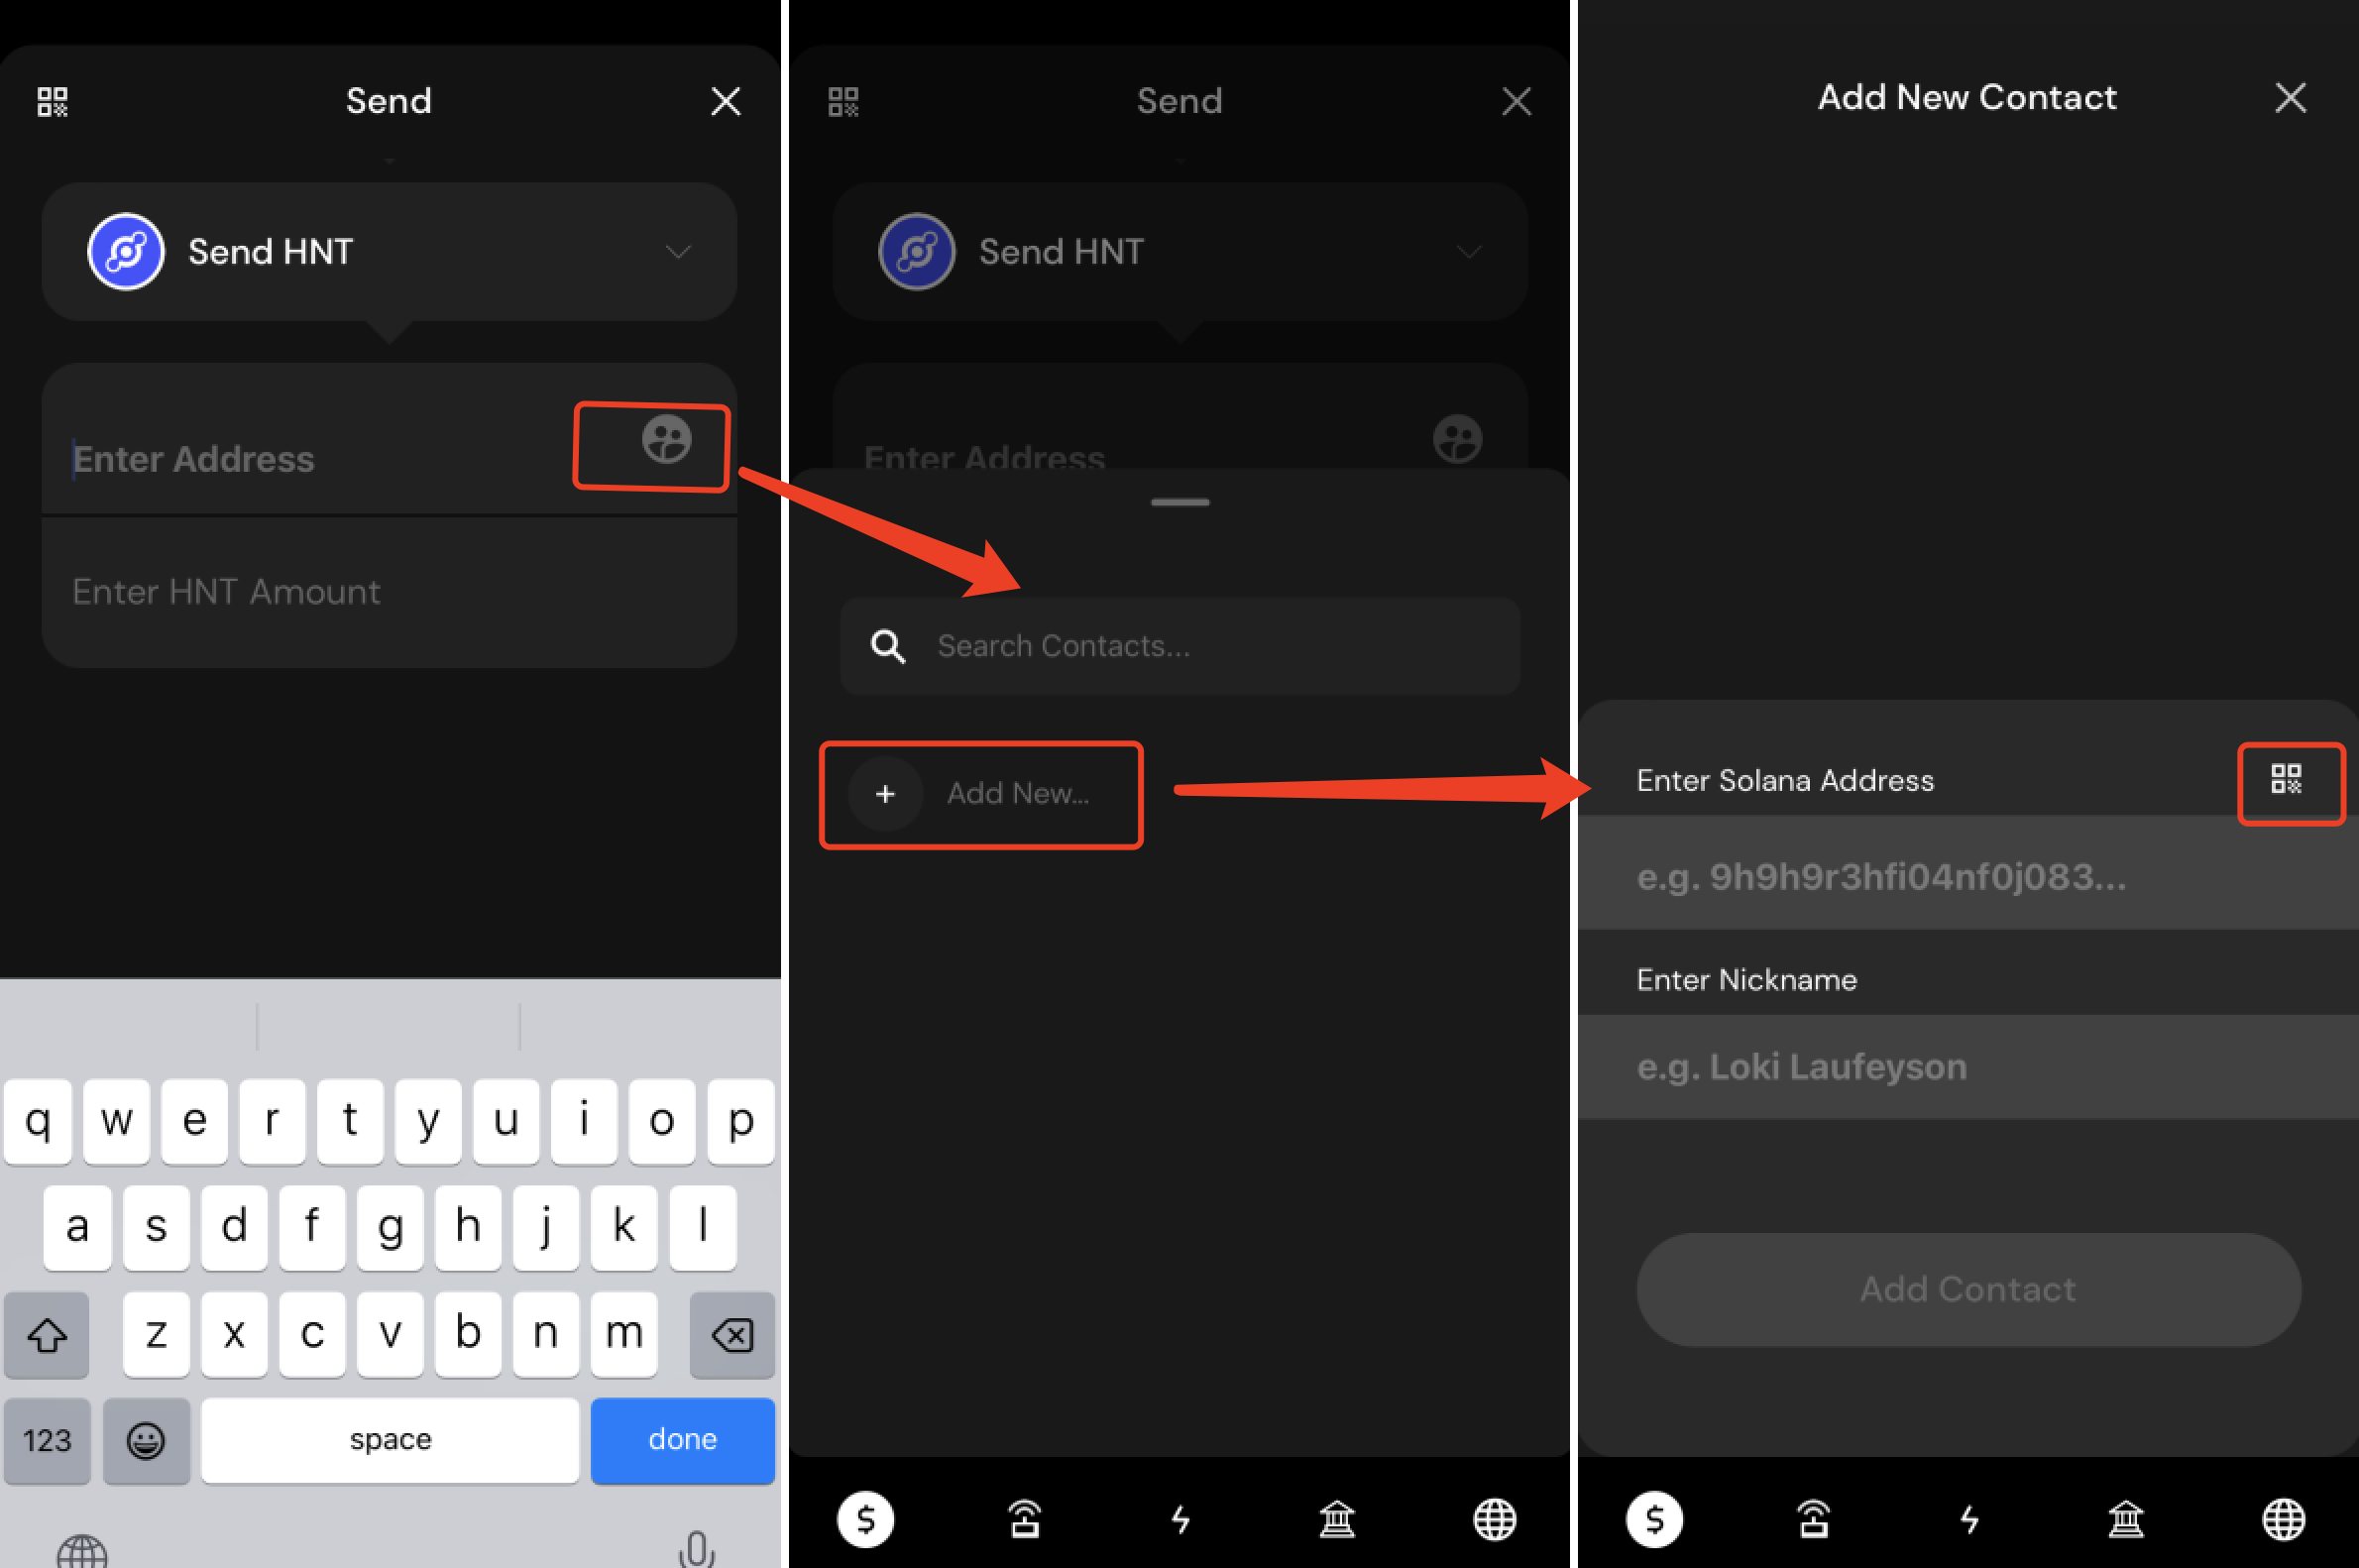
Enter the amount and the recipient’s address. You can input the recipient's address in the “Enter Address” field, or click the icon on the right to enter the add address page. Click the QR code icon to scan and input the address from a QR code.
Tap“Pay”, slide”Swipe to Send”, click”Approve”to proceed to the transaction signing stage.
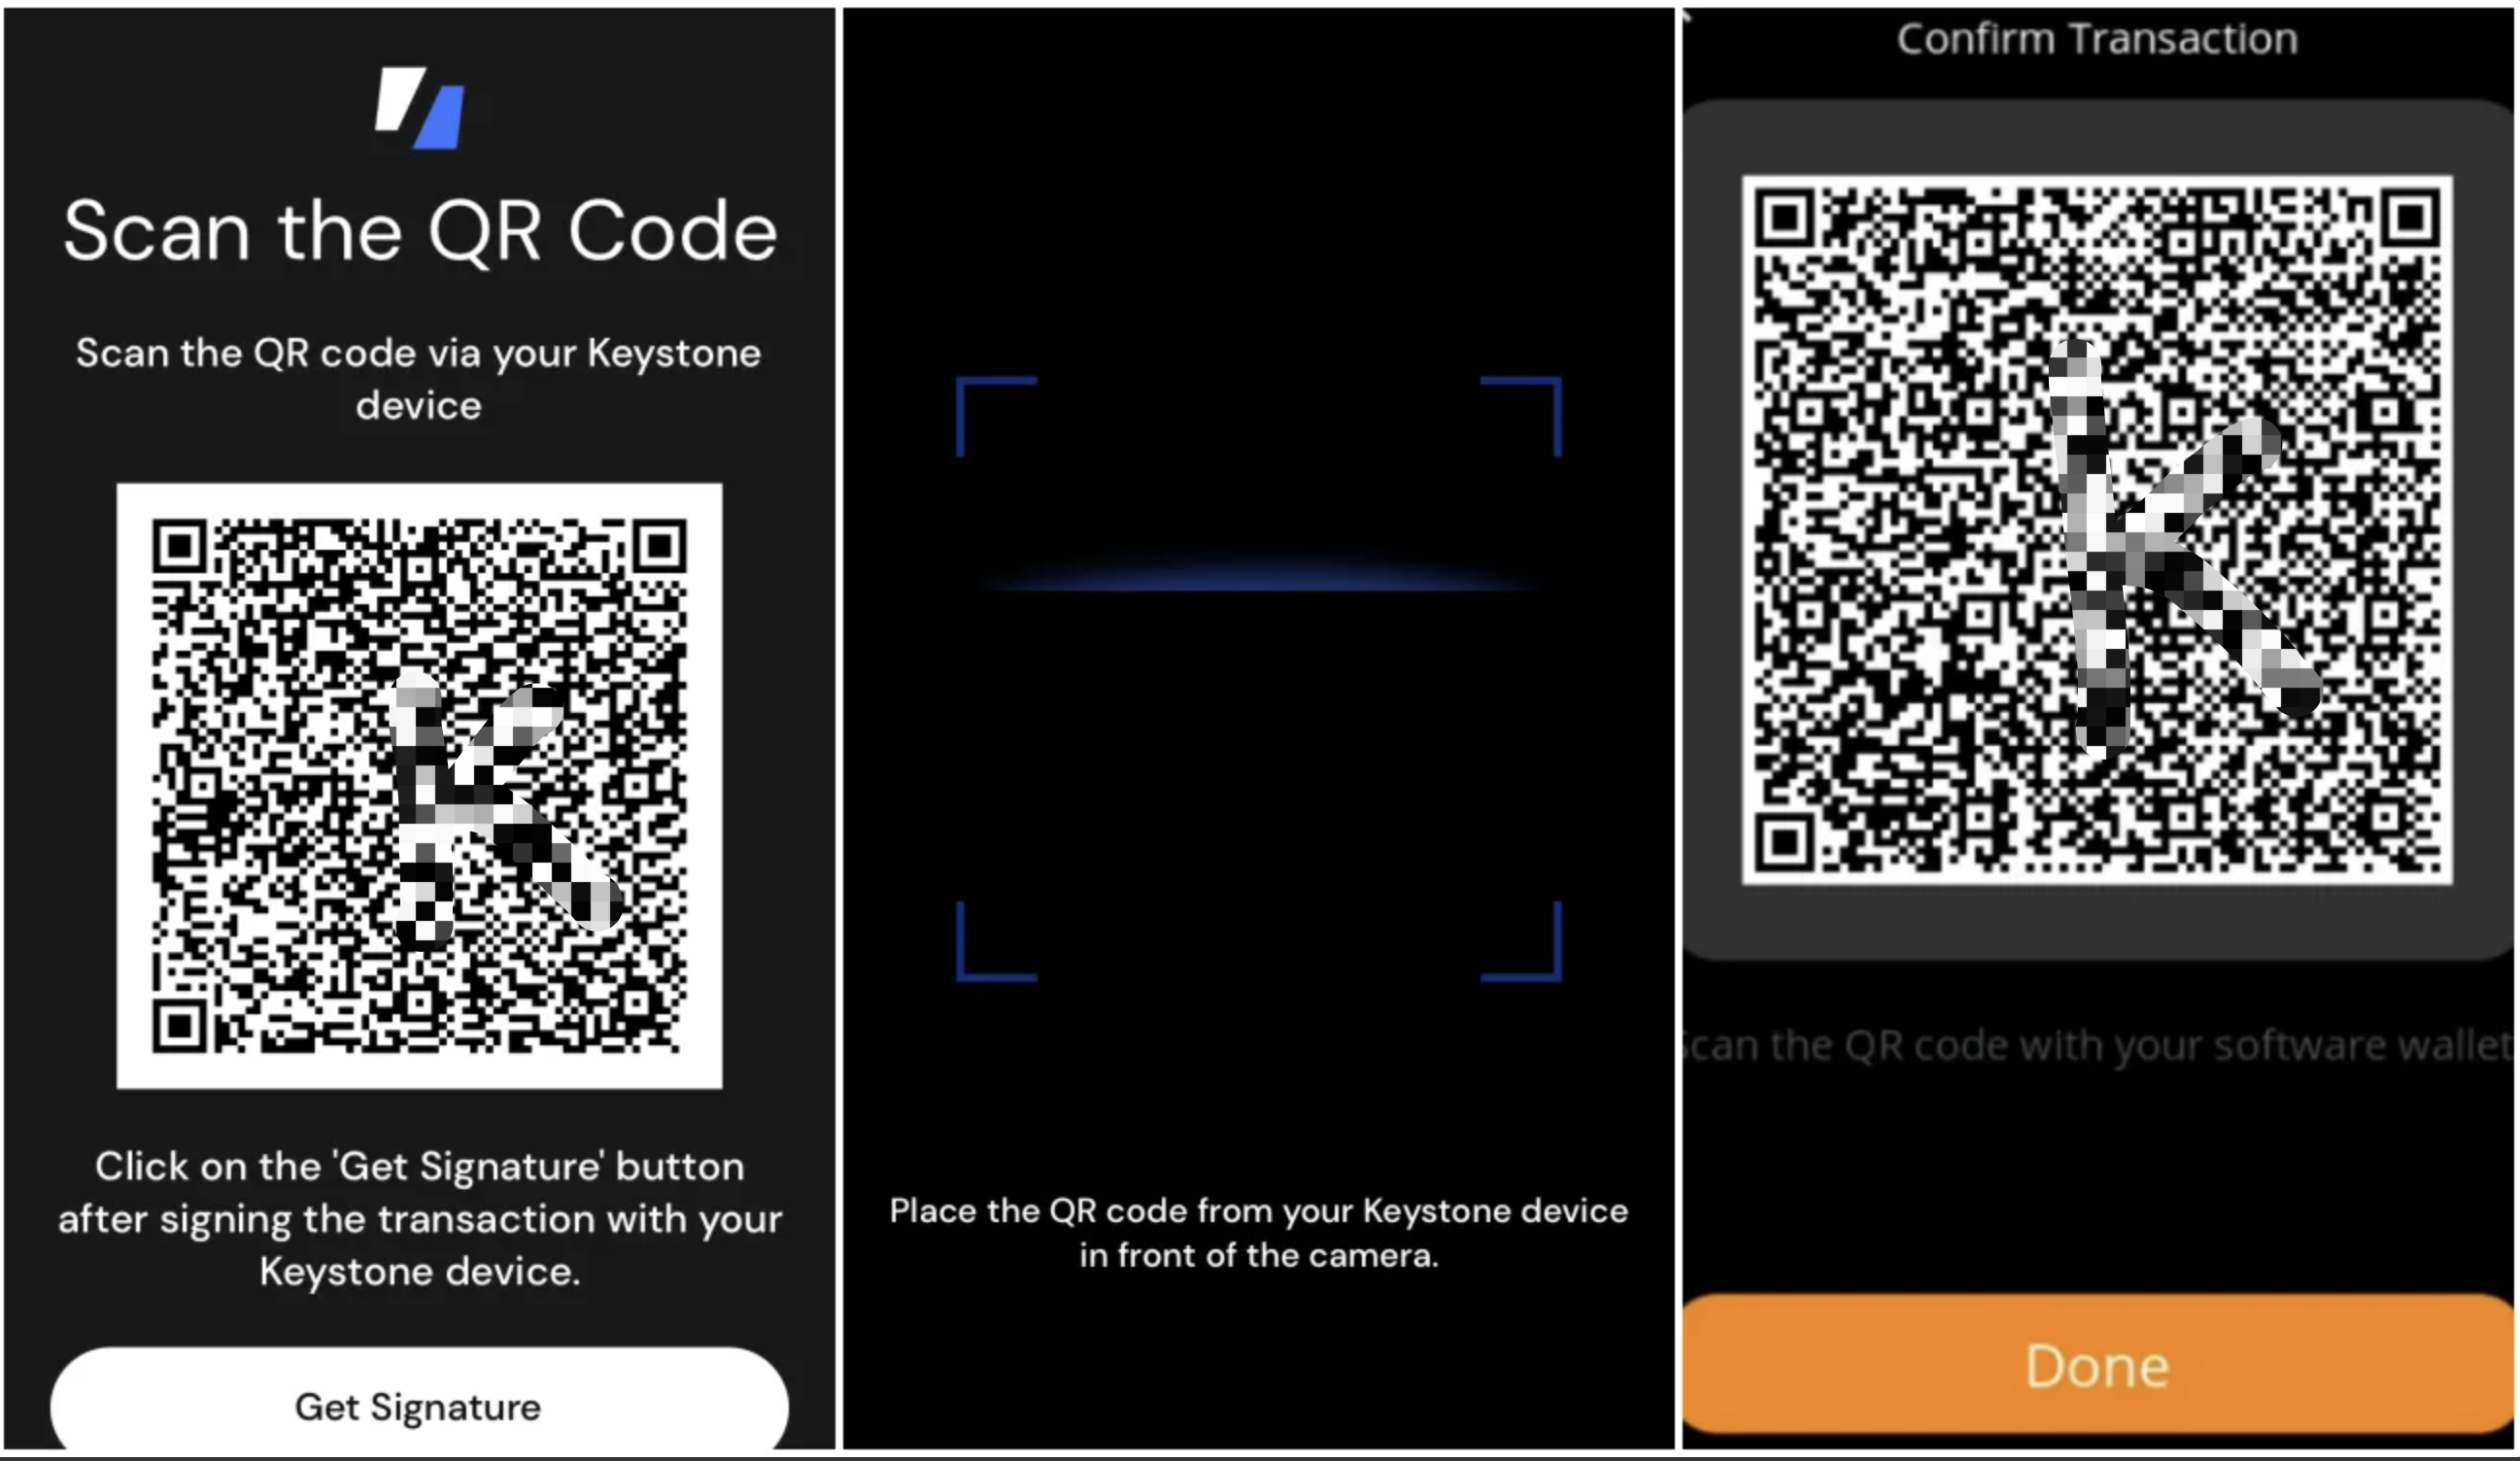
Sign the Transaction
Helium Wallet generates a QR code for signing.
Tap the scan icon at the bottom right of the Keystone homepage and scan the QR code on the Helium Wallet > Confirm the transaction details > Slide“Swipe to Confirm” > Keystone will generate a QR code for confirming.
Return to Helium Wallet, click "Get Signature," and use your phone to scan the QR code generated by the Keystone page to complete the transaction.
And there you have it! You've successfully sent your cryptocurrency to another address.
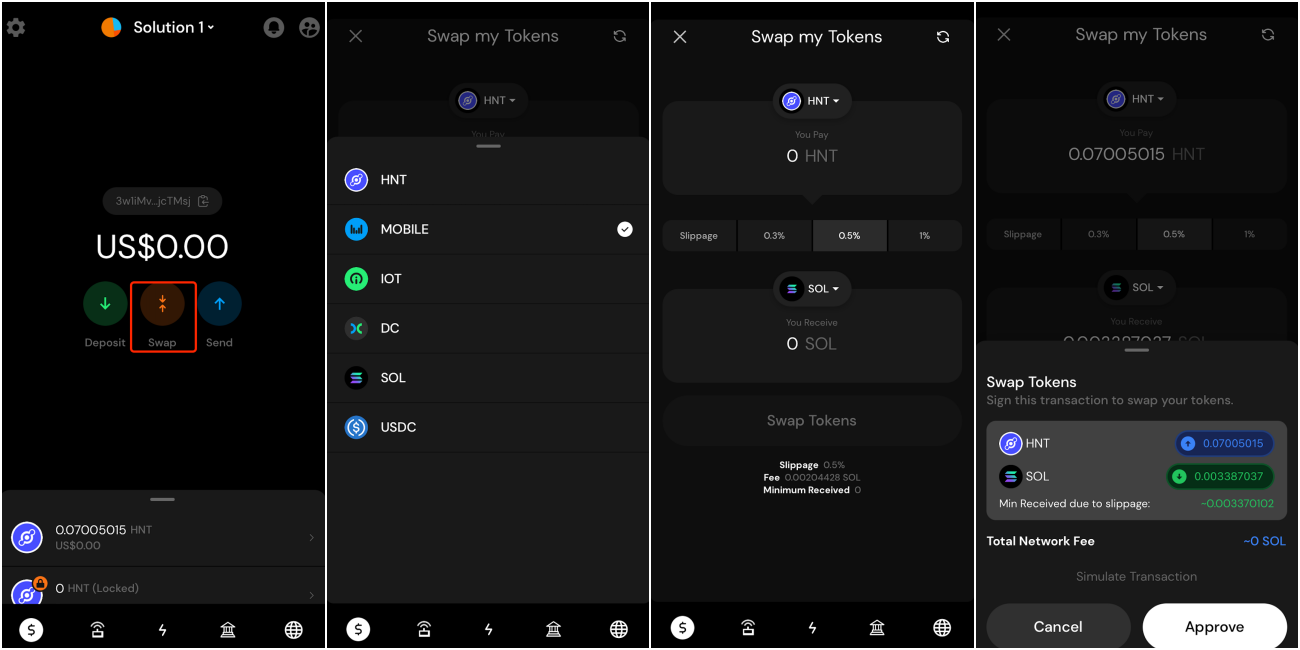
4. Swap
On Helium Wallet
On the wallet homepage, select “send” to enter the swap page.
Select a pair of tokens, such as SOL and HNT > Enter amount, choose the slippage > Tap “Swap Tokens”> Confirm the transaction details, then click “Approve” to proceed to the signing stage.
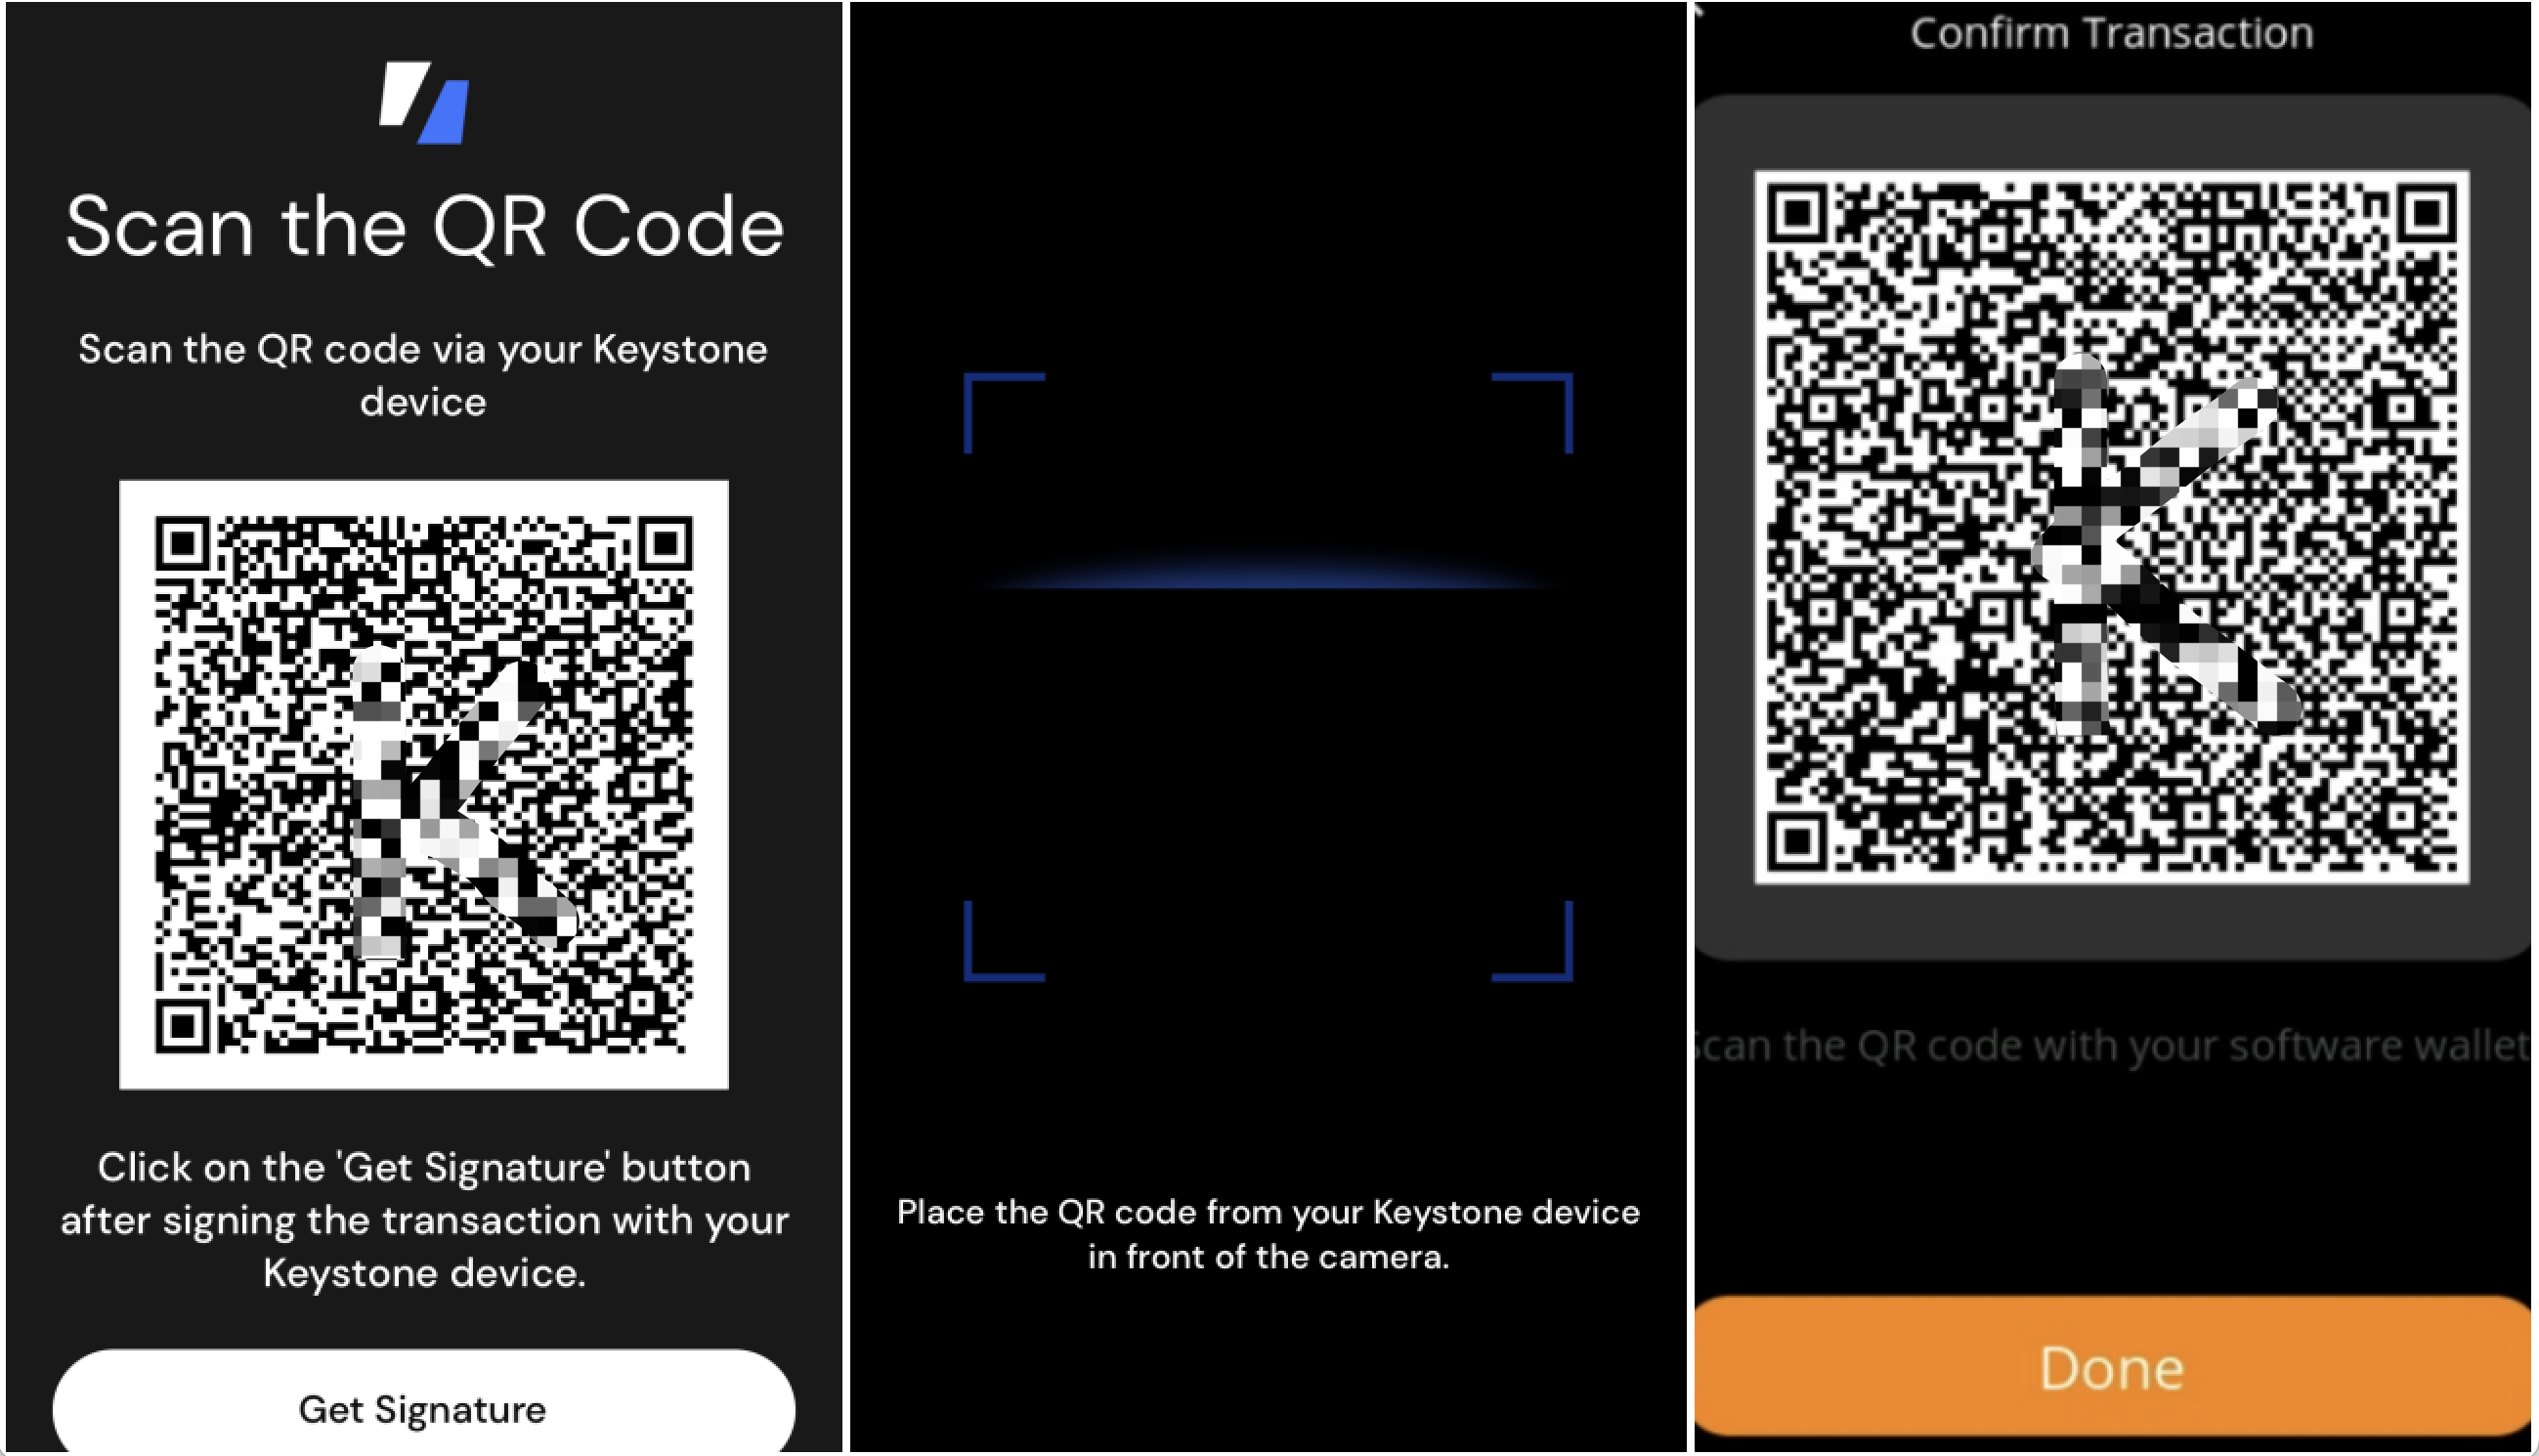
Sign the Transaction
Helium Wallet generate a QR code for signing.
Tap the scan icon at the bottom right of the Keystone homepage and scan the QR code on the Helium Wallet > Confirm the transaction details > Slide “Swipe to Confirm” > Keystone will generate a QR code for confirming.
Return to Helium Wallet, tap "Get Signature," and use your phone to scan the QR code to complete the transaction.
Security Note: To protect your assets, we recommend comparing the address displayed in Helium with the address generated on your Keystone 3 Pro device after the connection is complete, and making sure the two addresses match exactly. Also, do not scan any external QR codes that were not generated by your Keystone device.