Core Wallet (Mobile)
Welcome to this tutorial! It will guide you through linking your Keystone hardware wallet with the Core Wallet (mobile version), so you can easily manage your digital assets such as BTC, ETH, and AVAX. Let’s get started!
Preparation
Before getting started, please make sure you meet the following two requirements:
- Firmware version V2.0.6 or higher (For firmware upgrade instructions, please refer to this guide).
- Download the latest version of the Core Wallet.
Connecting Keystone Hardware Wallet with Core Wallet
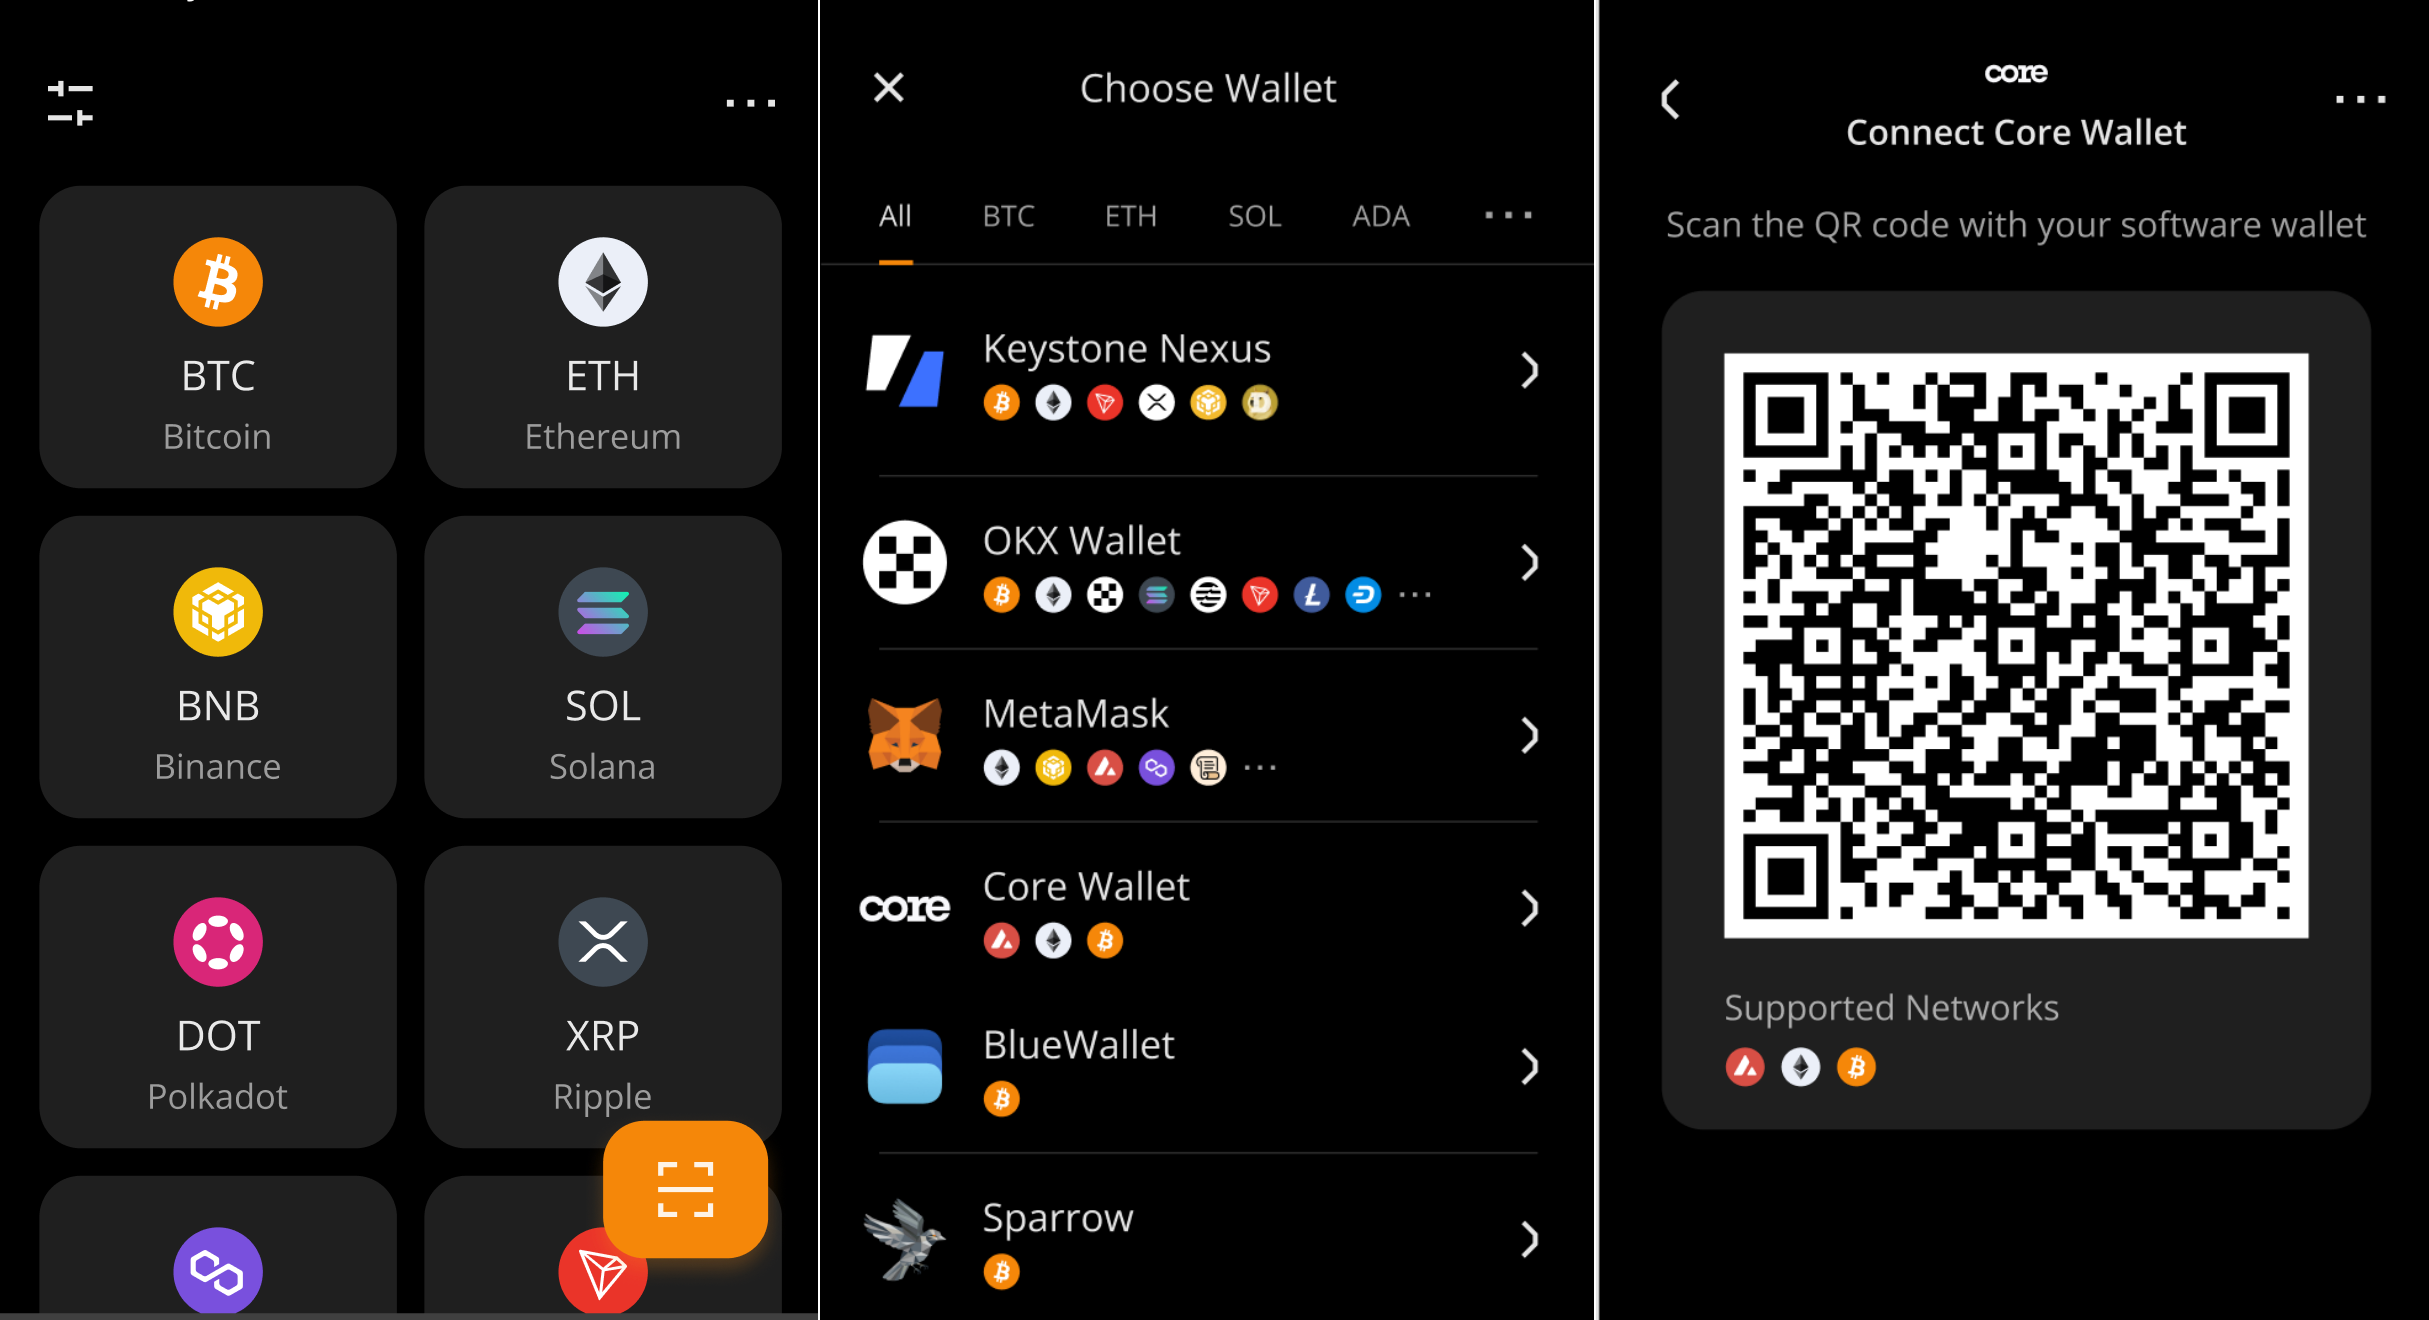
On the Keystone hardware wallet:
Tap the “…” icon at the top right corner of the main screen > select “Connect software wallet”
Scroll down > Choose “Core Wallet” > The device will display a QR code for connecting to Core Wallet.
On the Core Wallet app:
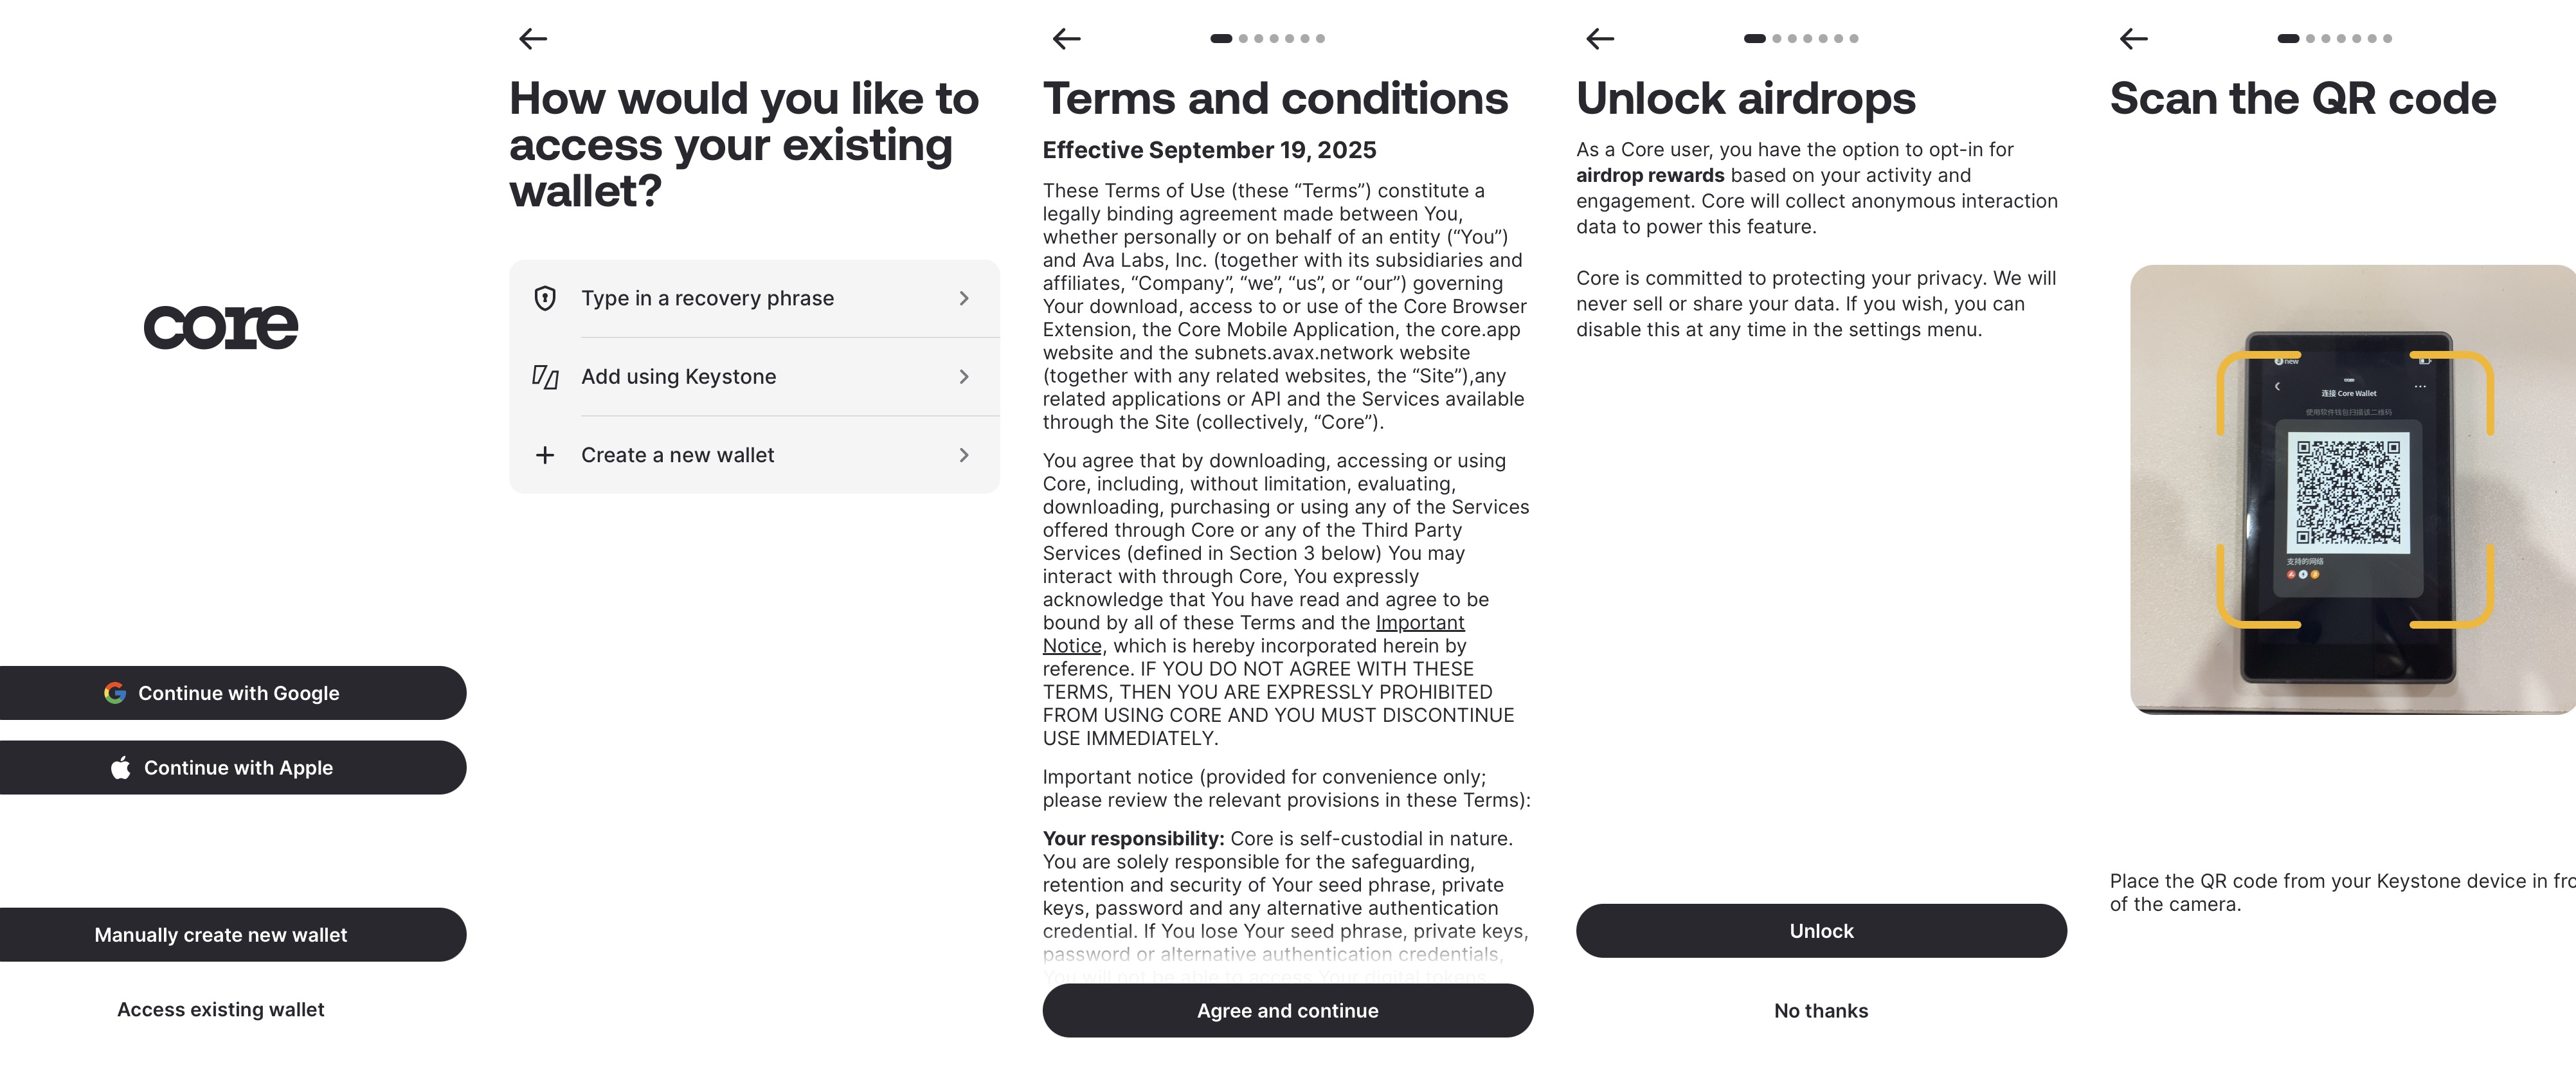
Open the Core Wallet app and tap “Access existing wallet.”
Tap “Add using Keystone” > “Agree and continue” > Choose whether to enable “airdrop” > Proceed to the QR code scanning screen > Scan the QR code displayed on your Keystone device.
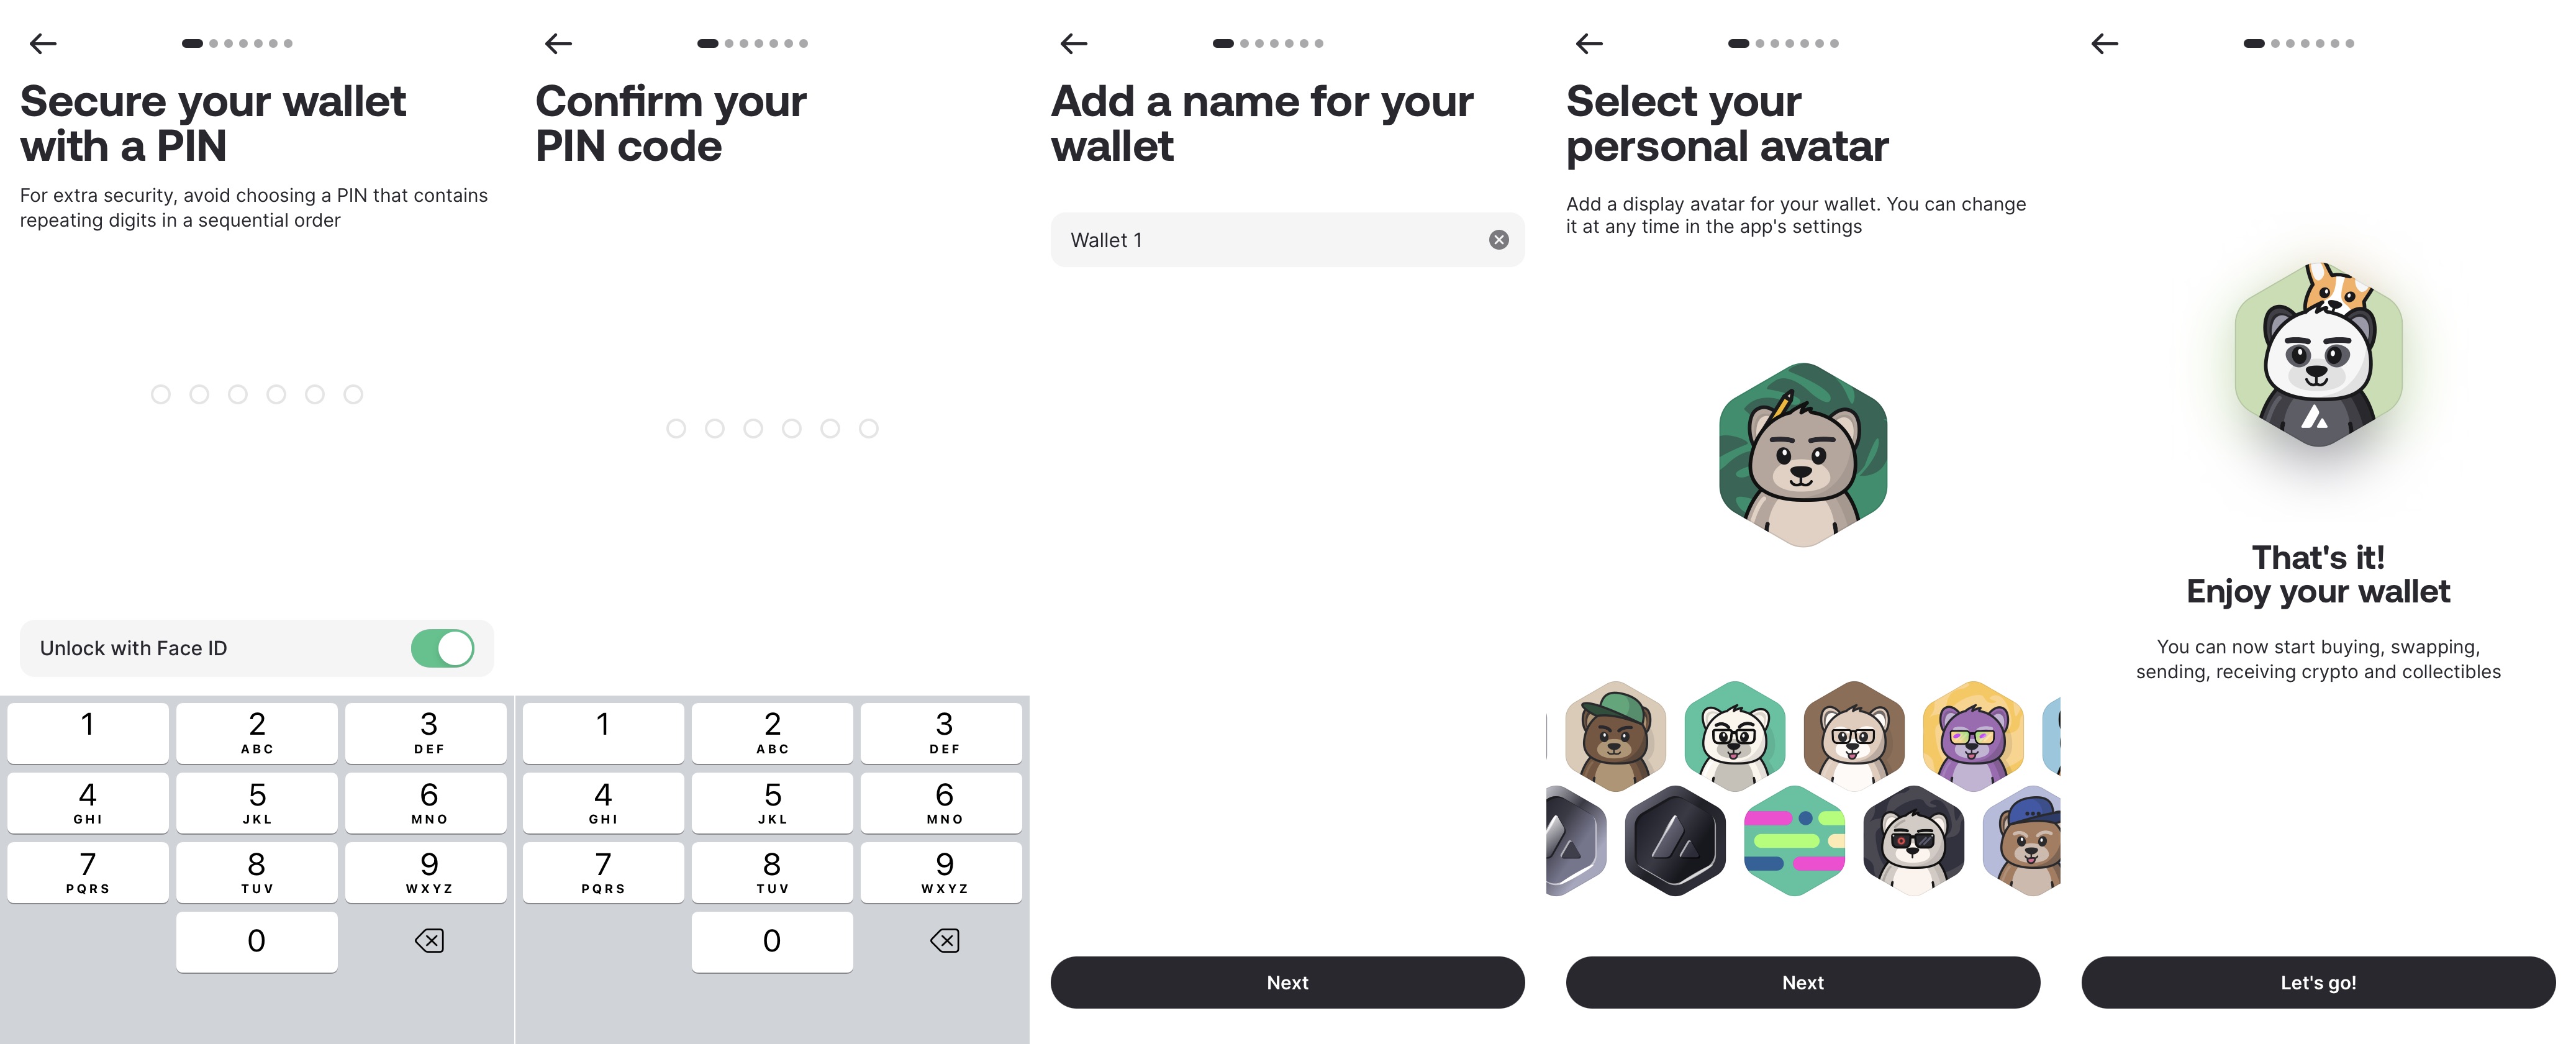
Set and confirm your PIN code > Name your wallet > Choose a profile avatar > Complete the connection between Core Wallet and Keystone.
Congratulations on successfully connecting your Keystone with Core Wallet! Now, try sending a transaction to get started!
Security Note: To protect your assets, we recommend comparing the address displayed in Core with the address generated on your Keystone 3 Pro device after the connection is complete, and making sure the two addresses match exactly. Also, do not scan any external QR codes that were not generated by your Keystone device.
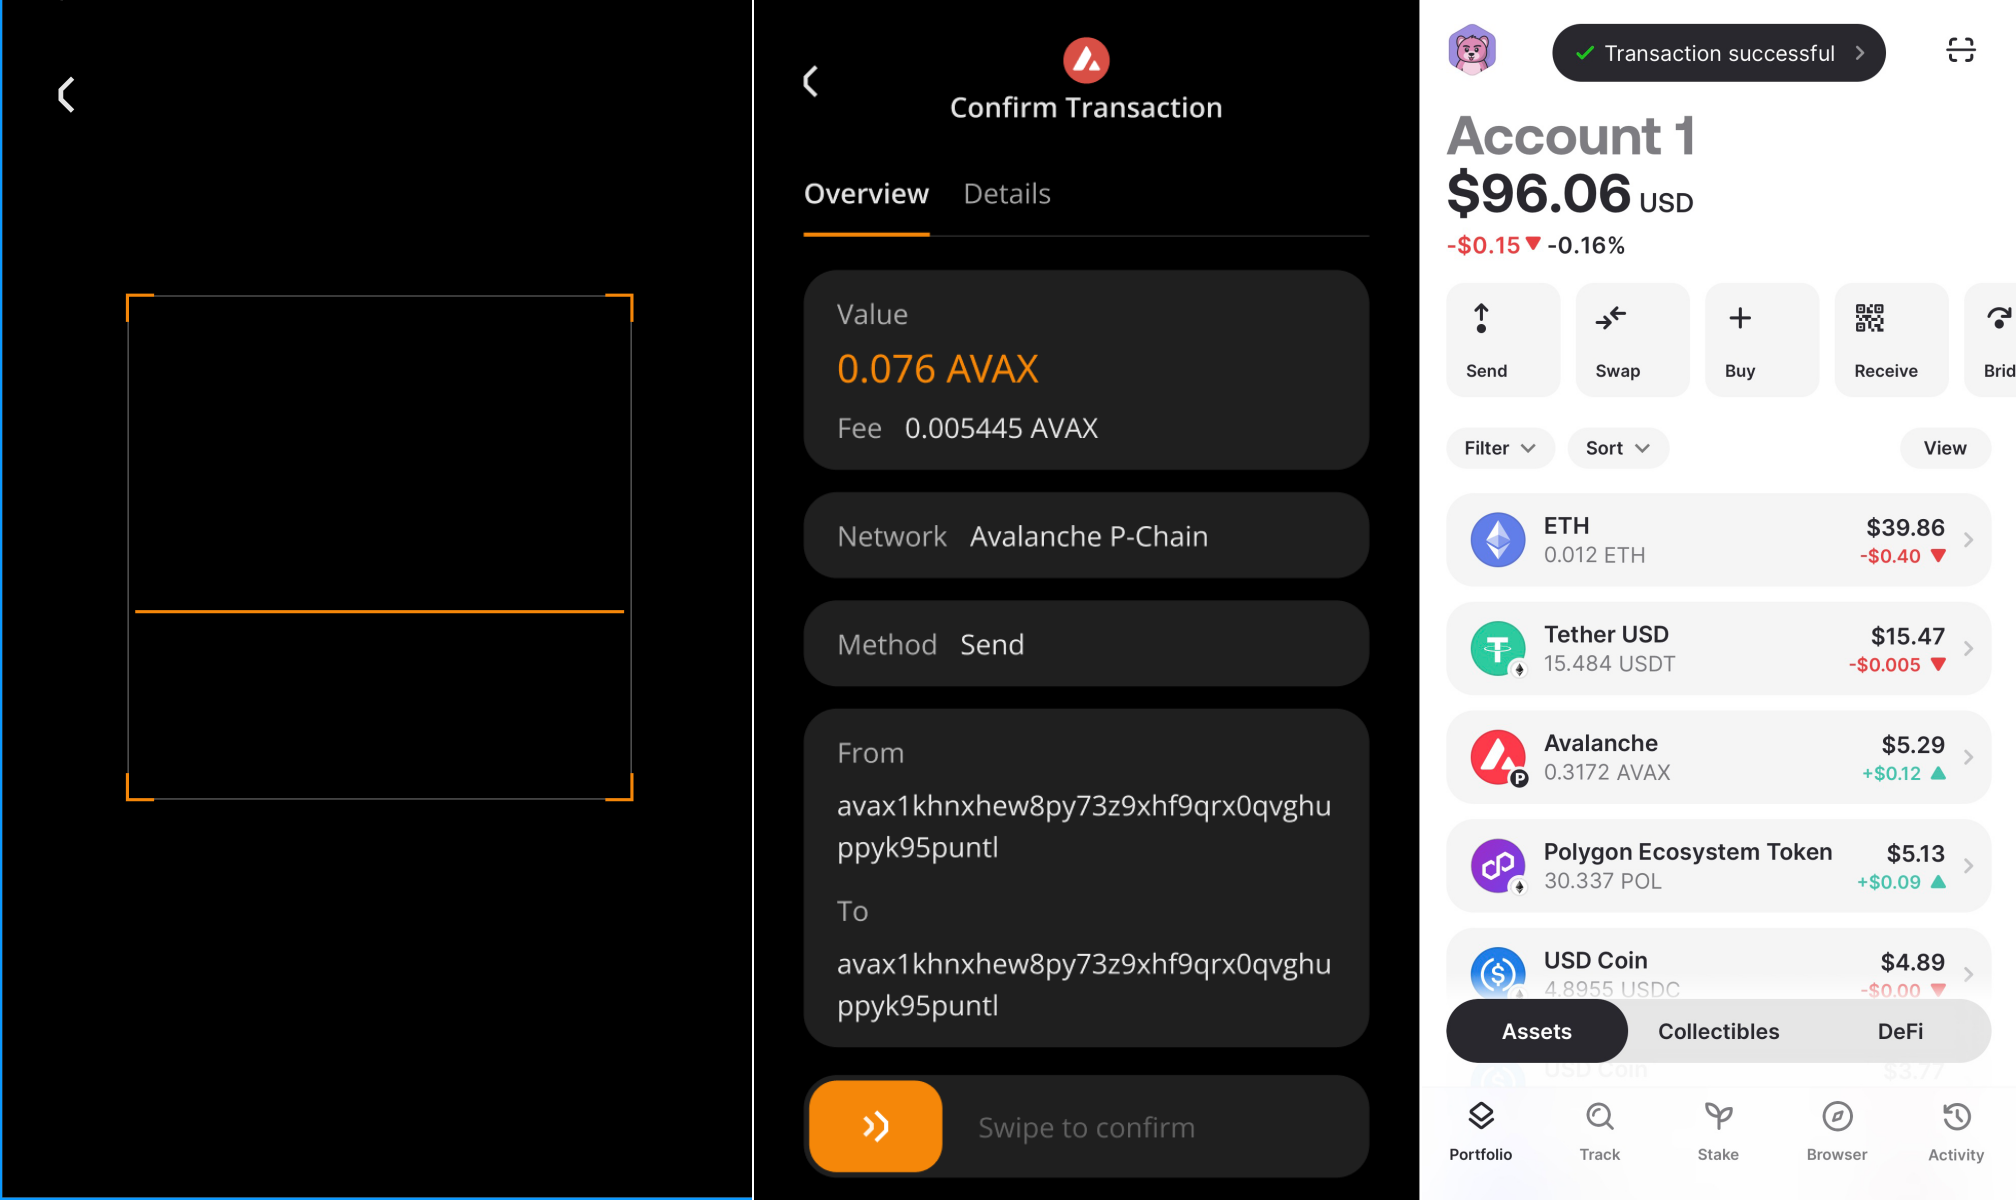
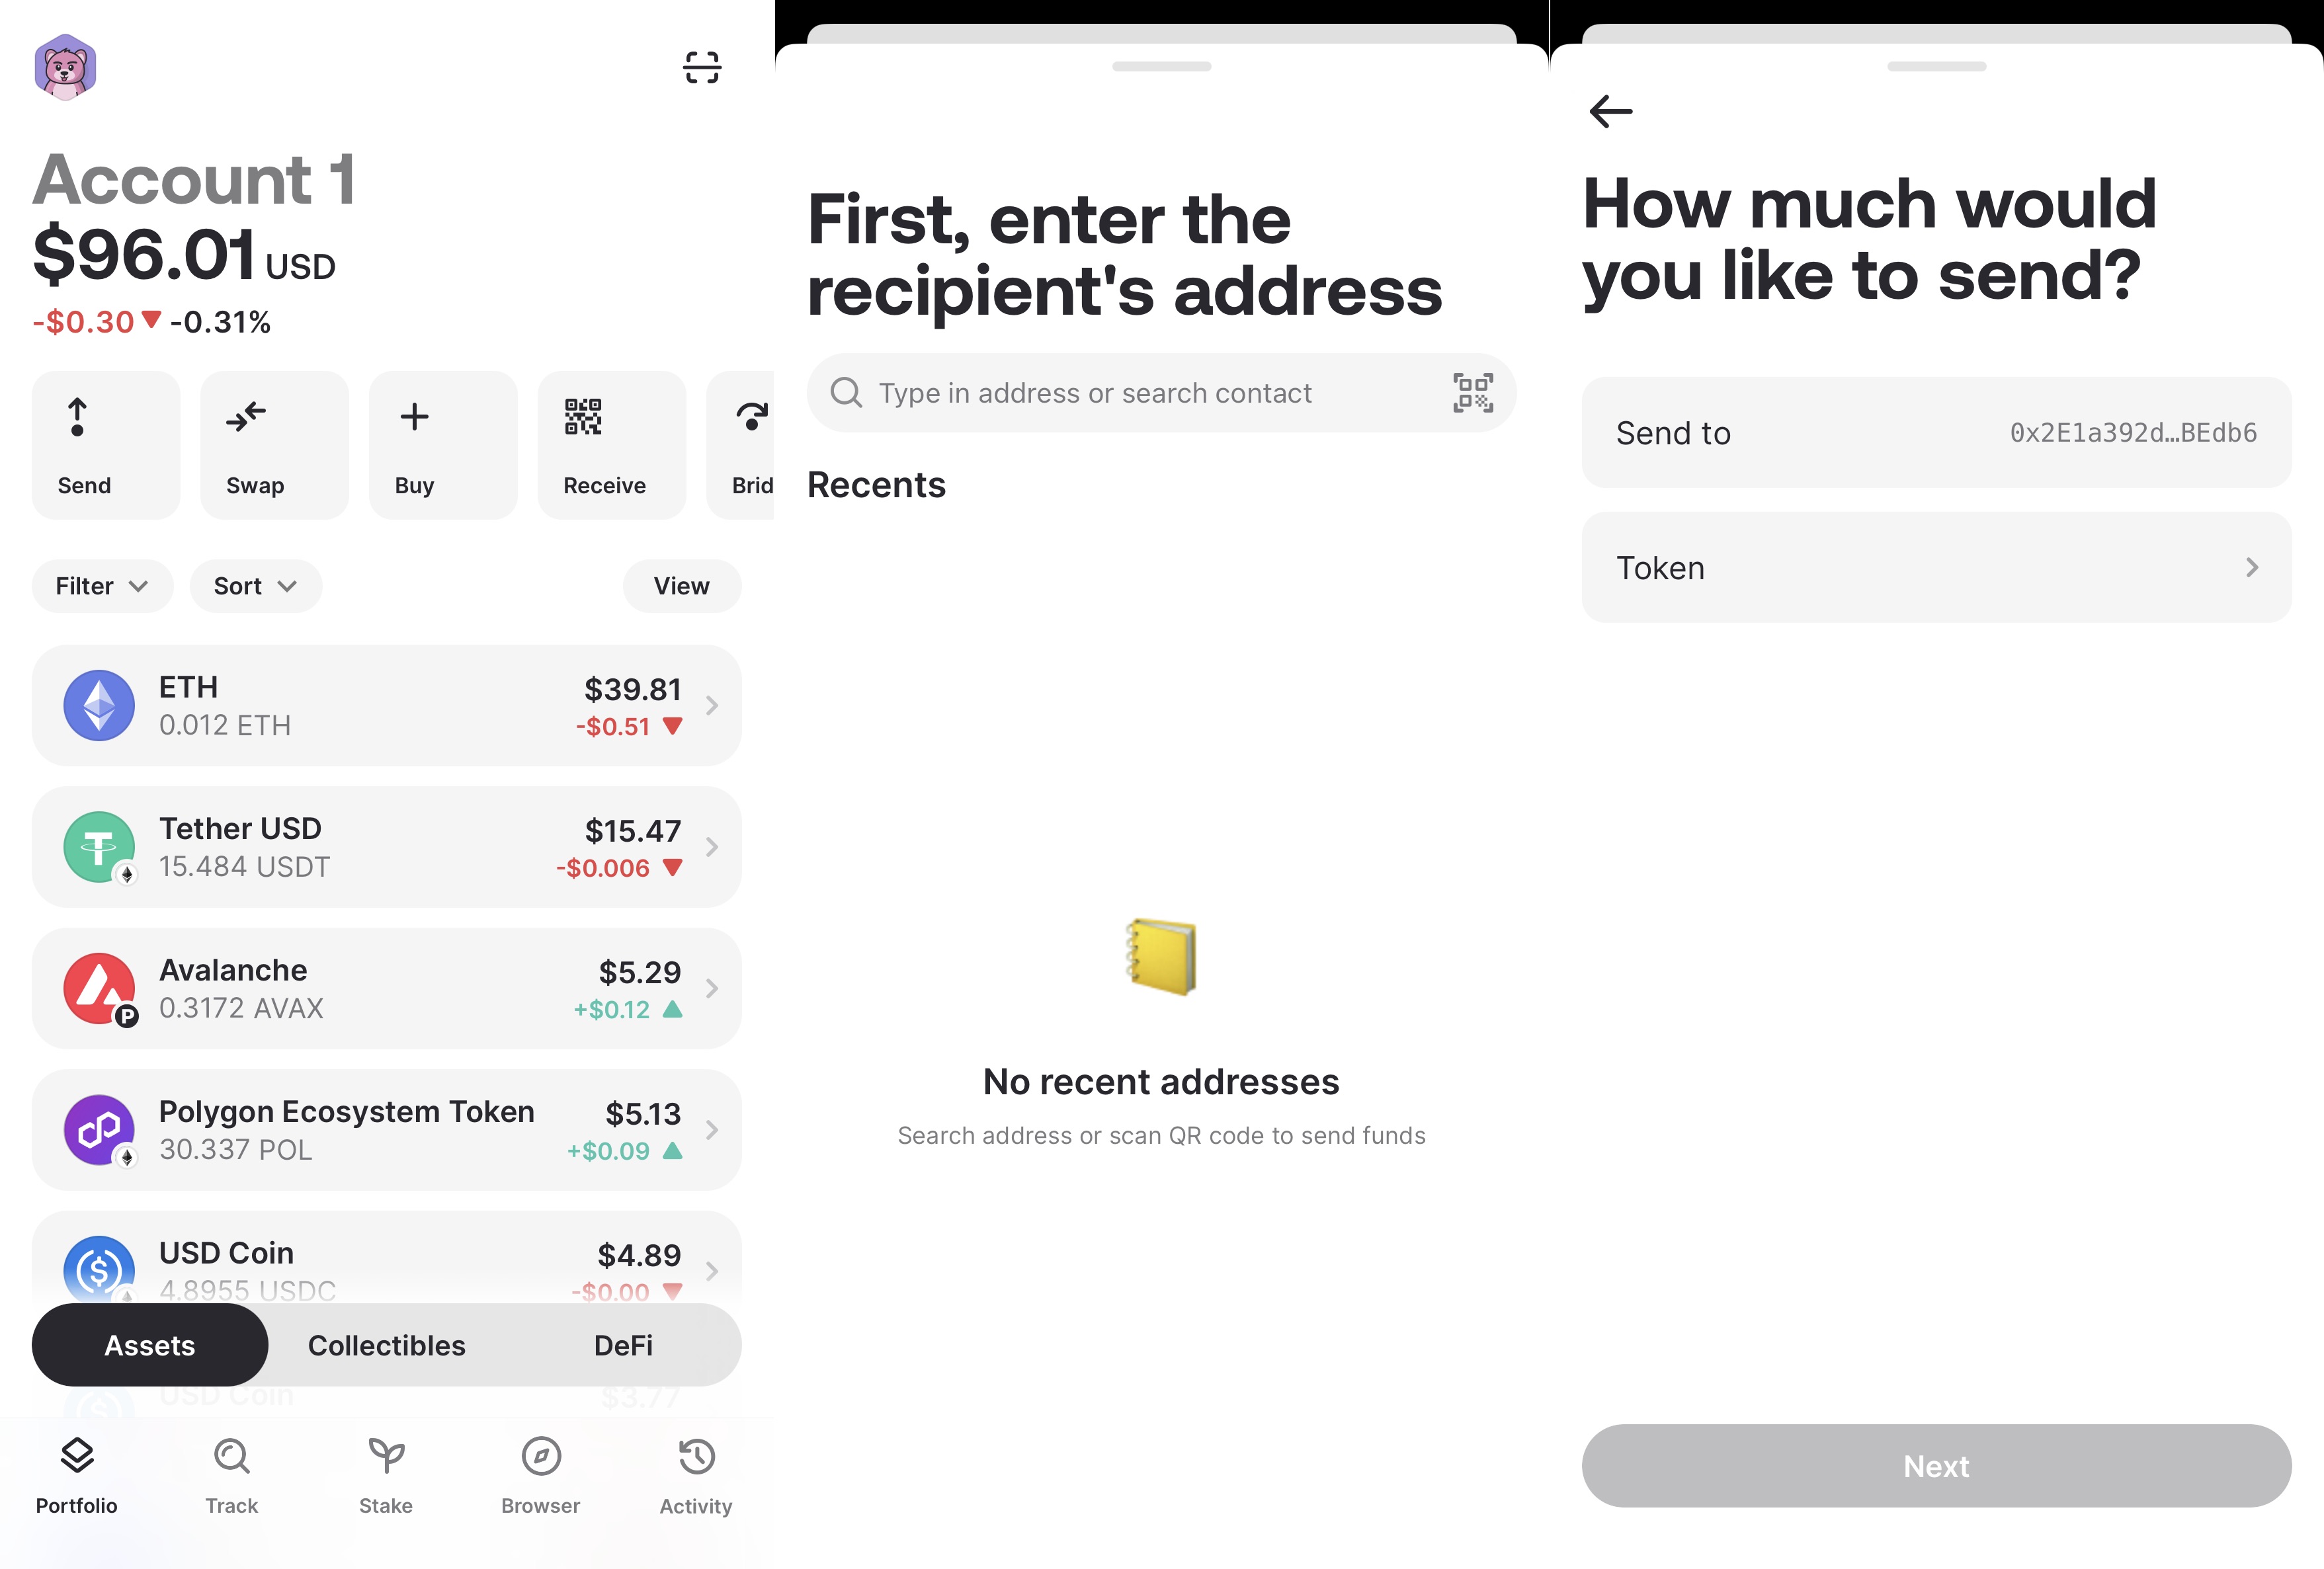
Send (Take AVAX as an Example)
On the Core Wallet app:
On the Core Wallet home screen.
Tap “Send” > Enter the recipient address > Select the token to send > Enter the amount > Tap “Next.”
Review the transaction details > Tap “Approve” , Core Wallet will generate a QR code containing the transaction information.
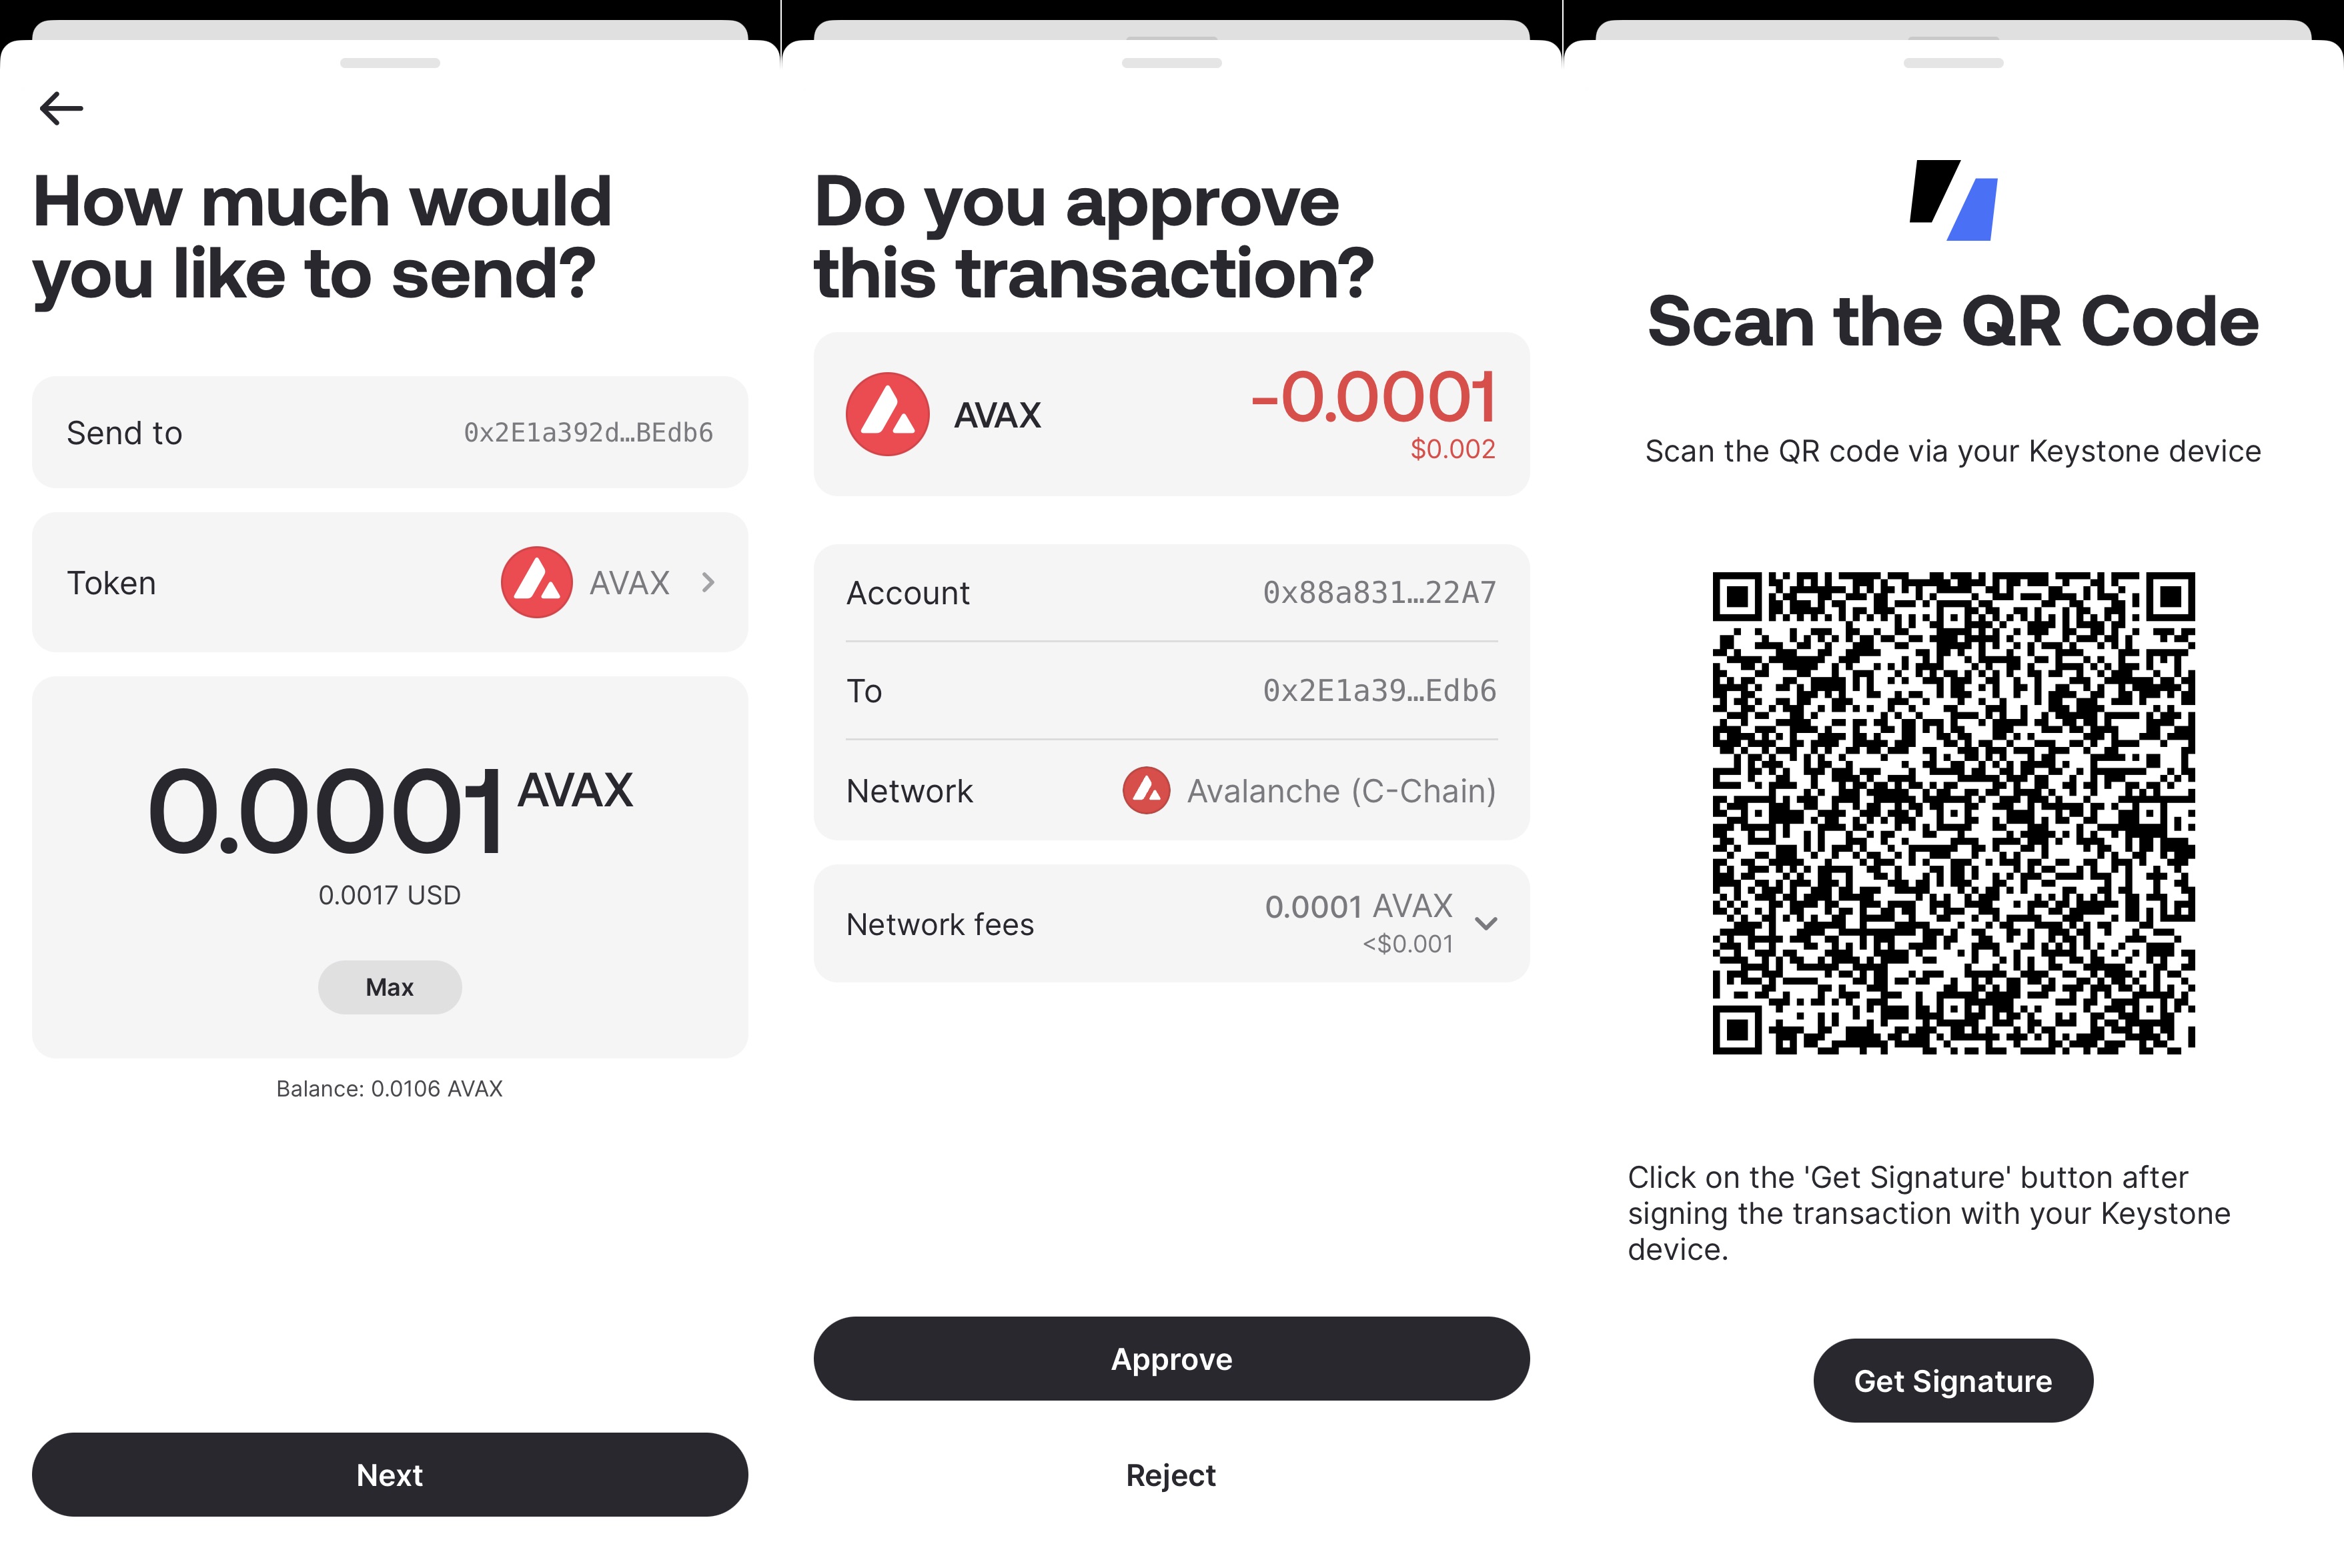
On the Keystone hardware wallet:
Tap the QR code icon at the bottom right of the Keystone home screen > Scan the QR code displayed on Core Wallet.
Review the transaction details > Swipe right to confirm > Enter your password or use your fingerprint to sign the transaction > Keystone will display a signature QR code.
On Core Wallet, tap “Get Signature” and scan the QR code shown on Keystone to broadcast and complete the transaction.