IOTA Wallet (Extension)
Welcome to this tutorial. In this guide, we will show you how to connect your Keystone hardware wallet to the IOTA Wallet so that you can manage your IOTA assets.
1. Preparation
- Firmware version 2.2.14 and above running on Keystone 3 Pro (For firmware upgrade instructions, please refer to this guide).
- IOTA Wallet extension installed (version 1.4.0 or above).
2. Connecting Keystone Hardware Wallet with IOTA Wallet
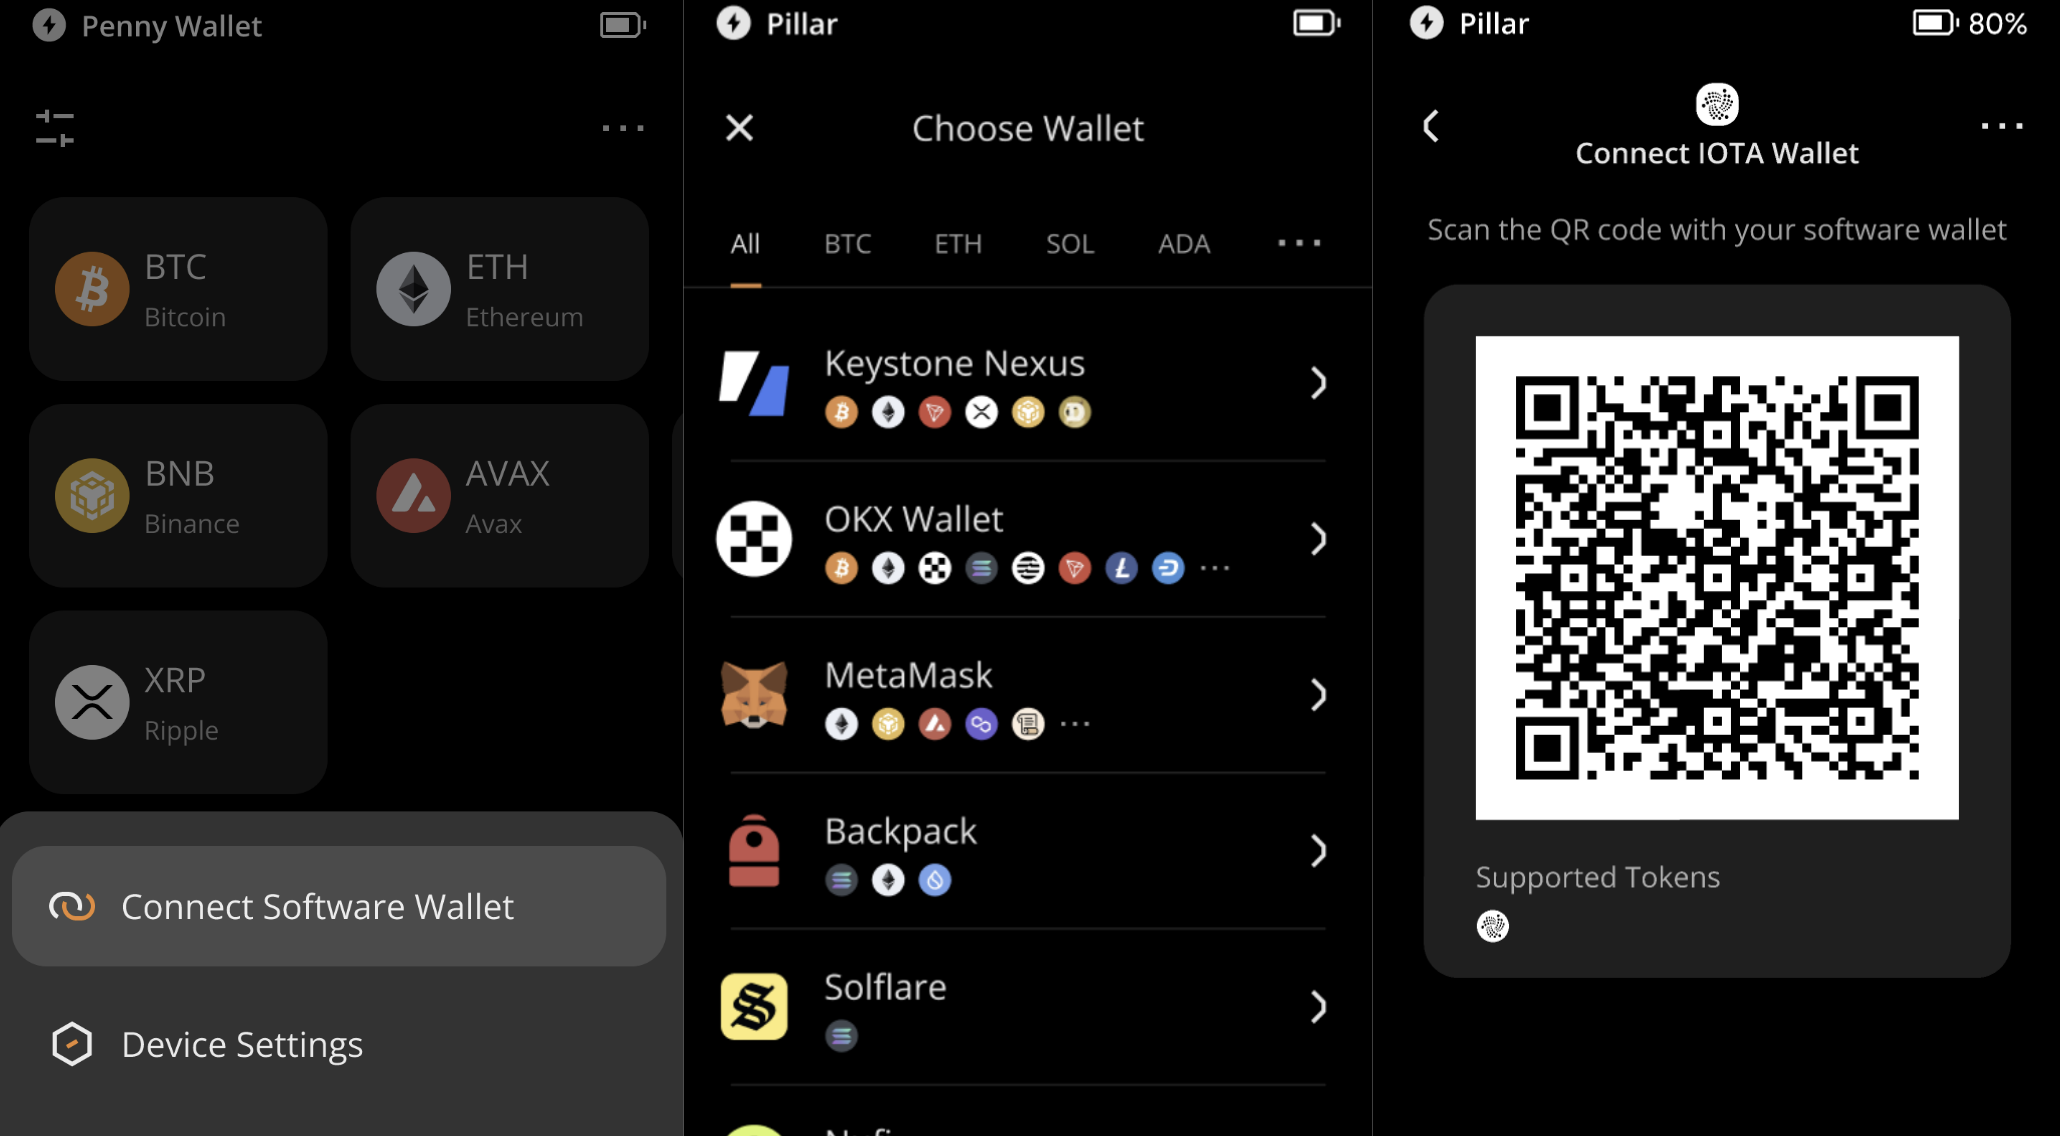
a. On your Keystone Hardware Wallet
Open your Keystone device, tap the top-right corner [···] > [Connect Software Wallet], find [IOTA Wallet], and a dynamic QR code for connecting the wallet will appear on your device.
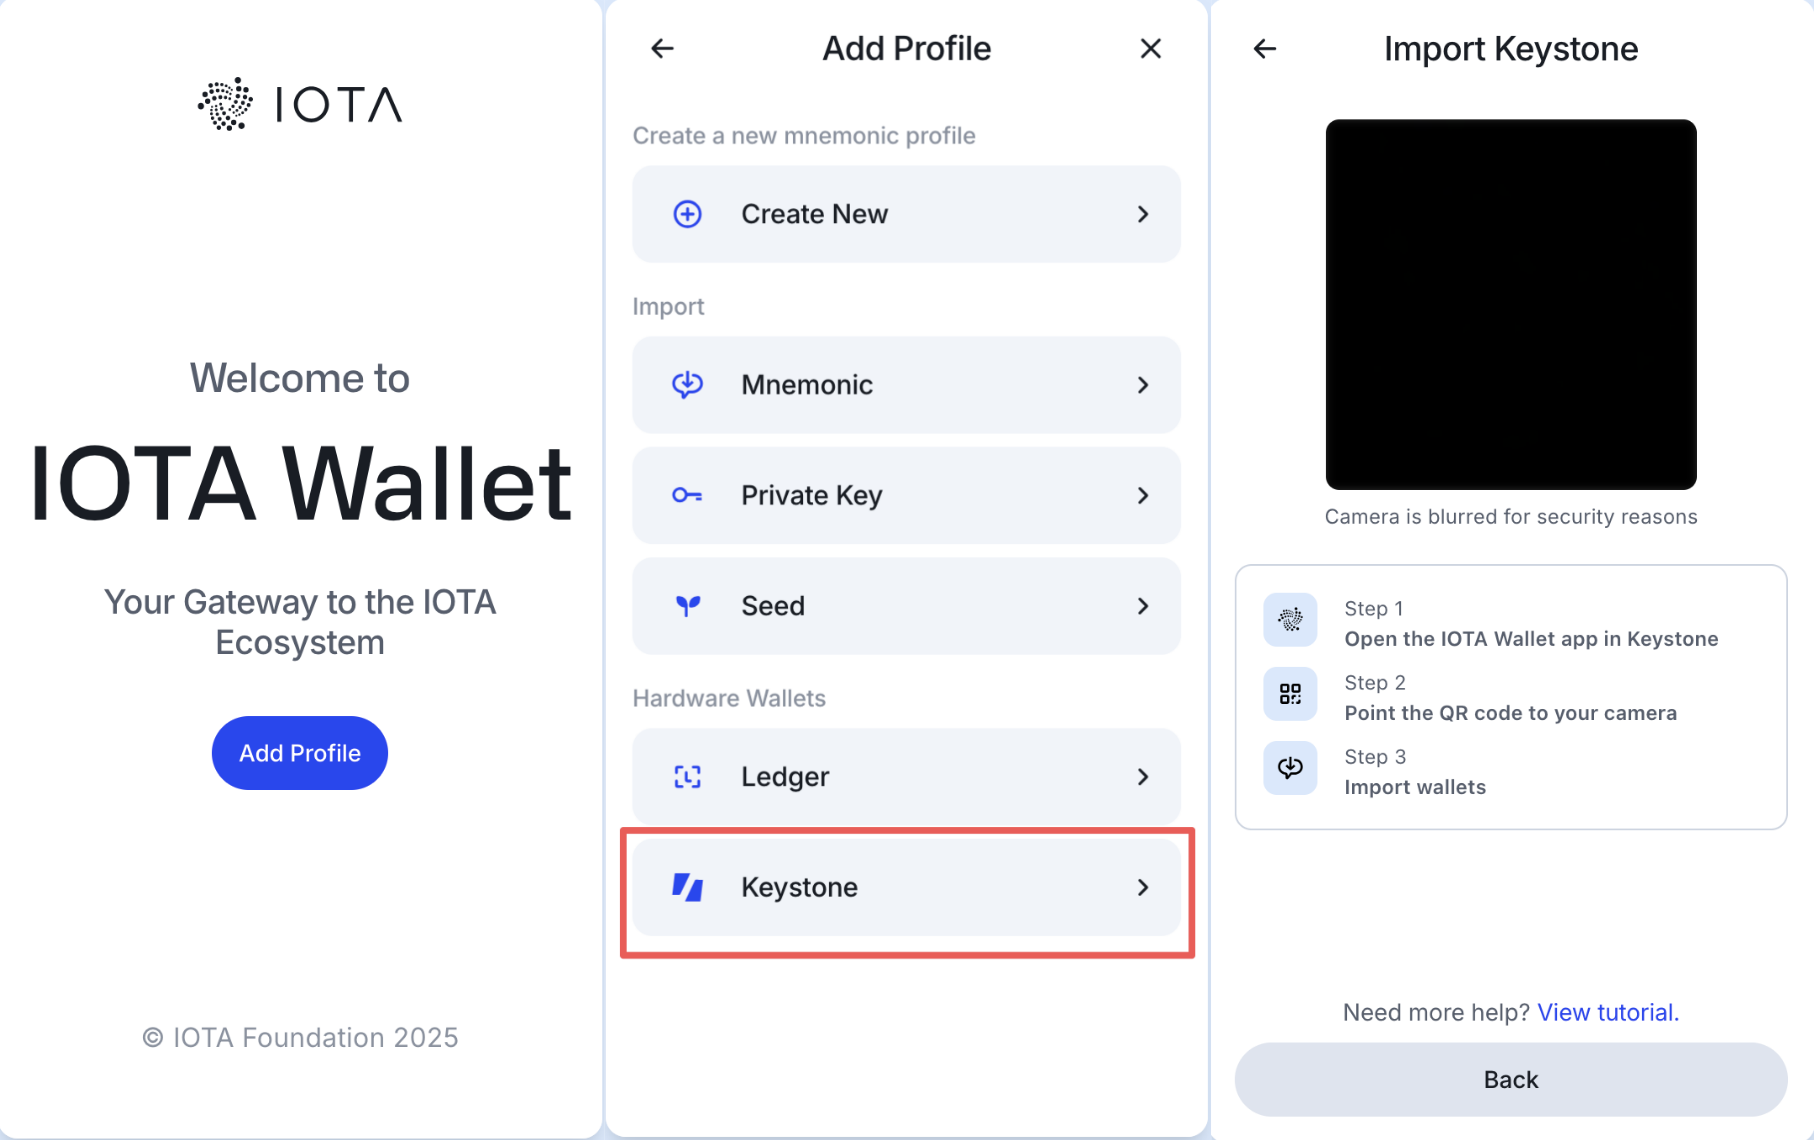
b. On your IOTA Wallet
Launch the IOTA Wallet browser extension and click [Add Profile] > [Keystone], and scan the QR code displayed on your Keystone device in the previous step.
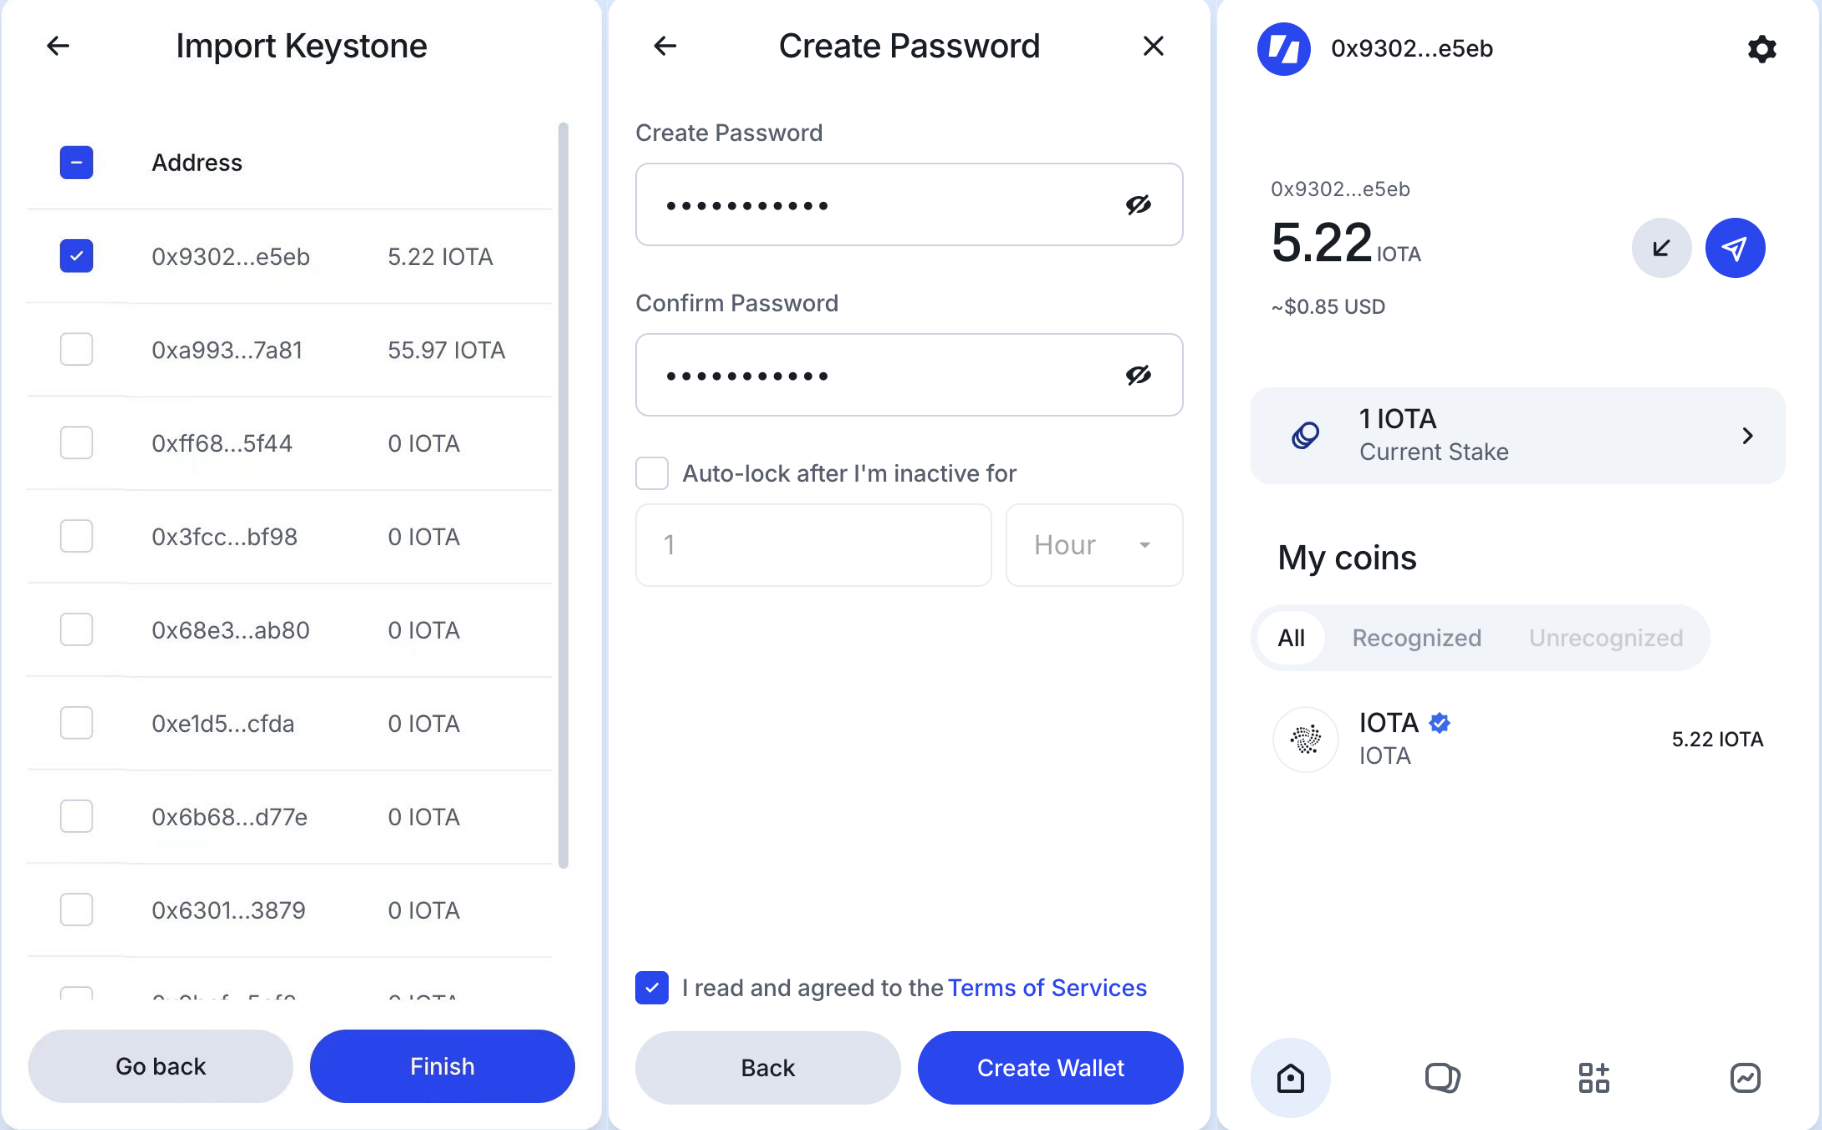
Once the connection is successful, your current addresses and balances will be displayed. Select the address you want to import and manage, then click [Finish].
Set a password and idle auto-lock time for managing your IOTA wallet. Once completed, click [Create Wallet] to finish setup and enter the homepage.
Security Note: To protect your assets, we recommend comparing the address displayed in IOTA Wallet with the address generated on your Keystone 3 Pro device after the connection is complete, and making sure the two addresses match exactly. Also, do not scan any external QR codes that were not generated by your Keystone device.
3. Sending
a. On your IOTA Wallet
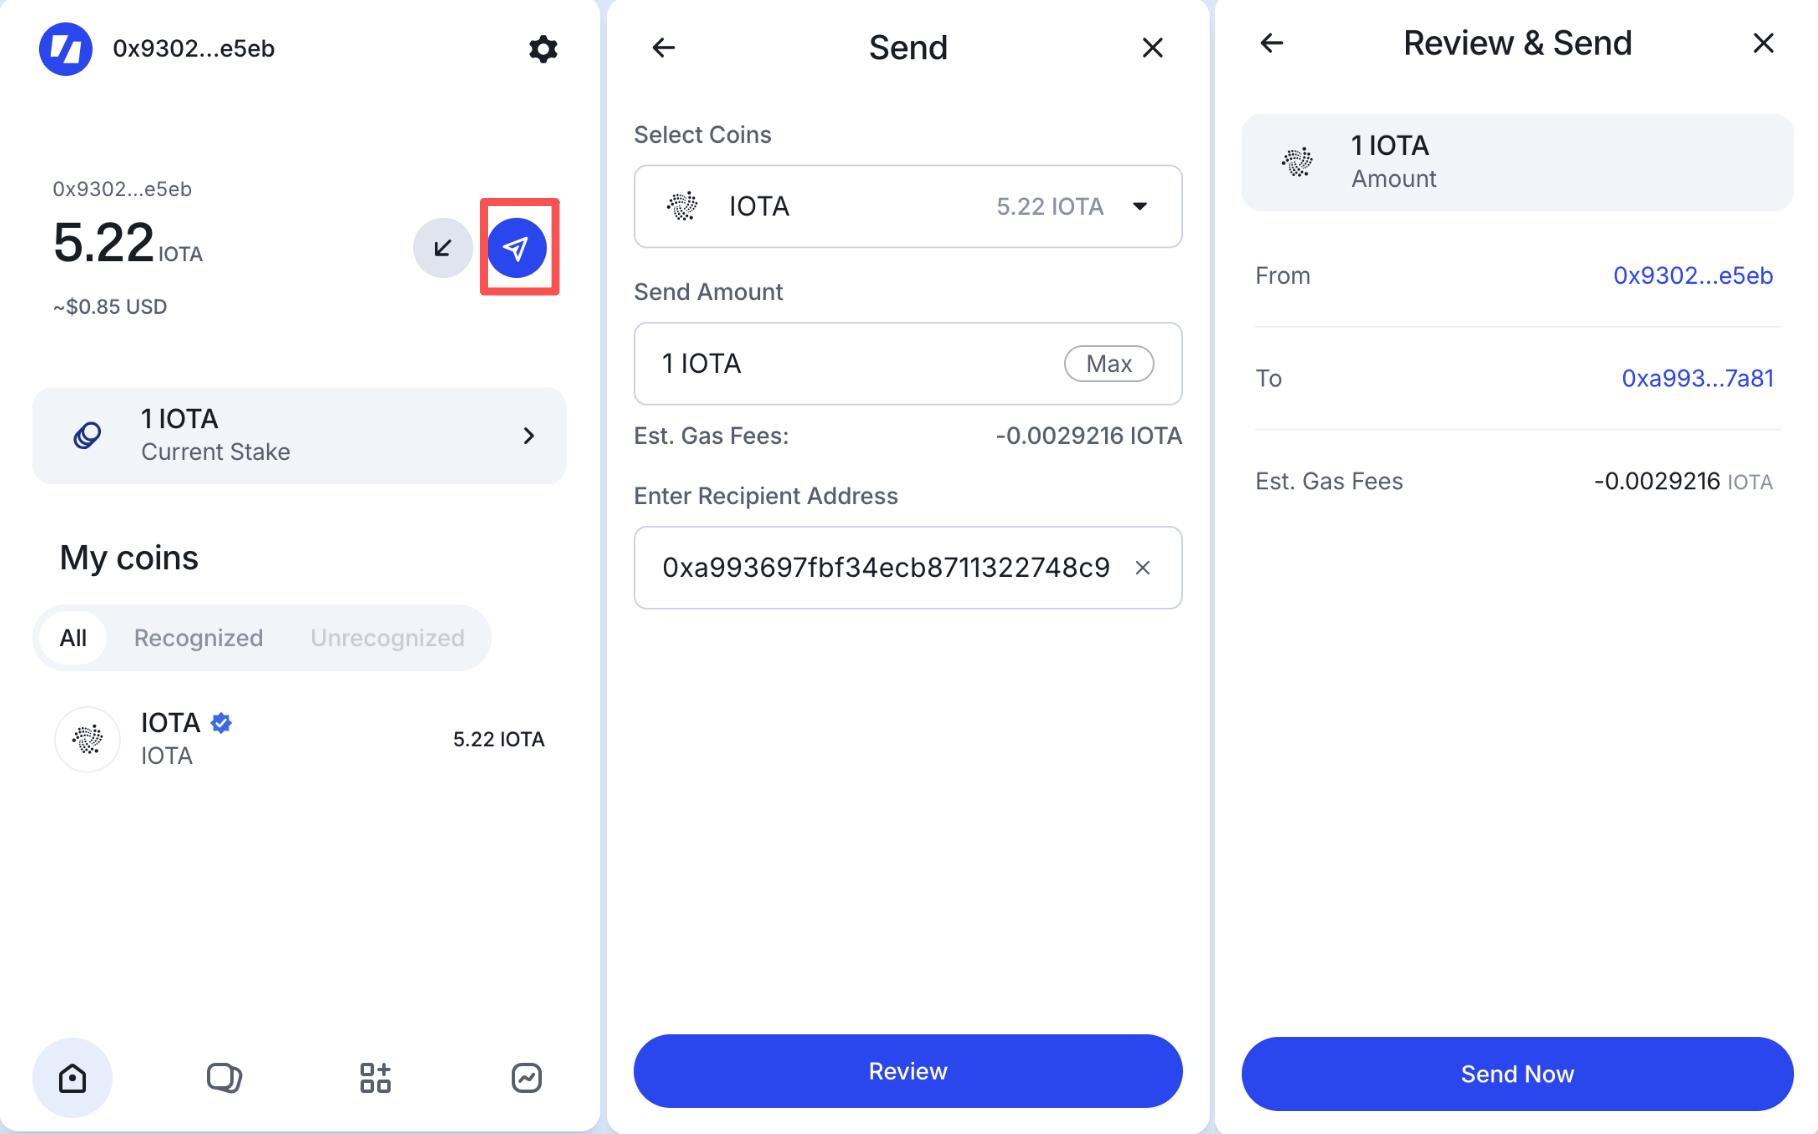
In the IOTA Wallet, click the “Send” icon next to the asset.
On the Send page, enter the amount and recipient address, then click [Review].
Review the transaction details on the Review & Send page. If everything is correct, click [Send Now].
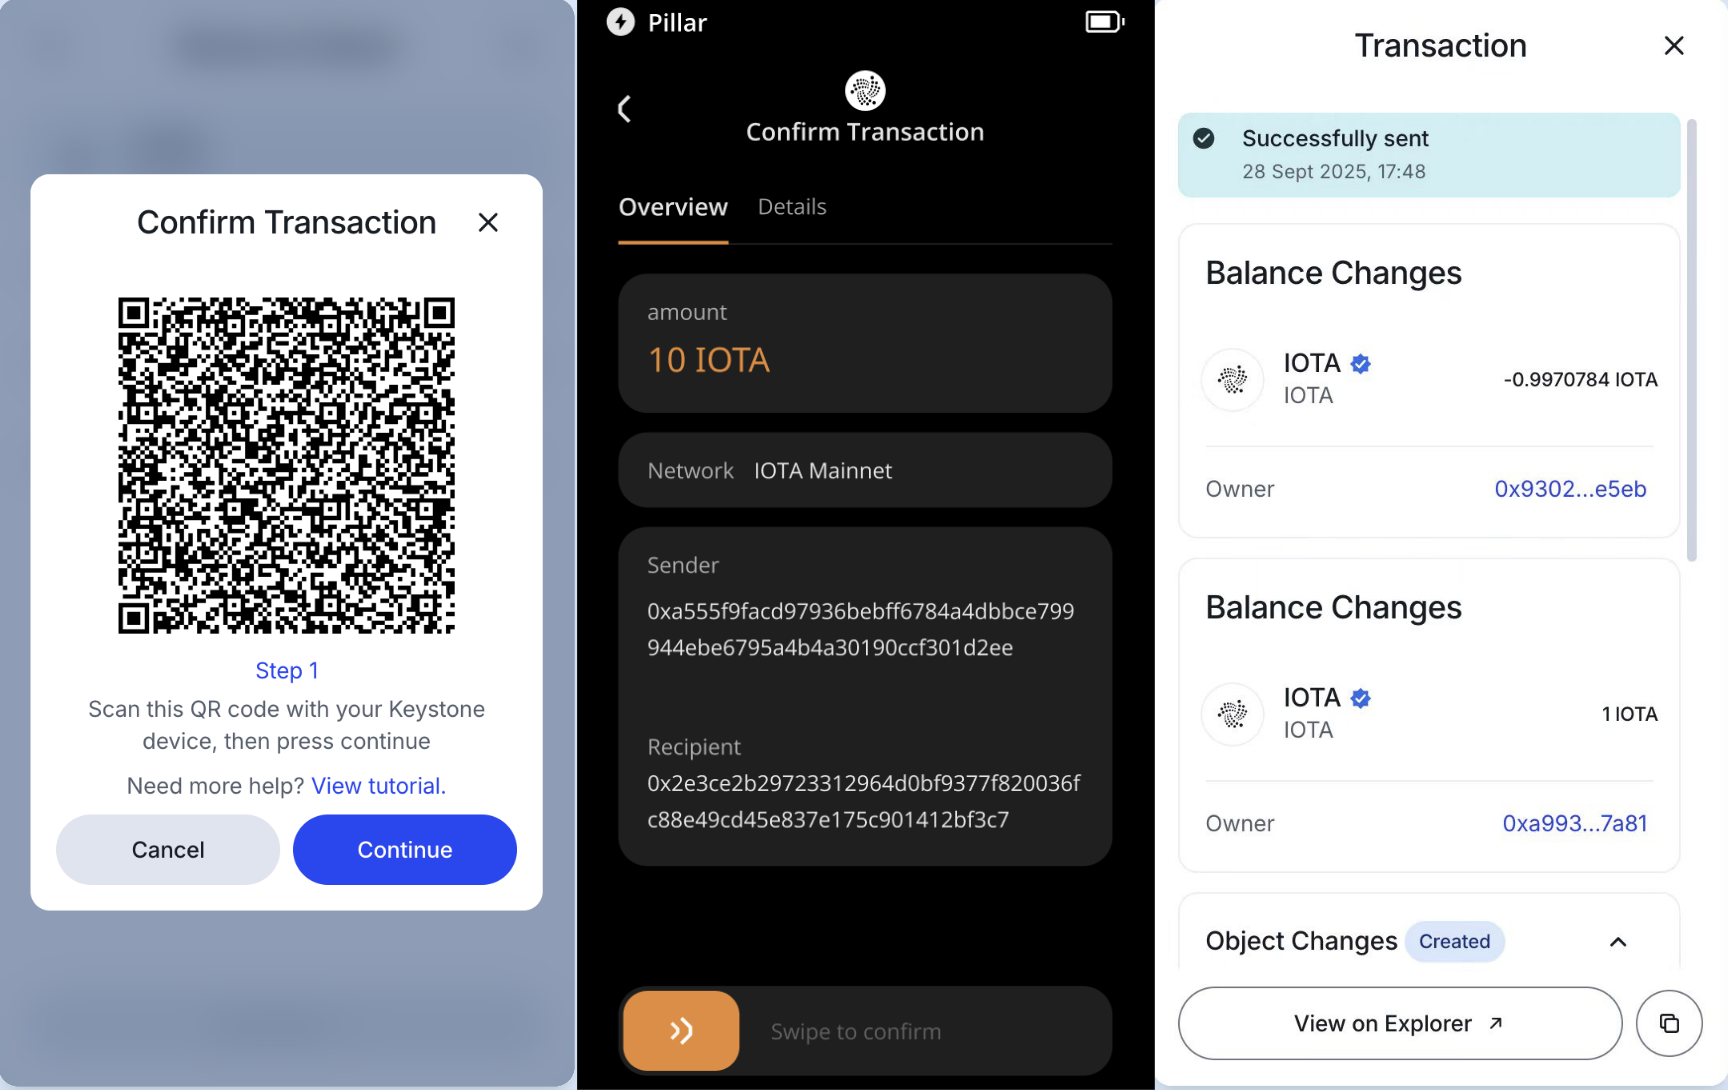
b. Sign the Transaction
A QR code requesting your signature will appear in the IOTA Wallet pop-up. On your Keystone device, tap the QR scan icon in the bottom-right corner of the home screen, scan the code to sign, verify the transaction details, and slide to confirm the signature.
After signing, a QR code will be generated on your Keystone device. In the IOTA Wallet pop-up, click [Continue] and hold the device’s QR code up to your computer camera to complete the transaction successfully.